Review of the Pentax IQ Zoom 140M with Sample Photos! | 5 Reasons Why It's the Perfect 35 mm Panorama Point and Shoot Film Camera


(By using the links and/or codes below it supports Myles Katherine Photography. We may get a small kick back by you doing so.)

pentax iq zoom 140M 35 mm camera

I sort of bought the Pentax IQ Zoom 140M on a whim one day. I’d been using the Vivitar IC101 for years as my go-to 35 mm panorama camera whenever I traveled, but I was curious what other panorama film cameras were out there. While I love the grainy, low-fi quality of the Vivitar IC101, I was really looking for a camera with a bit of a sharper lens. I came across the Pentax IQ Zoom 140M while browsing KEH Camera and it was only $20 so I went for it! I’ve been using it for years now and it never disappoints. It has so much more to offer than just the panorama feature. I’ve noticed this camera has started to go up in price quite a bit too, so I’d snag one soon if I were you! There are many different versions of this camera, but they all essentially do the same thing. Pretty much any IQ Zoom will get you about the same results. They have different zoom lens lengths available, so it really depends on your preference. I purchased the IQ Zoom 140M which has a 38-140mm zoom lens. I wanted to share 5 reasons why I love this camera. It’s become a necessity when I travel and it packs quite a punch into such a tiny camera!

5 Reasons Why I Love the Pentax IQ Zoom 140M

  1. The Lens is Surprisingly Sharp!

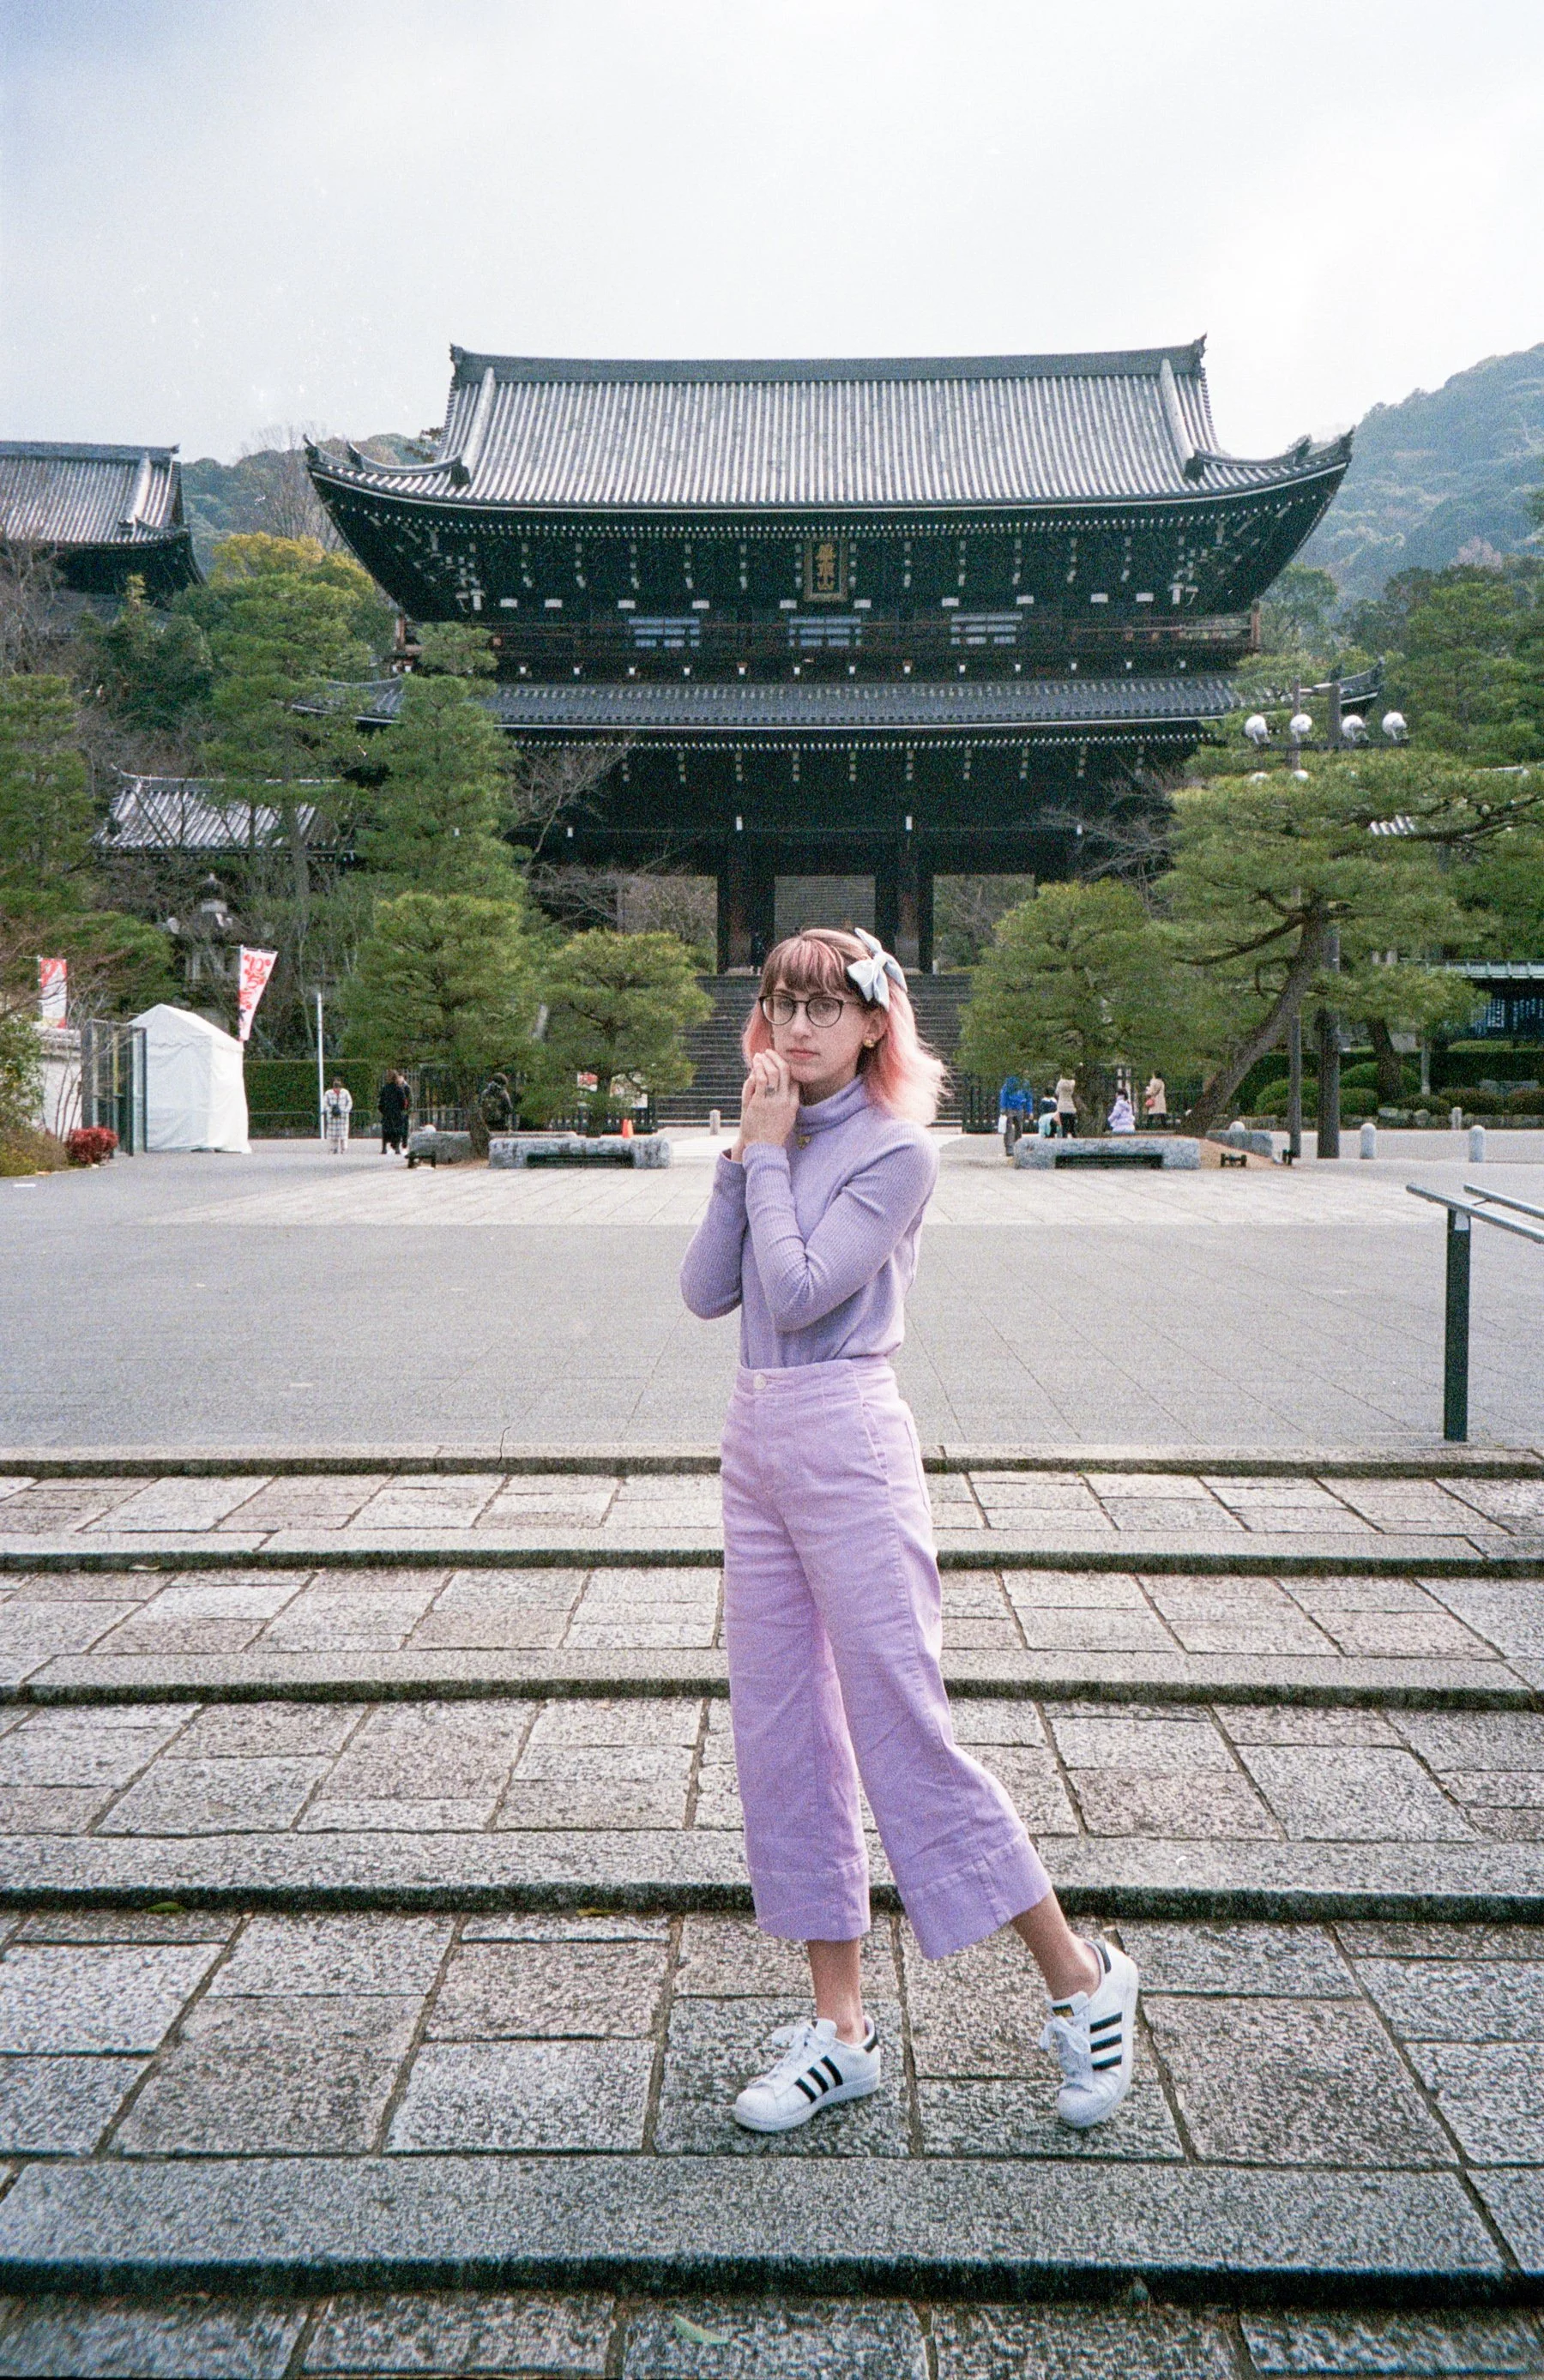
    The Pentax IQ Zoom 140M is a pretty standard point and shoot camera. It really doesn’t look particularly cool or impressive, but I’m always pleasantly surprised by how sharp this lens is. Especially if you’re using an ISO 100 film or similar, you can get some incredible images! I took this camera to Japan with me and I’m obsessed with how the images turned out. It’s perfect for snapping some quick street photography and the lens is wide enough that you can get entire buildings and landscapes.

2. You Can Easily Switch Between the Panorama Mode and the Standard 35 mm Frame Size

This is the best part of this camera and ultimately, why it has become one of my favorite travel cameras. With the Vivitar IC101, I could only take panorama photos. It made me feel very limited when using the camera and it didn’t really have any use other than that. With the Pentax IQ Zoom, you can switch mid-roll between the panorama frame size and the standard 35 mm frame size, as many times as you want! This is a game-changer. Most of the time, I just want to use the standard frame size. But when I’m traveling and I find myself at the top of a mountain or bell tower looking out onto a beautiful view, I always want that option to take a panorama photo. Sometimes, I like the leave the black border around the photos, so I included two different presentation versions below for you. :)

3. It has a Flash!

This is another necessity for me when it comes to travel cameras. You just never know what lighting situation you’re going to find yourself in when you’re traveling and I always feel more secure when I have the option of using a flash. Especially if I’m out at dinner and I just want to snap a few candid photos with my friends or family, the flash makes all the difference.

4. It’s Super Tiny and Weighs Nothing!

Again, this is another important feature that I look for in a travel camera. Traveling is exhausting. The last thing I want to do is lug around 20 pounds of cameras. The Pentax IQ Zoom is small and lightweight and can always find a home in my camera bag. I usually end up squeezing it in a tiny spot amongst my other cameras. It takes up no space at all. And at the end of a long day, when I drop off all of my big, heavy cameras in the hotel room and want to have a night out, this is the one camera I’ll bring back out with me. It can fit in my purse, it’s inconspicuous and it’s cute!

5. It has a Ridiculous Zoom Lens!

The 38-140mm lens is definitely a surprising feature of this camera. When you first look at the camera, you’d really have no idea it was even there! When I’m traveling, I usually prefer to shoot wide shots, so I don’t use the zoom lens often. But if you’re someone who likes to zoom in on your iPhone to get tighter shots of animals, people or landscapes, then this will definitely come in handy for you!

I hope this review gives you a better idea of what this incredible little camera is capable of. It has tones of other features, like a self-timer, red-eye reduction and bulb exposure mode. There’s really nothing that it doesn’t do! In my opinion, this is the perfect, affordable point and shoot 35 mm film camera. If you’re on the hunt for one, you should try out these sites:

PENTAX IQ ZOOM 140M:

Amazon

eBay

KEH Camera

If you’re interested in reading about my personal favorite 35 mm color films to use with this camera, check out my blog post here!

I’ve included sample photos below, but you can also check out my full YouTube video about the Pentax IQ Zoom 140M here!

If you found this post helpful or if you’d like to see more of my work, I’d love it if you considered signing up for my Patreon! For as little as $1 a month, you’ll get early access to all of my YouTube videos, plus tons of photos that I don’t post anywhere else. Depending on which tier you choose, you could also receive seasonal prints and/or discounts! I always use all of the proceeds towards film & processing. Find out more here!

Thanks so much for stopping by! Feel free to leave any questions or comments below. And don’t forget to stop by my Amazon storefront for more camera/film recommendations. :)

<3 Myles Katherine


How to Create Double Exposures and Multiple Exposures with a Holga Toy Camera | 5 Simple Tips and Tricks with Sample Photos!


This post contains affiliate links and I will be compensated if you make a purchase after clicking through my links. 

How Do You Create Double Exposures and Multiple Exposures with a Holga Toy Camera?

This HAS to be my most frequently asked question. If you follow my work you know I’m obsessed with the Holga and multiple exposures (specifically, the Holga GCFN). I still remember the very first double exposure I ever took and the excitement I felt when I realized what had happened. I suddenly felt like the opportunities were endless when it came to photography. I realized that photography didn’t necessarily need to mimic real life. I could create a world that didn’t exist, by merging photos taken directly from reality. That juxtaposition blew my mind and really catapulted my interest in photography.

It might seem intimidating at first when it comes to creating multiple exposures. I think there’s an innate and expected fear that they’re going to be TERRIBLE. That they won’t make sense. That no one will know what they’re looking at. But guess what, that’s FINE! In fact, it’s better than taking the same boring photo that everyone else takes. It takes some time to get used to layering images and understanding how the final product is going to turn out. But even now, with a decade of experience under my belt, I still don’t feel like I have complete control over my multiple exposures. I always have an expectation in my mind and it never quite fits with how I envision them. Either they’re not as good as I’d hoped, or they’re even better. And usually the ones that I’m just messing around with end up being the best. It’s really better NOT to plan. To just try out different textures and faces and landscapes and see how they turn out.

In case you’re having some trouble getting started though, here are a few tips for creating multiple exposures with a Holga camera. The Holga is one of the best cameras, in my opinion, to try out multiple exposures. But first, you have to understand HOW to take a multiple exposure. It’s actually SUPER simple. After taking a photograph, you just simply don’t wind the film advance dial at all. You just take another photo right over top of the first one. And you can do this as many times as you want, which is why I love the Holga so much. A lot of film cameras will automatically advance to the next frame, leaving you without the option to shoot over top of the first frame. The Holga is meant for multiple exposures. It’s very easy to accidentally take a multiple exposure with the Holga too, simply because it is a manual advance camera. So oftentimes, you might nor even mean to take a photo over top of another one, it just might happen. Actually, it WILL happen at some point if you use the Holga. It’s just part of the magic of the camera!

5 Simple Tips and Tricks for Creating Incredible Double & Multiple Exposures with the Holga Toy Camera

Tip #1 - Try out a portrait over top of a landscape!

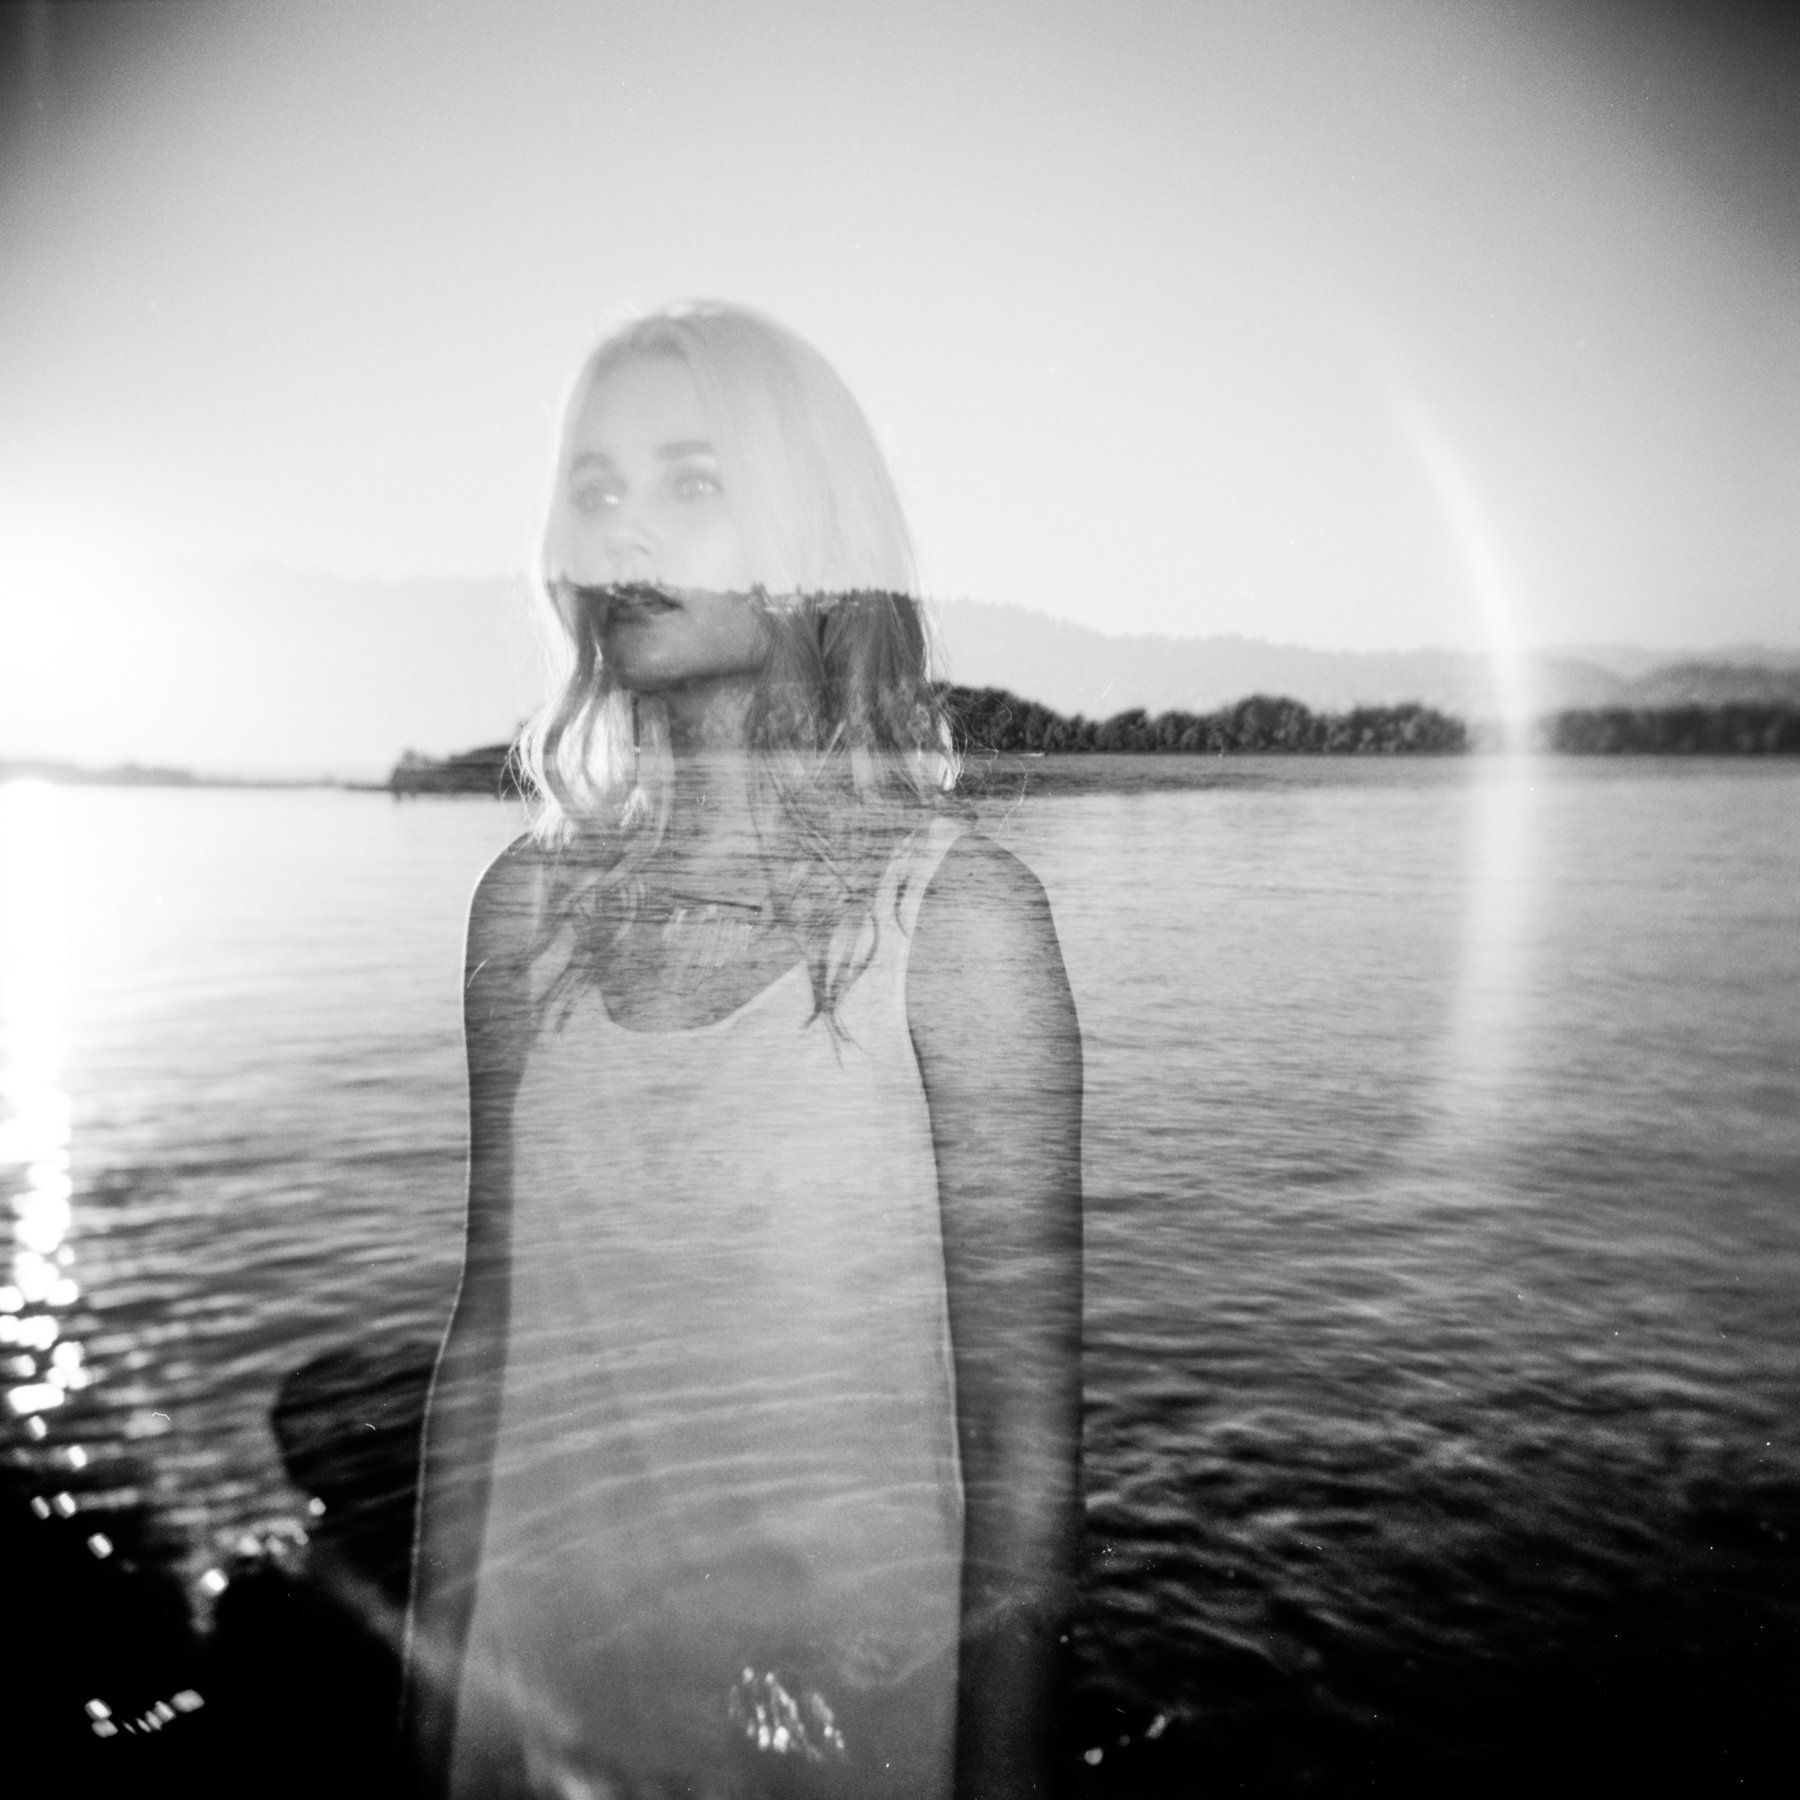
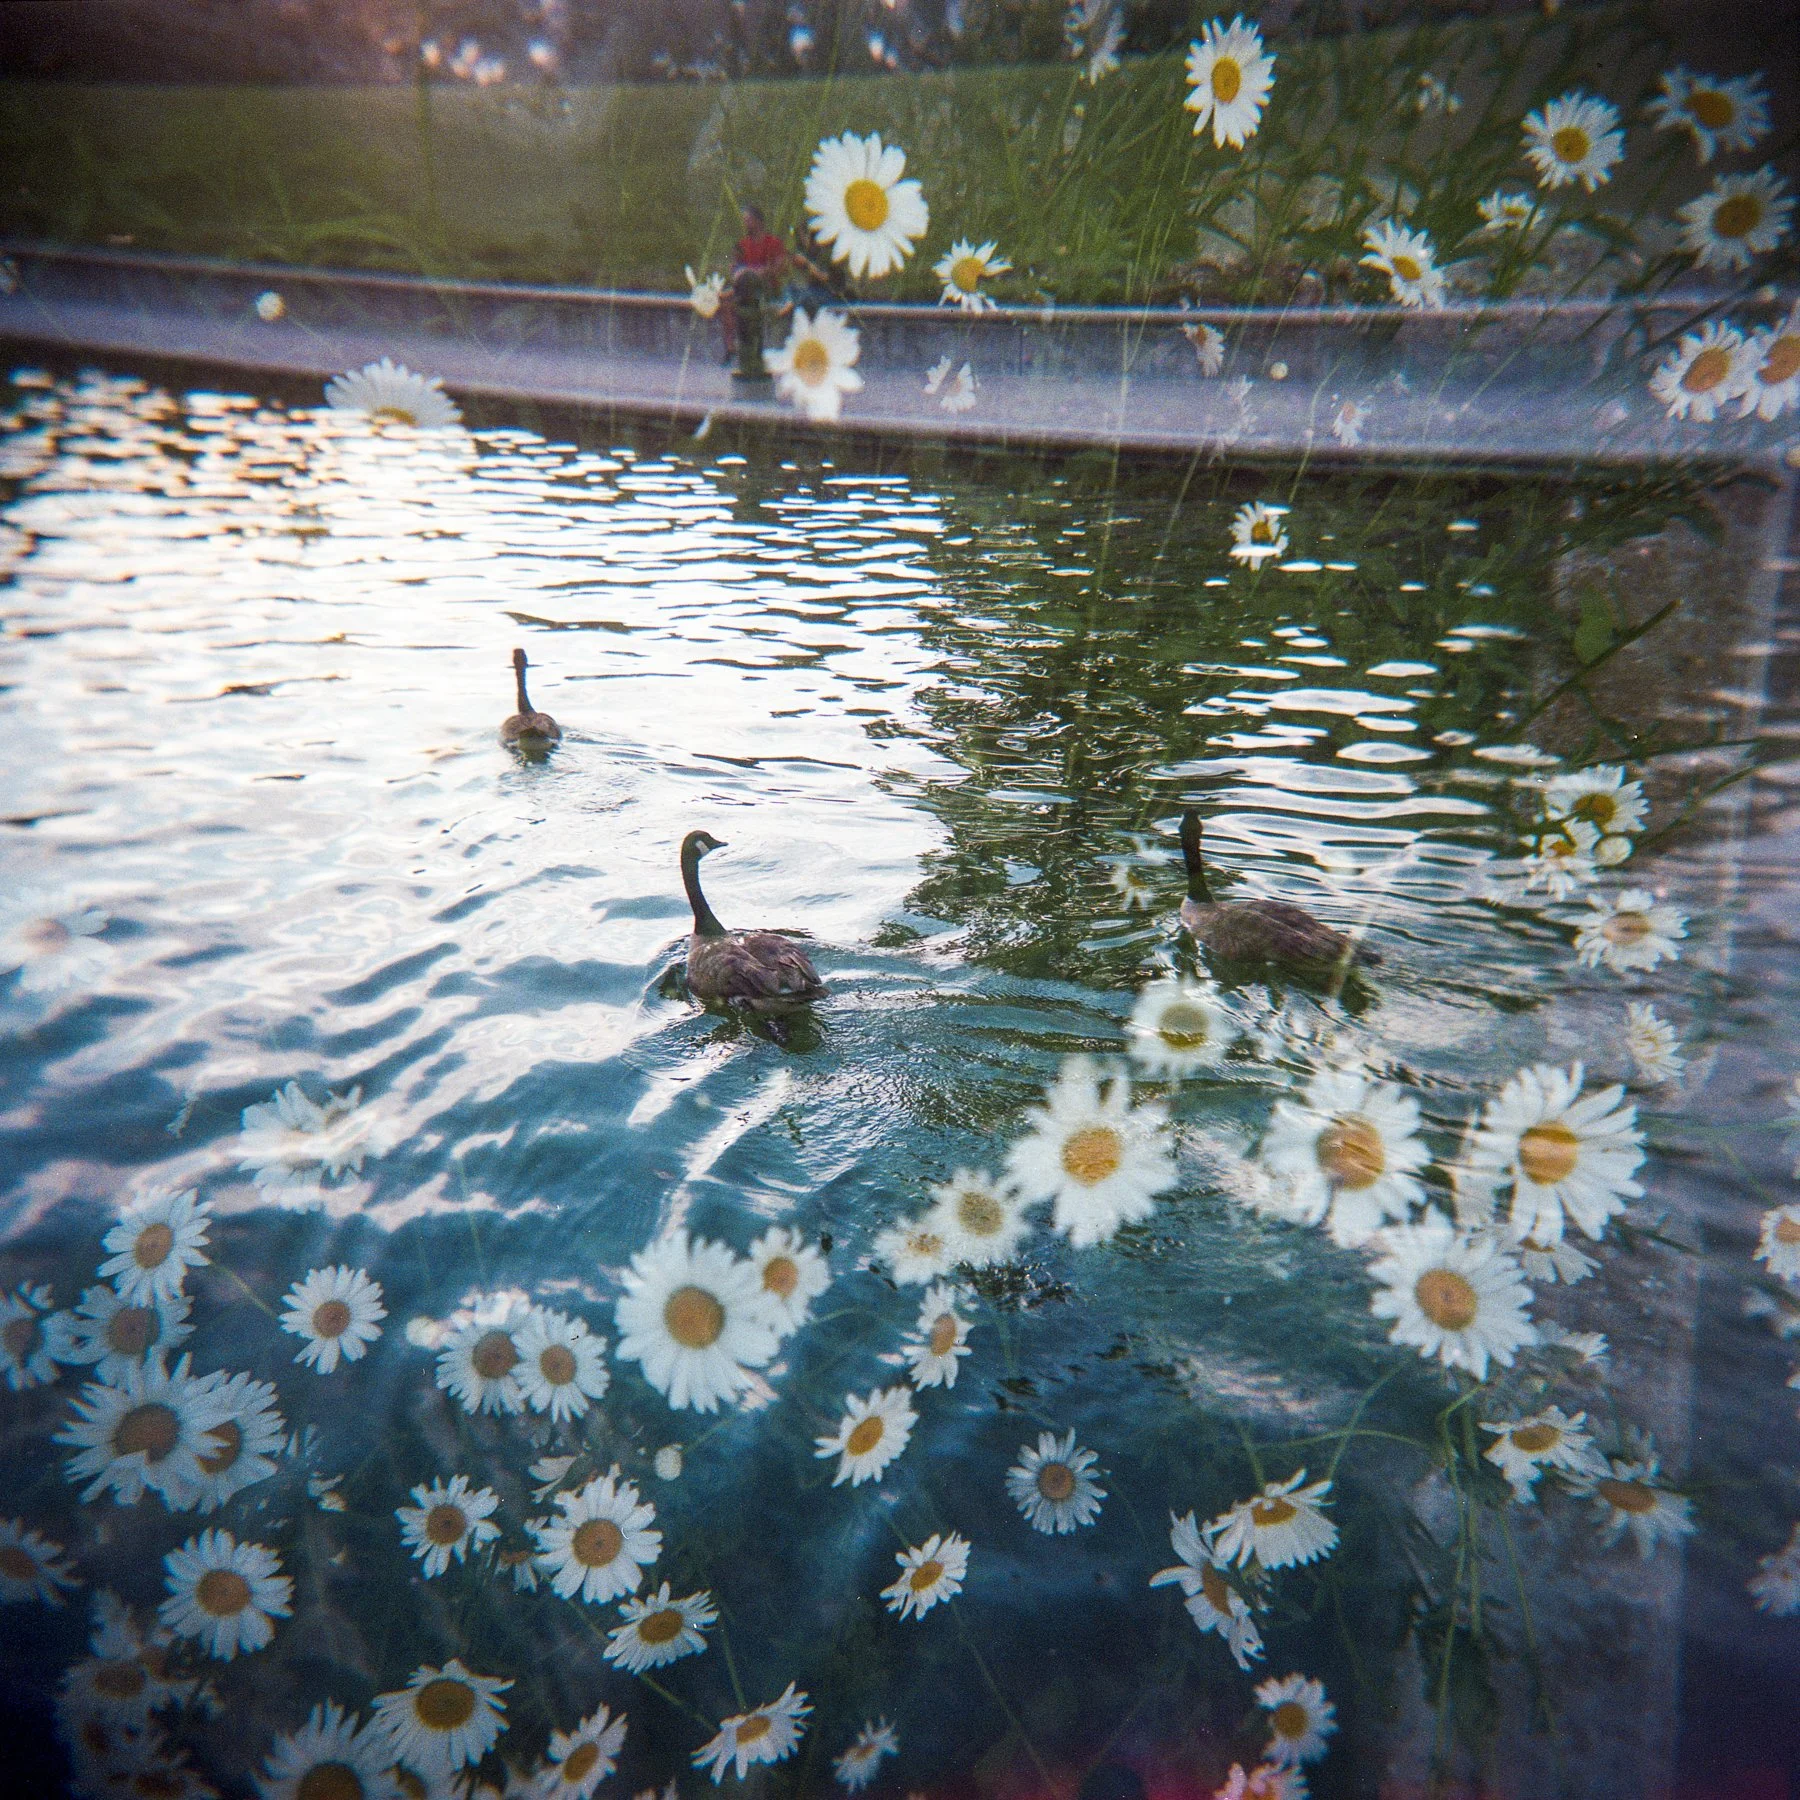
This is probably one of my main choices for creating double exposures. It usually ends up quite interesting and beautiful. I’ll shoot the first image on the infinity/mountain setting of the Holga and then shoot the second image as a close-up portrait using the single-person setting on the Holga.

Tip #2 - Try asking your subject to move slightly / try a new pose in-between images

This is another go-to for me when it comes to double exposures. It ends up creating very ghostly, spooky images that are incredibly unique and unpredictable. These are often my favorite photos to get back after a photo shoot.

Tip #3 - Try out different close-up textures as your second image

This one is somewhat of a risk, but oftentimes pays off! If the texture is too much, it can sometimes end up being a big indecipherable mess. But other times, it can add a bit of mystery and atmosphere to your photo.

Tip #4 - Try flipping your camera upside down for a second shot of the same subject

This is really fun to try with cityscapes, buildings and landmarks, mostly because they don’t move and you have enough time to plan out your shot.

Tip #5 - Try having your model step out of the second shot, but keep the background the same

This creates a very ghostly vibe, because the model becomes somewhat hazy and somewhat see-through. This is definitely another one of my favorite multiple exposure methods when using the Holga.

I’ve included a few more samples below of my favorite double/multiple exposures I’ve taken over the years with the Holga. It’s gotten to a point where I won’t even buy a camera anymore if it doesn’t have the option for multiple exposures! It’s become a huge part of my process and I feel extremely limited now when I’m not able to create them. If you’re interested in multiple exposures, you should definitely pick up a Holga and try it out! You can also check out my full review and blog post about the Holga here. Or you can check out my YouTube video! I LOVE the Holga. My main advice though is to be patient when you’re first starting out. You can’t expect perfection when it comes to the Holga. It has a mind of its own. But if you’re willing to learn its eccentricities, it will surprise you.

CAMERA:

Purchase a Holga 120 GCFN on Amazon

Purchase a Holga 120 GCFN on eBay!

Purchase a Holga 120 GCFN on KEH Camera

FILM RECOMMENDATIONS:

Lomography 400 120 film

Kodak Portra 160 120 film

Kodak Portra 400 120 film

#ad

If you’re interested in supporting my work and seeing lots more videos in the future, be sure to check out my Patreon! As a patron, you’ll receive early access to my YouTube videos, as well as access to never-before-seen images and seasonal prints, depending on the tier you sign up for.

Feel free to leave any thoughts/comments/questions/concerns below! Thanks so much for stopping by. And don’t forget to stop by my Amazon storefront for more camera/film recommendations. :)

<3 Myles Katherine


First roll of film with the Lomography LomoApparat 35 mm camera using Kodak Gold 200 | Review and sample photos from our trip to St. Augustine, Florida


This post contains affiliate links and I will be compensated if you make a purchase after clicking through my links. 

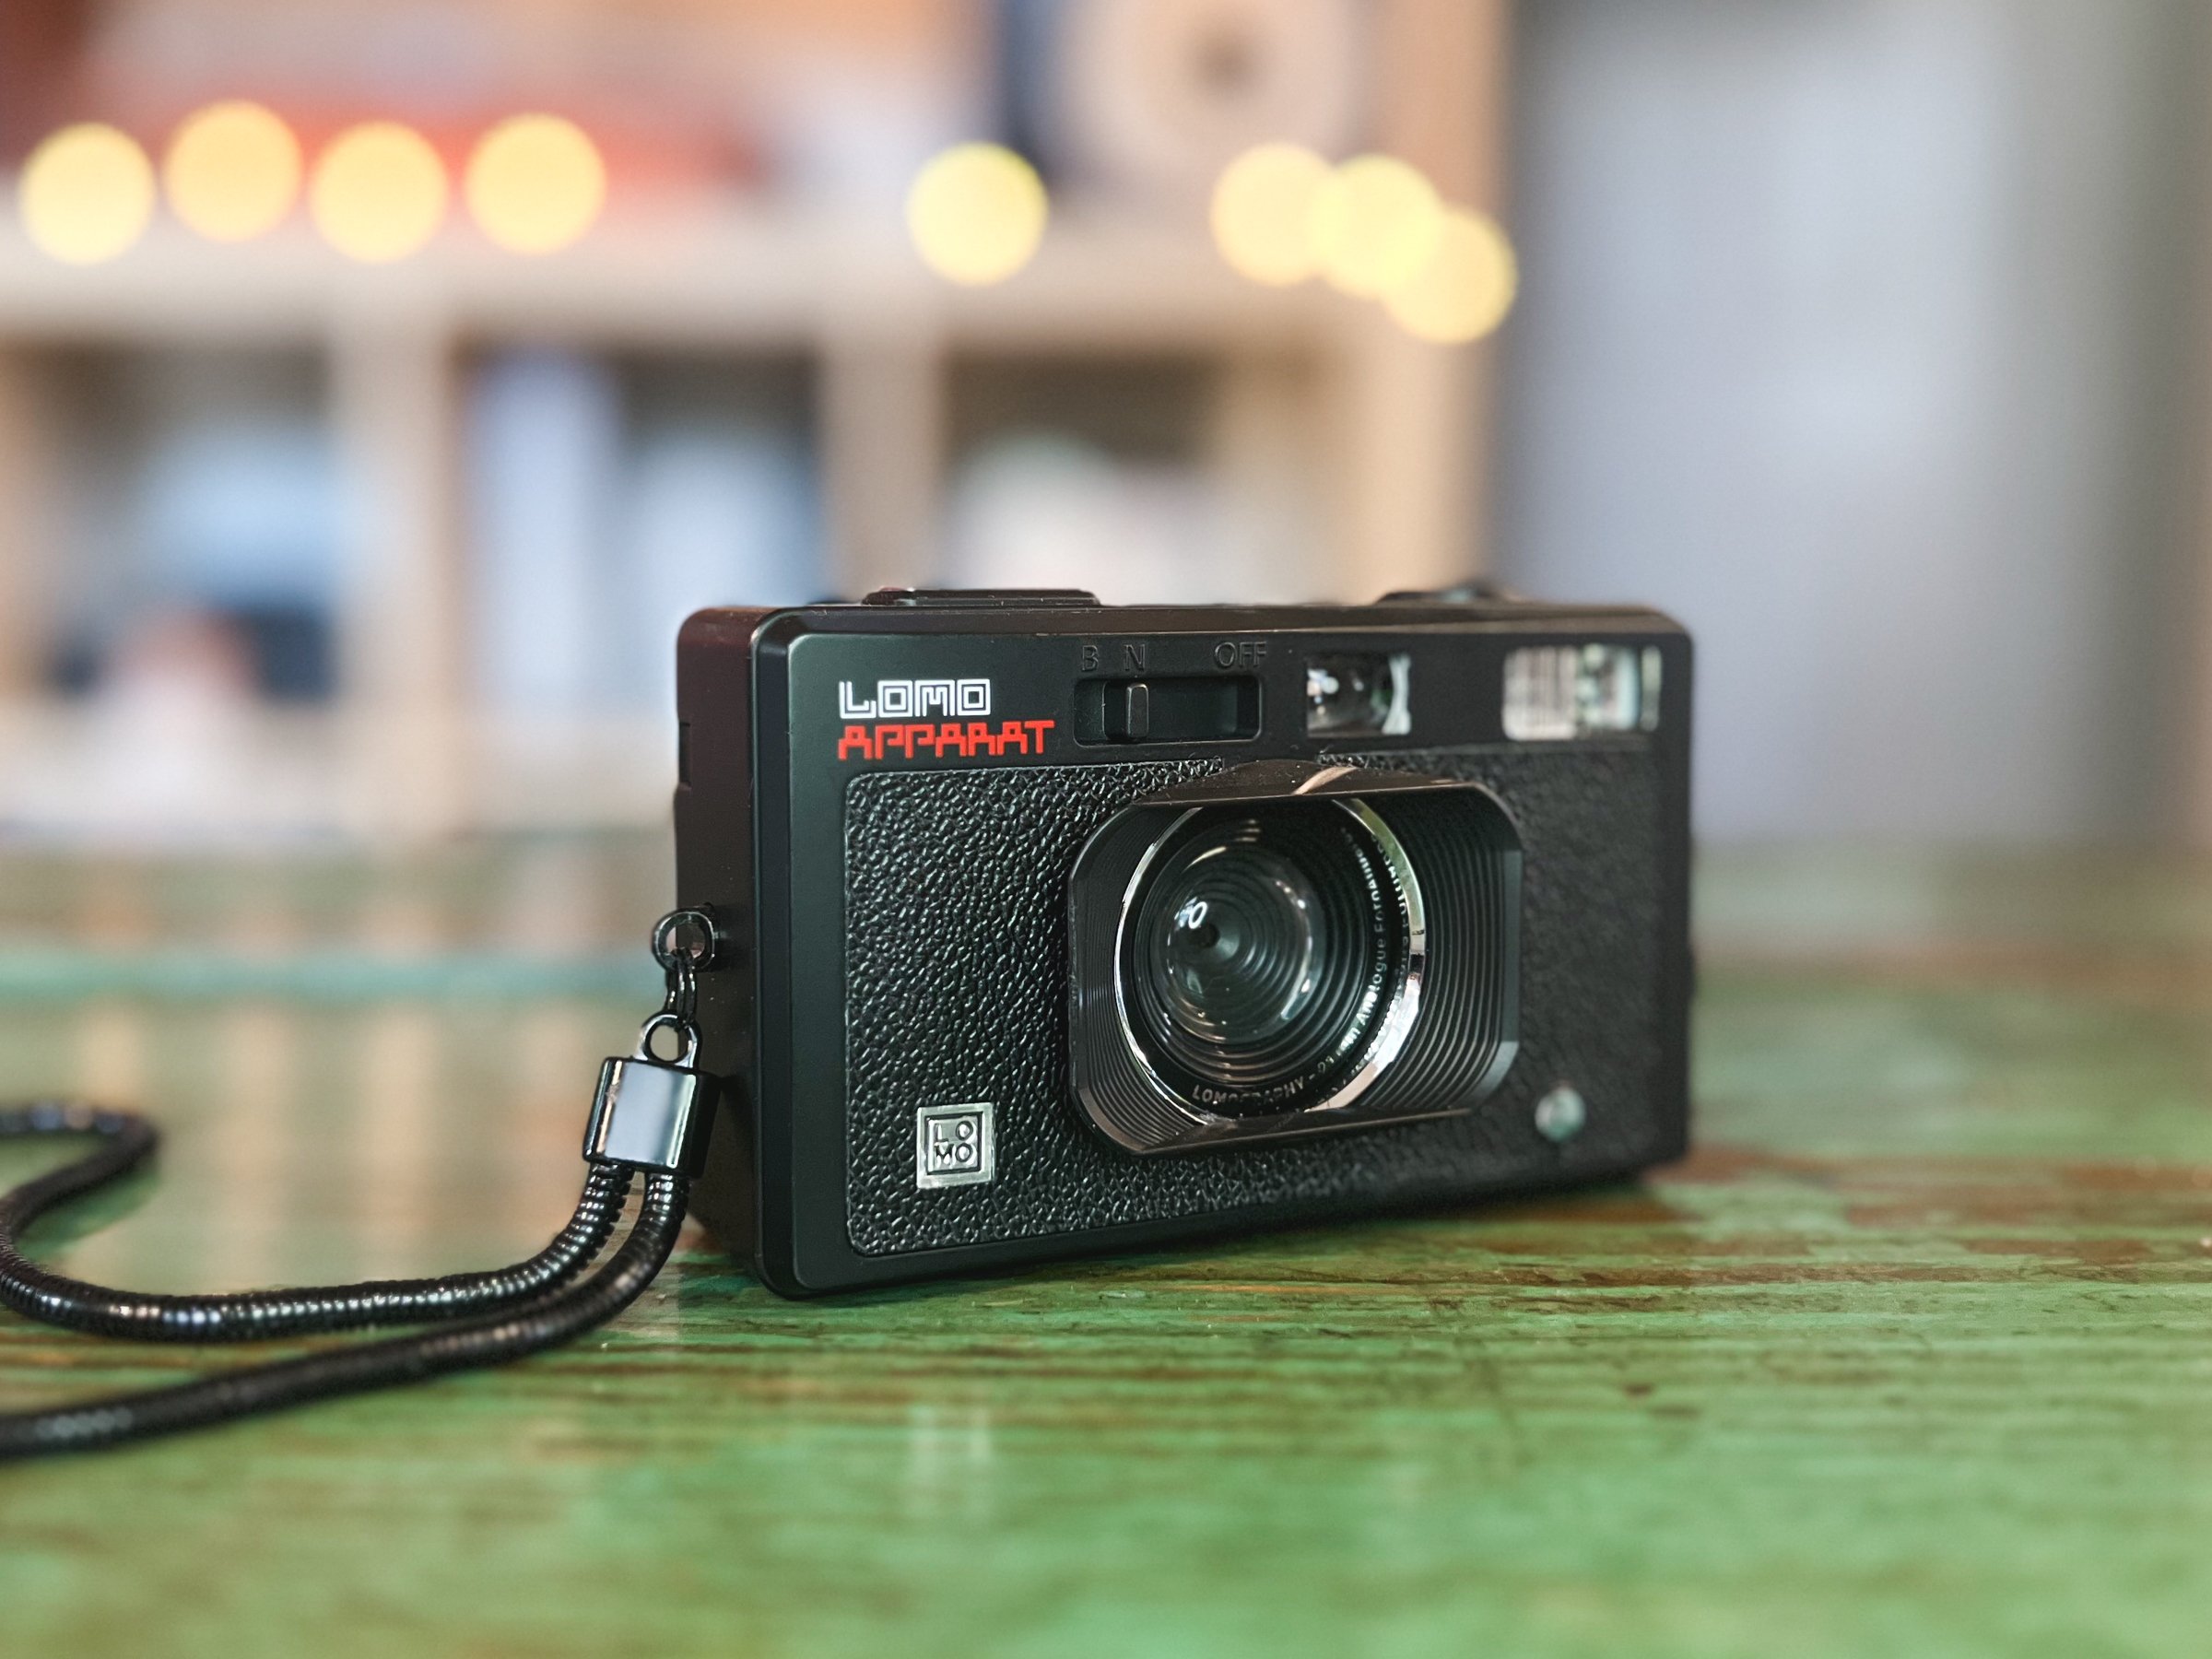
I was SO excited when I found out I was one of the winners of the “Human Stories” Lomography TEN AND ONE 2021 Photography Competition. But I was even more excited when I discovered that my prize was the LomoApparat 35 mm film camera. It’s Lomography’s newest camera and is an experimental, ultra wide 35 mm film camera with a vintage, retro look and tons of features for creating unique, original photographs.

I received the camera right before my birthday and decided to try it out for the first time on my birthday trip to St. Augustine, Florida. I used a roll of Kodak Gold 200 to really give a golden beach glow to the photos. I LOVE taking Kodak Gold on any tropical or beach trip I go on because it adds such a nice, warm atmosphere. In a typical photo shoot situation, I actually prefer NOT to use Kodak Gold because I tend to favor cooler tones. But for the beach, ALWAYS Kodak Gold.

The camera itself was a lot less sturdy than I was expecting. It’s extremely light, made of plastic and feels more like a disposable point and shoot camera than anything else. But when it comes down to it, I don’t really mind. Mostly because I drop my cameras constantly. I throw them in my bag and drag them all over the world. I’m not the best camera mom, if we’re being honest. So I actually prefer that it’s not super fancy because I would destroy it. I still think the camera has a super cool, unique look to it. But ultimately what makes this camera special is all of the creative control it allows for. The various lens attachments, the colorful flash filters, the multiple exposure function and the wide angle lens. It’s just a fun camera to use, all around. The lens is much sharper than I thought it would be, however I did notice that when I used the kaleidoscope filter, the very center of the image would be out of focus. I was pretty bummed about this because I love using kaleidoscope filters. Though it does seem to be a bit sharper if you use the kaleidoscope filter for close-up portraits, rather than landscapes or distant shots. I love how all of the double exposures turned out and I LOVE the wide angle lens. I’ve always been more about composition than anything else, especially when I’m traveling, and the ultra wide lens allows me to capture everything I want and need in a photo.

The only thing I really had trouble with was loading the film. It took a few tries to figure it out and to be sure the film was grabbing as I was winding the film advance dial. Once it was loading correctly, there was much more tension and the film dial almost wanted to spring backwards. So, you’ll notice when the film is actually caught and is advancing through the camera. I’m planning on doing a more in-depth video about the film loading for this camera very soon, so stay tuned!

I just posted a video on my YouTube channel about the LomoApparat and our trip to St. Augustine, so make sure to check that out! Or you can scroll down to check out all of the photos from my first roll of film with the LomoApparat. Overall, I think the camera is super fun and versatile. I honestly can’t wait to take it on another trip and try out a few of the other features. If you love point and shoot cameras and you love having ultimate creative control, then the LomoApparat won’t let you down. I’ll be sure to share more full film rolls from this camera in the future, but for now, I’ve included all of the photos from my very first roll of film with the LomoApparat below. :)

PURCHASE THE LOMO APPARAT ON KEH CAMERA!

PURCHASE THE LOMO APPARAT ON EBAY!

PURCHASE KODAK GOLD 200 35MM FILM ON AMAZON!

#CommissionsEarned

If you found this post helpful or if you’d like to see more of my work, I’d love it if you considered signing up for my Patreon! For as little as $1 a month, you’ll get early access to all of my YouTube videos, plus tons of photos that I don’t post anywhere else. Depending on which tier you choose, you could also receive seasonal prints and/or discounts! I always use all of the proceeds towards film & processing. Find out more here!

Feel free to leave any questions/comments/thoughts below! And don’t forget to stop by my Amazon storefront for more camera/film recommendations. :)

Have a lovely day!

<3 Myles Katherine