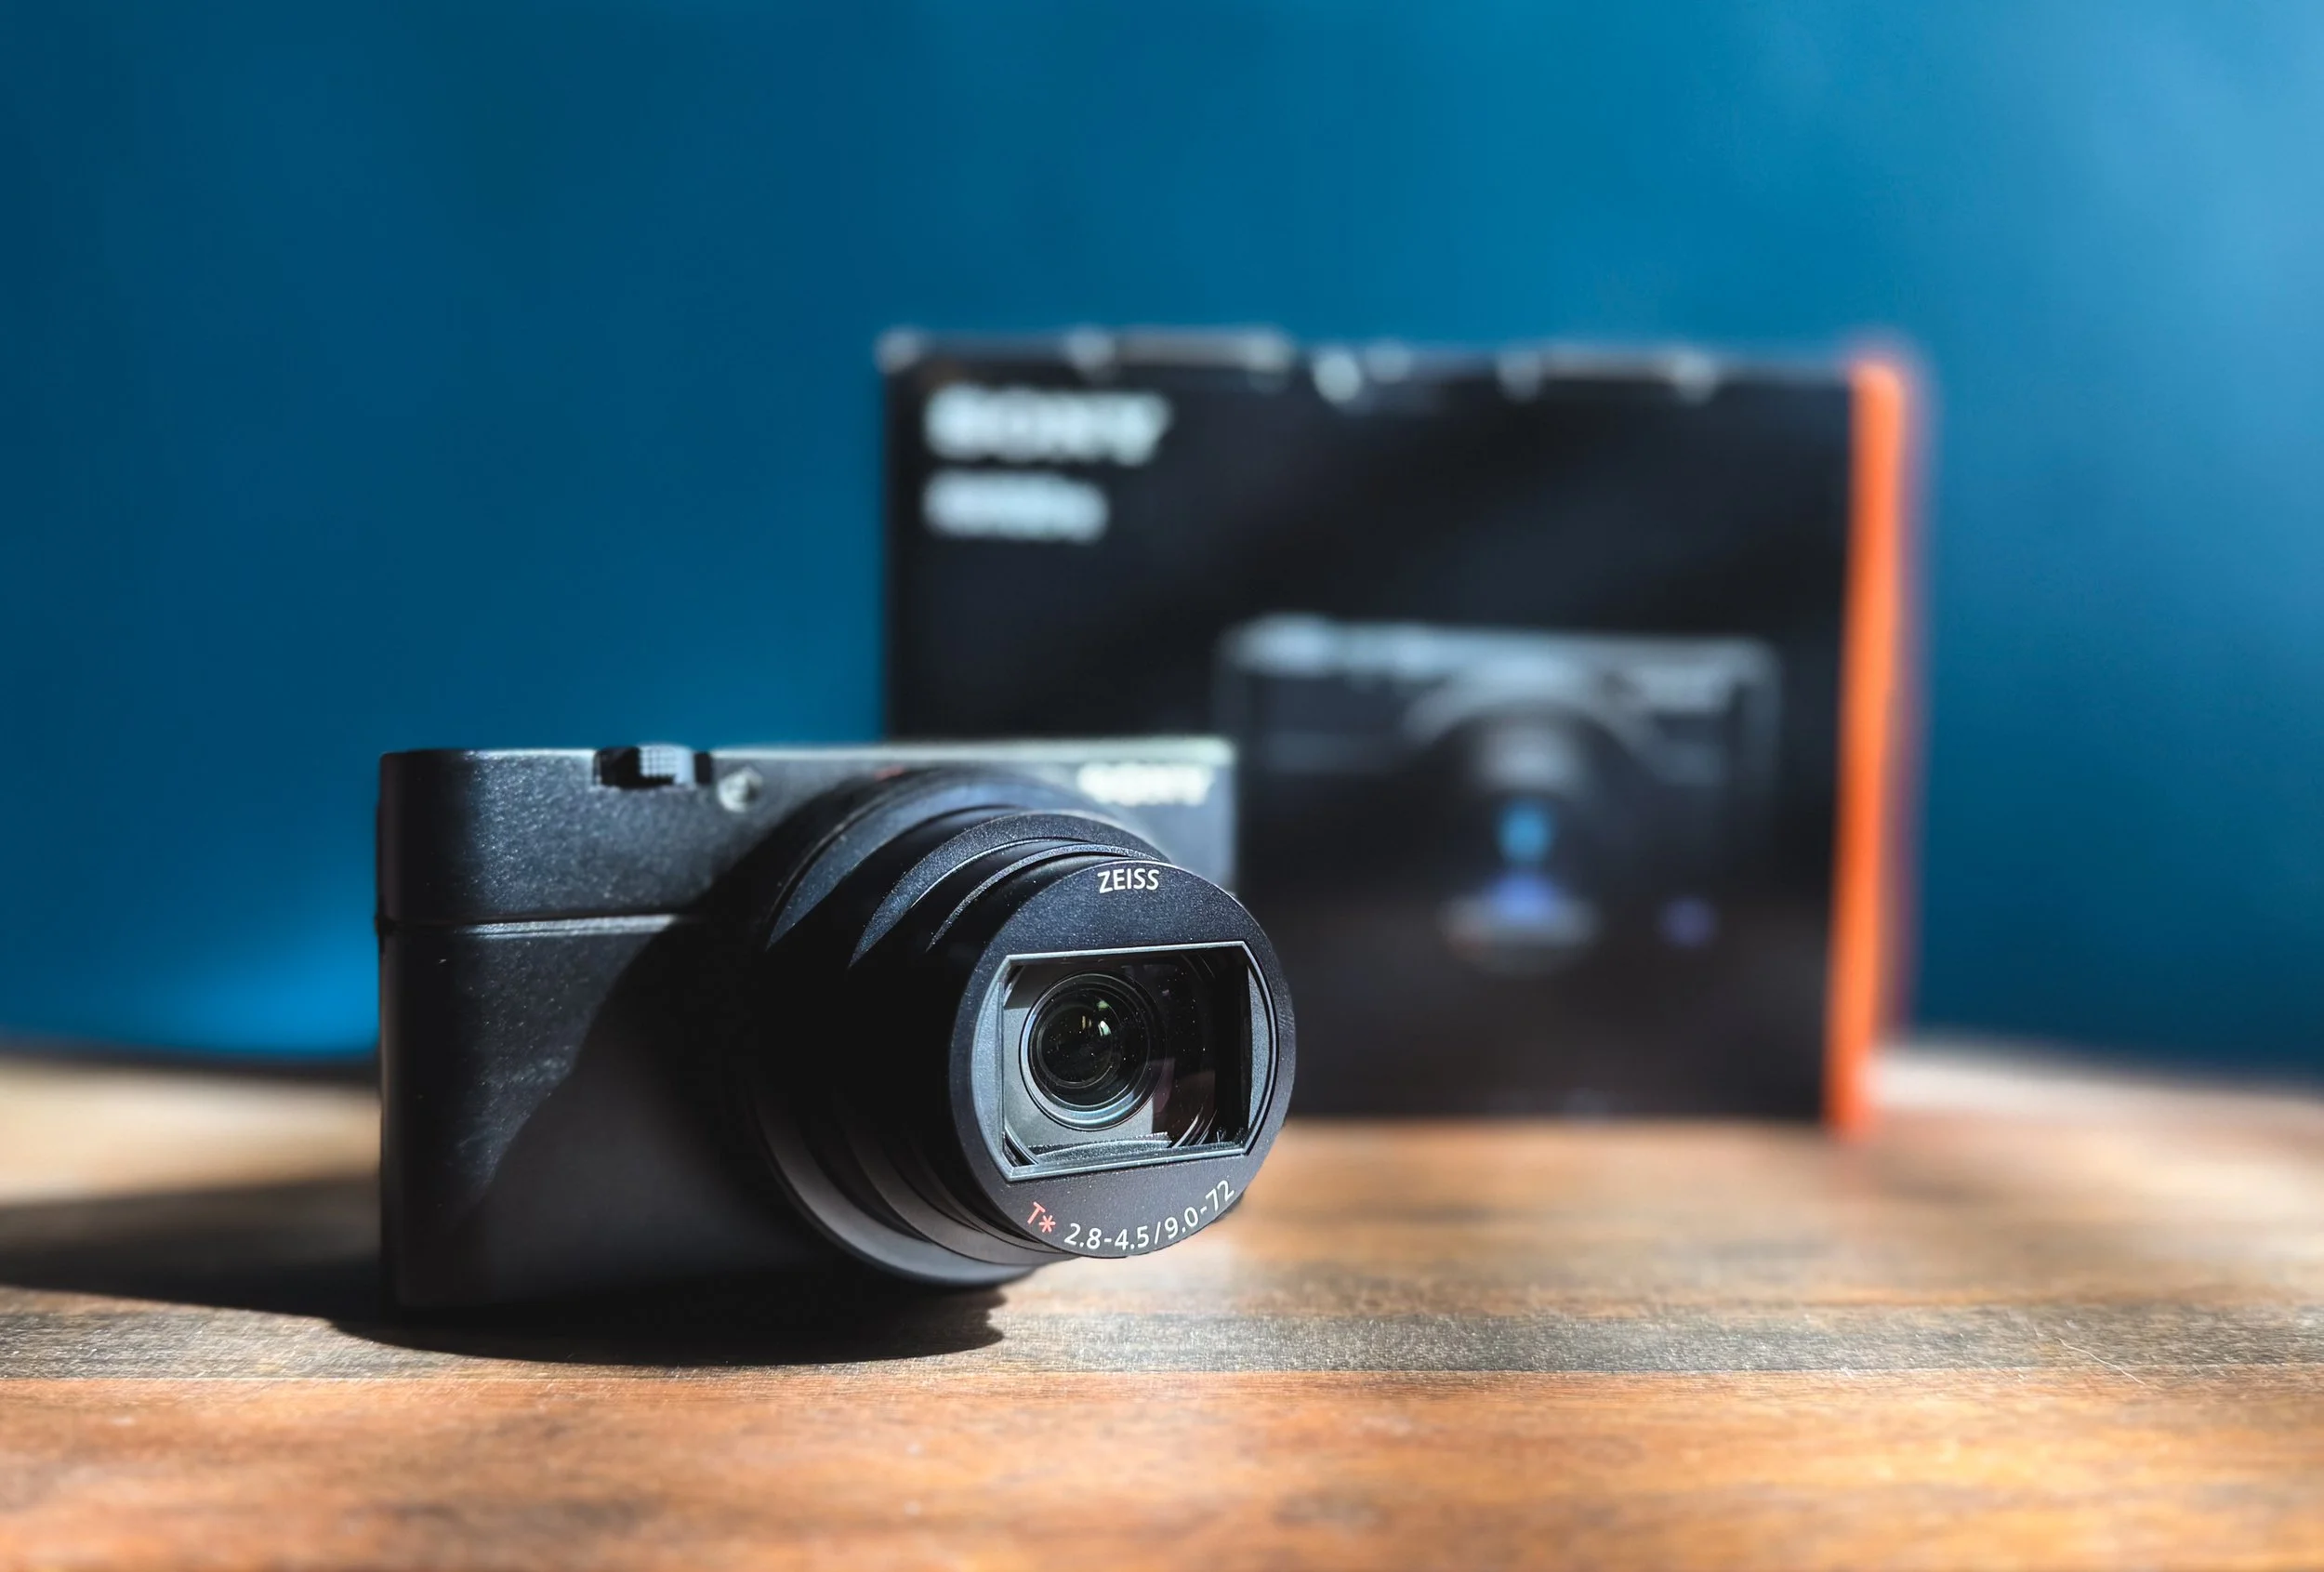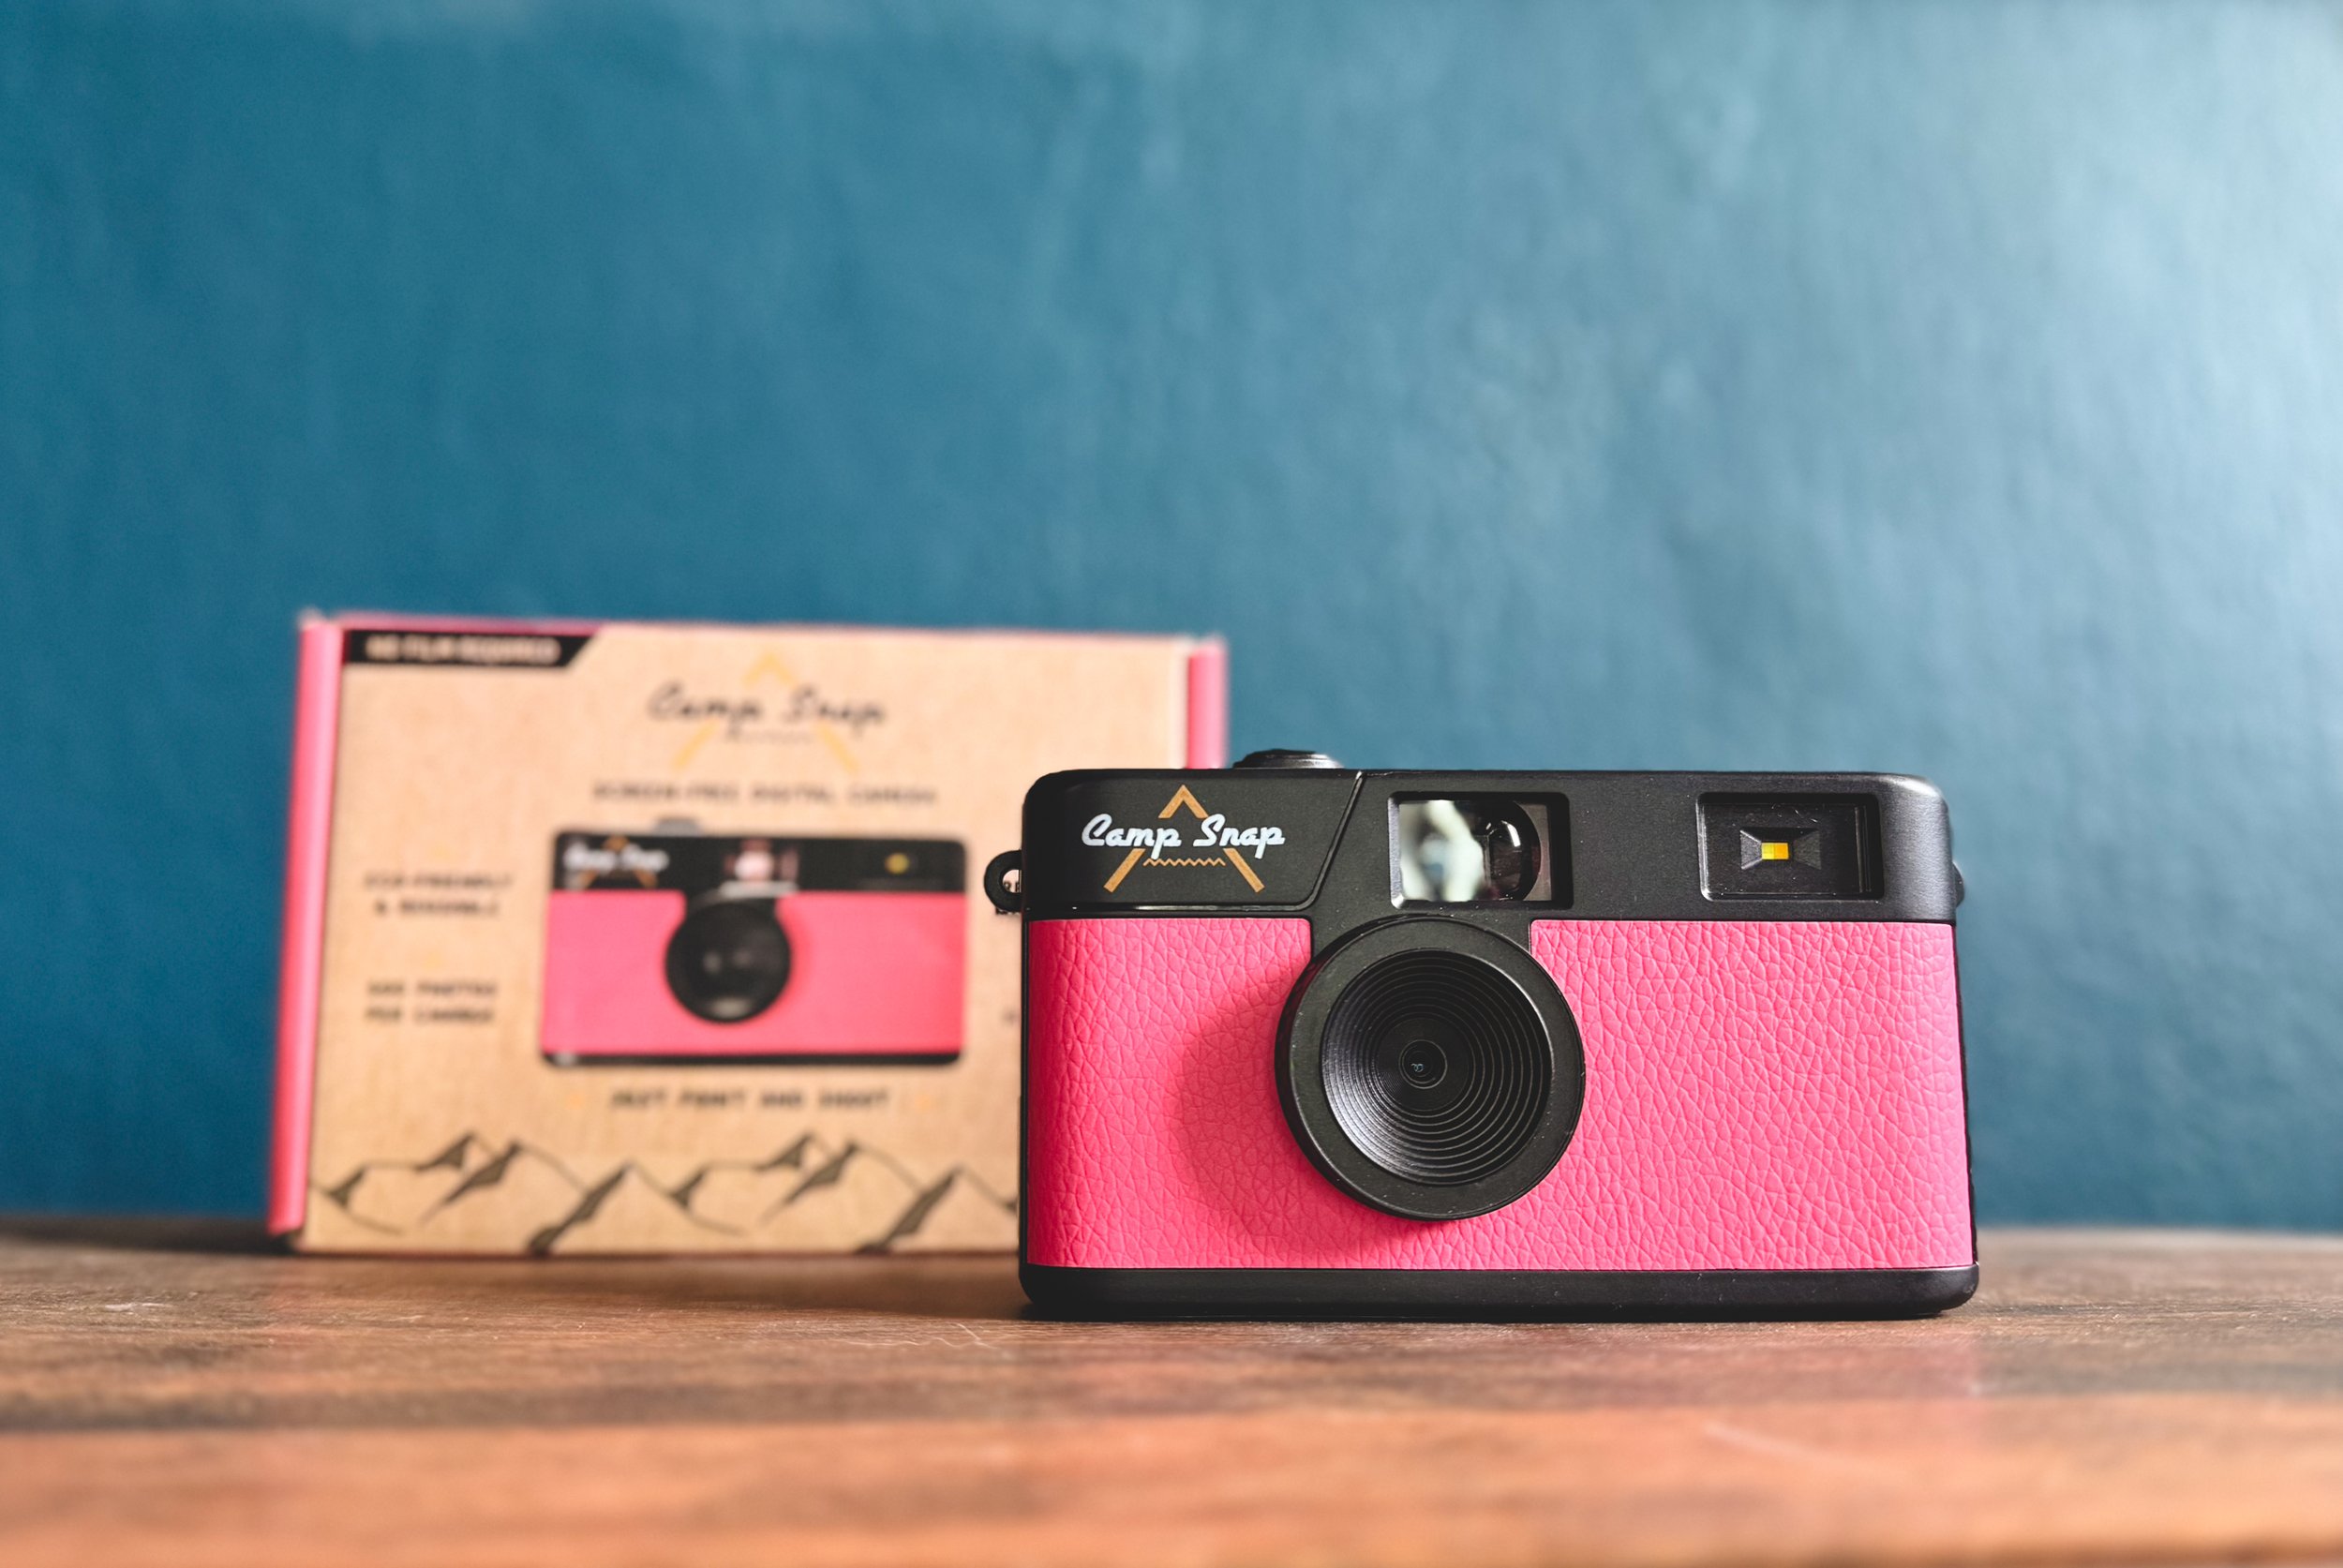
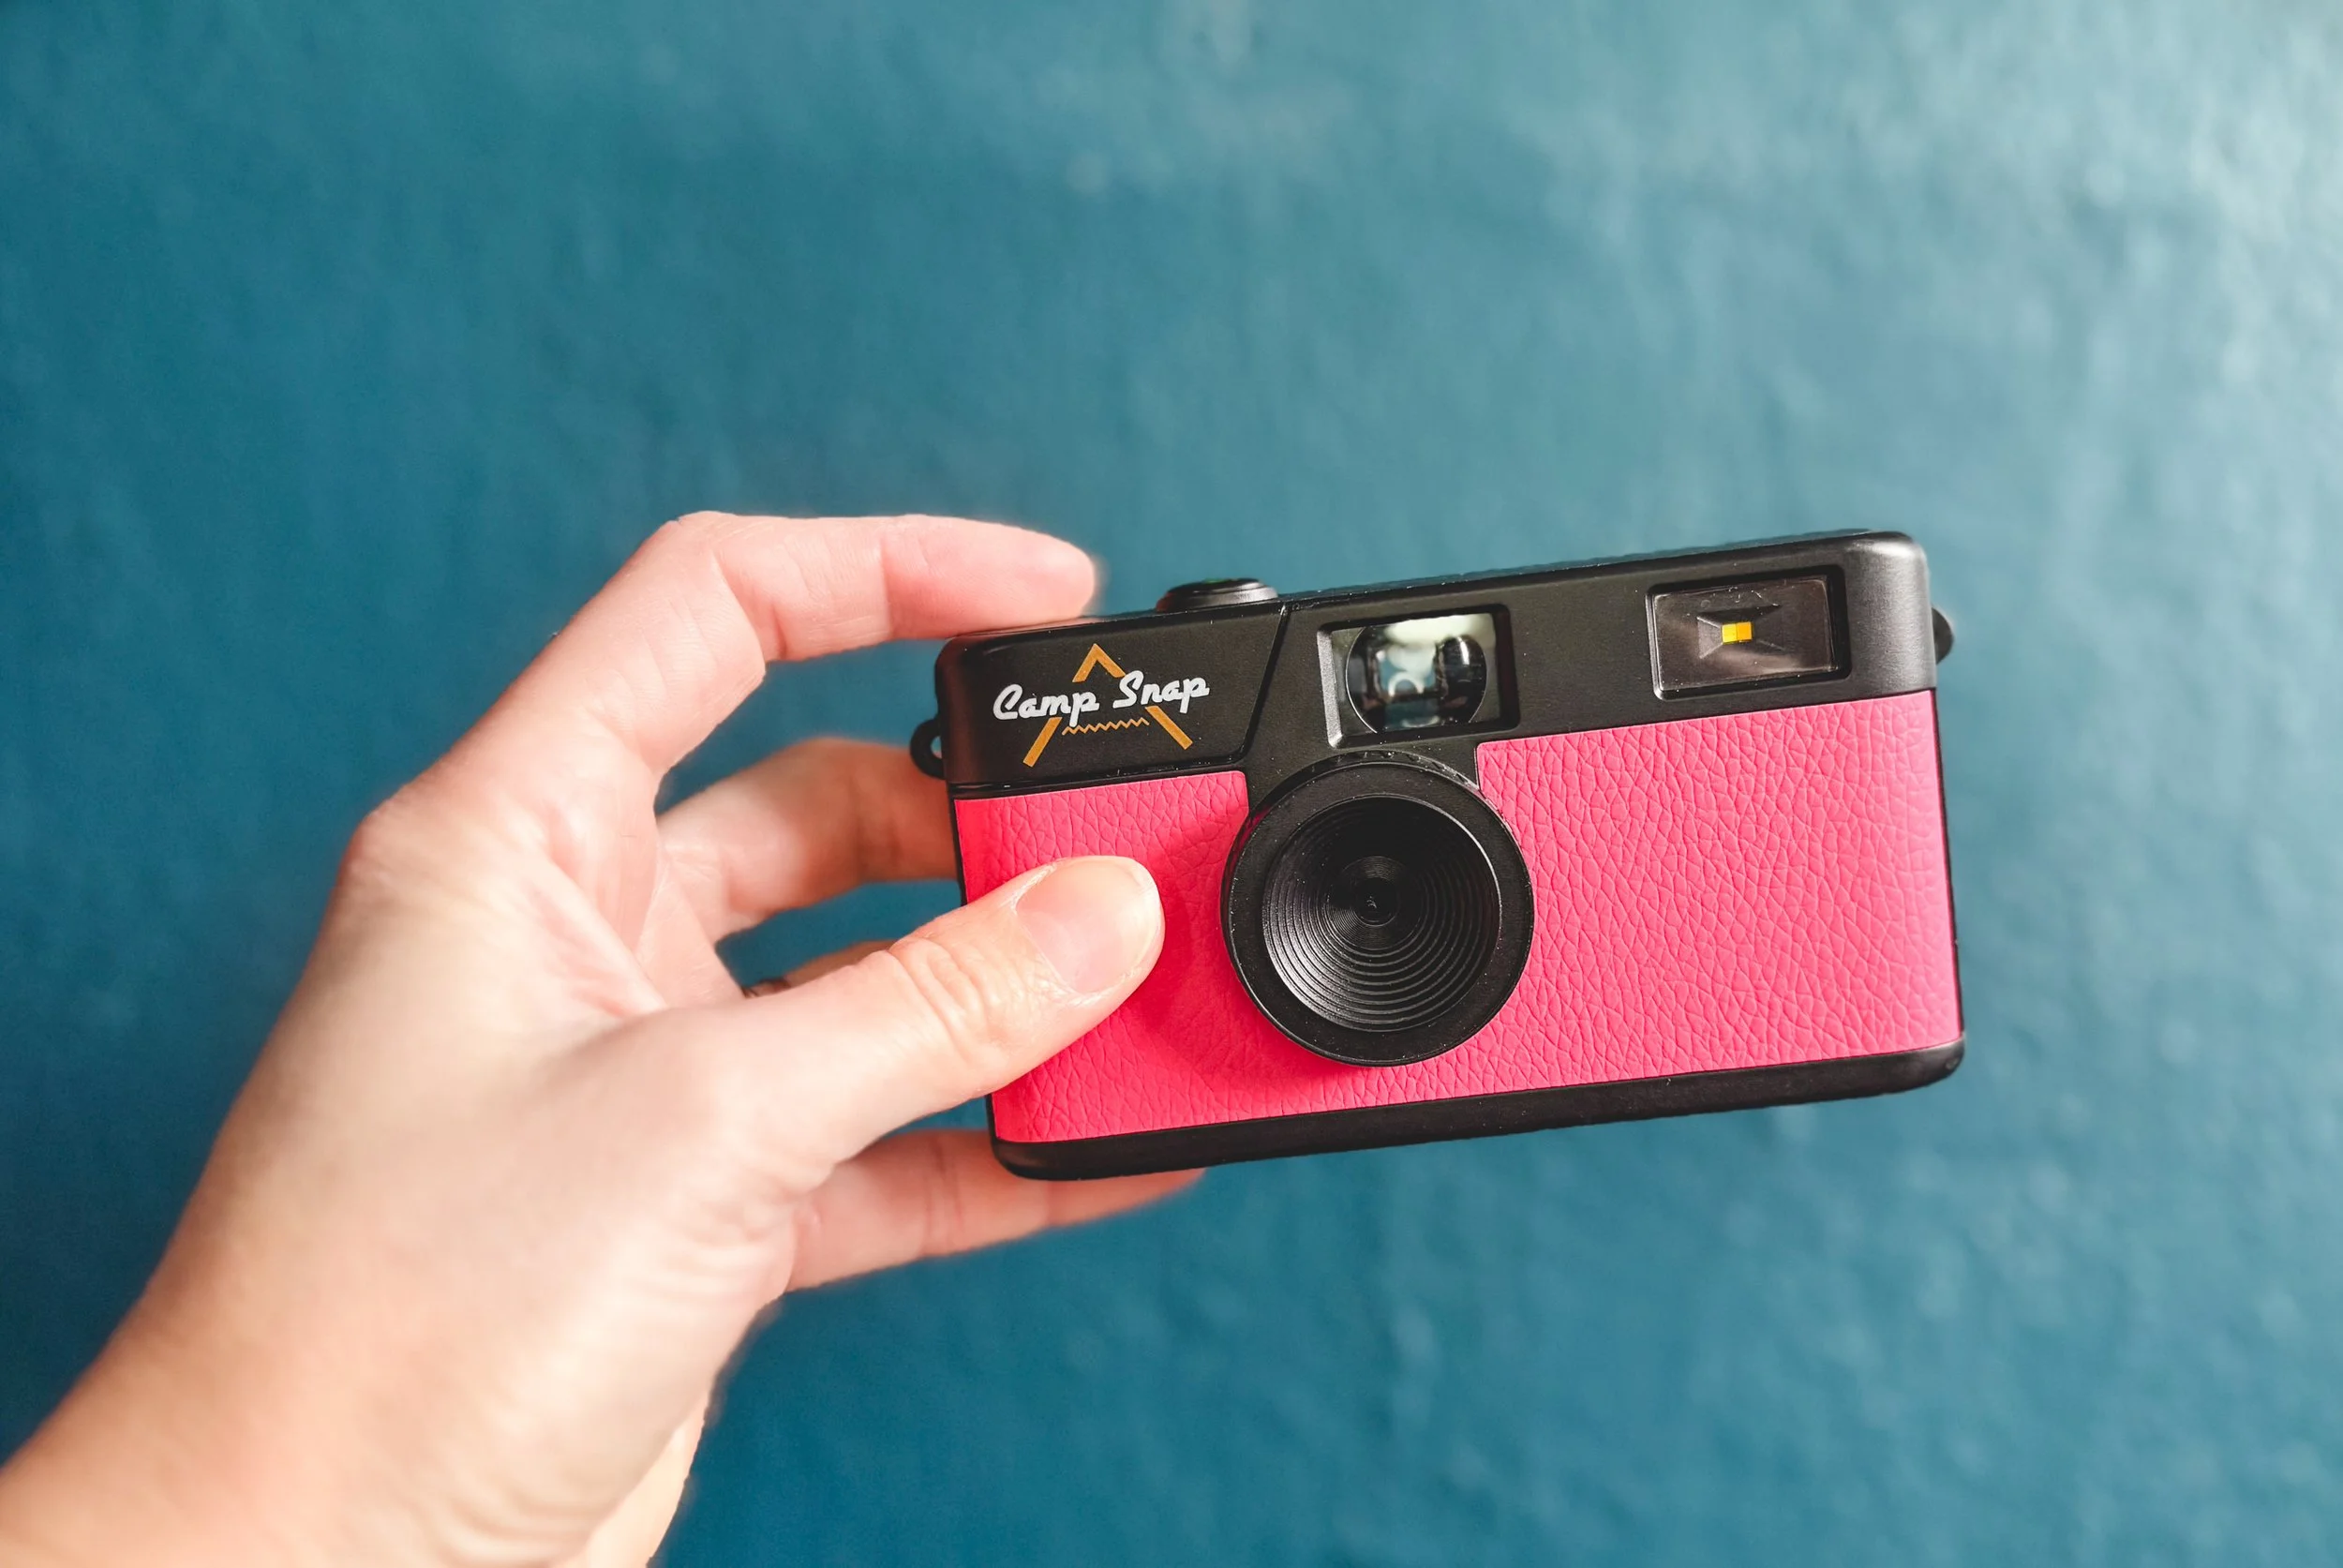
I’m sure you’ve seen ads for the Camp Snap camera all over your social media feeds. Or maybe that’s just me? Regardless, I’ve been incredibly curious about them for the last couple of years so when I received one for Christmas last year, I couldn’t wait to try it out. I love the general concept — a point-and-shoot digital camera meant to mimic a classic disposable 35 mm film camera from the 1990s and 2000s. The photos are captured on a digital memory card, but you’re not able to see what the photos look like until you import them into your computer. It’s meant to force you to live in the moment instead of taking a million photos on your iPhone until you get the “perfect” one. To me, this is exactly the kind of thing we need in modern society. Social media has definitely taken over in an unhealthy way and it’s time to scale it back and slow down. I’ve been using the Camp Snap camera for a few weeks now and I wanted to share the things I love about it and share some sample photos!

(By using the affiliate links and/or codes in this blog post it supports Myles Katherine Photography. We may get a small kick back by you doing so.)
PROS OF THE CAMP SNAP CAMERA
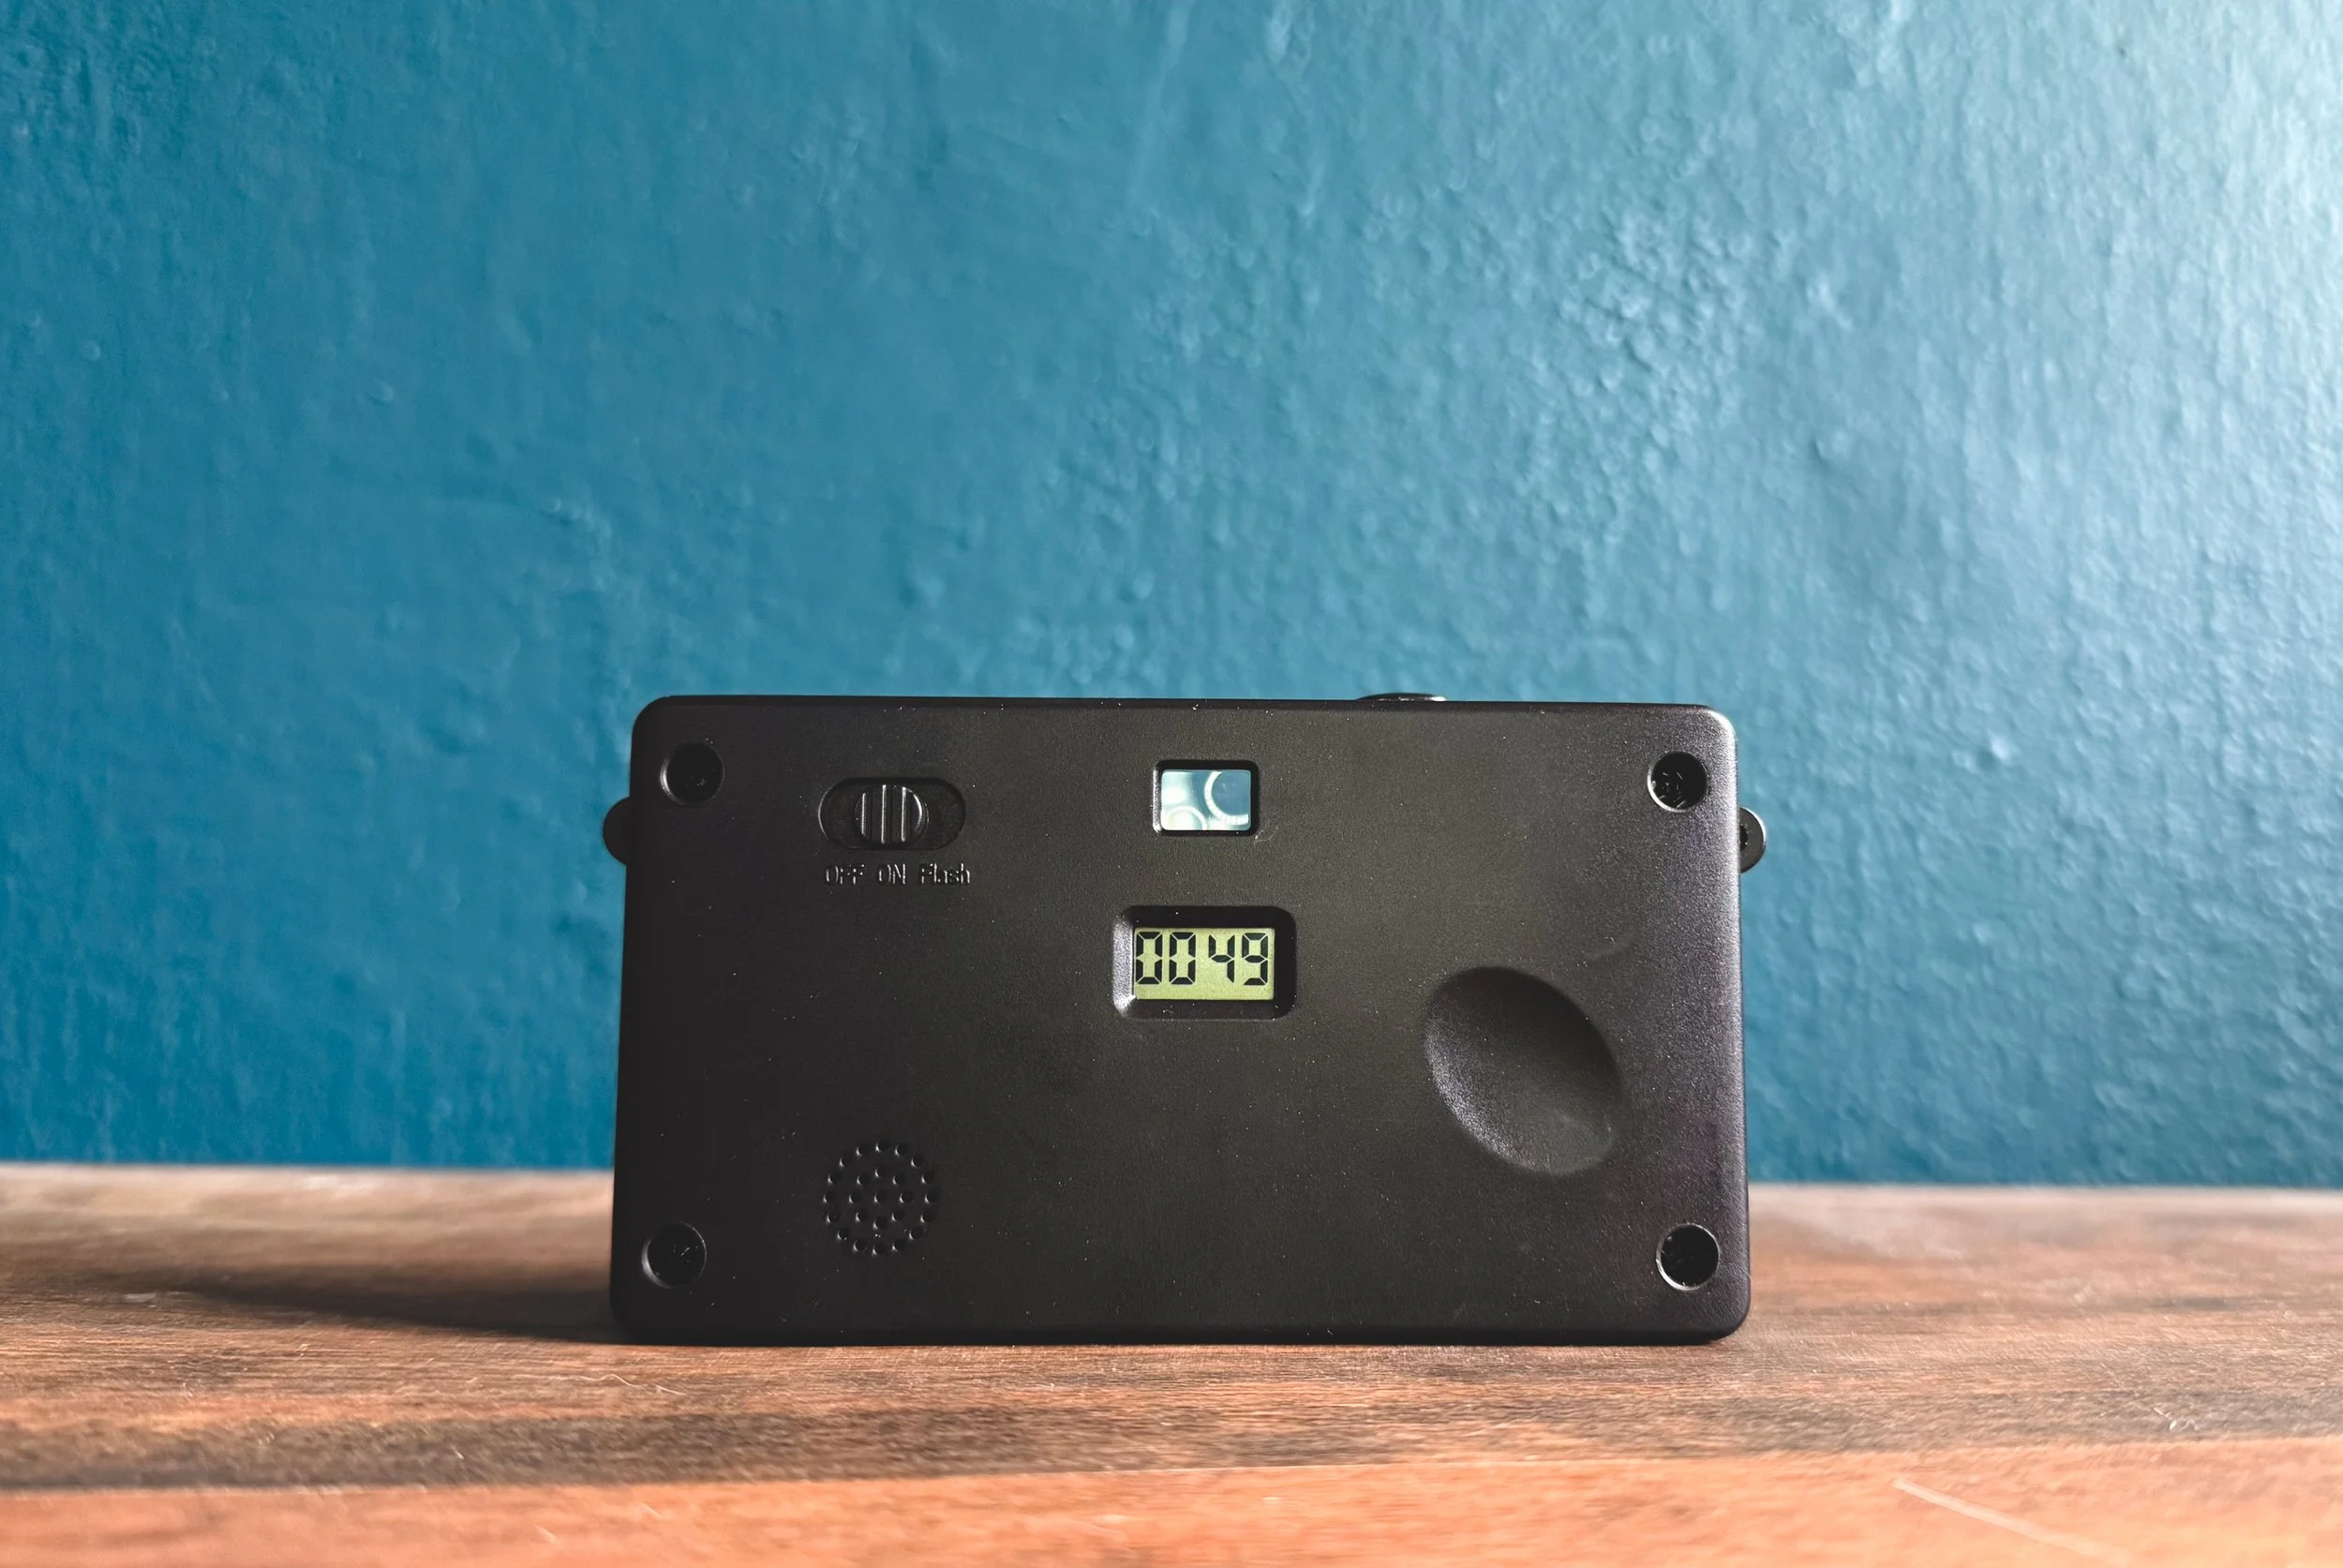
As I mentioned above, the whole point of this camera is to go back in time a little bit and take photos because we see something we love or we’re experiencing a moment that we don’t want to forget. There’s no digital screen on the back that lets you flip through the photos you’ve taken. There’s just a photo counter so you can see how many photos you’ve taken. When you’re ready to see how your photos turned out, you connect the camera to a computer and import the photos. I love that you don’t have to overthink or obsess over the photos, you just snap a photo and move on. That’s the whole magic of disposable cameras from the 90s. You had to wait a week for your film to get developed and the photos typically weren’t great. They were crooked or out of focus or underexposed… it was part of the magic. For some reason, those kinds of photos are just more memorable to me. They aren’t perfect, and that’s why they’re great. They aren’t curated or overprocessed… they just captured the moment the way that it was. It makes photography more fun and less stressful. As a professional photographer, I need this sometimes. I constantly burn myself out trying to take the perfect photo, but the Camp Snap camera allowed me to enjoy the moments, instead of trying to capture the ultimate photo.
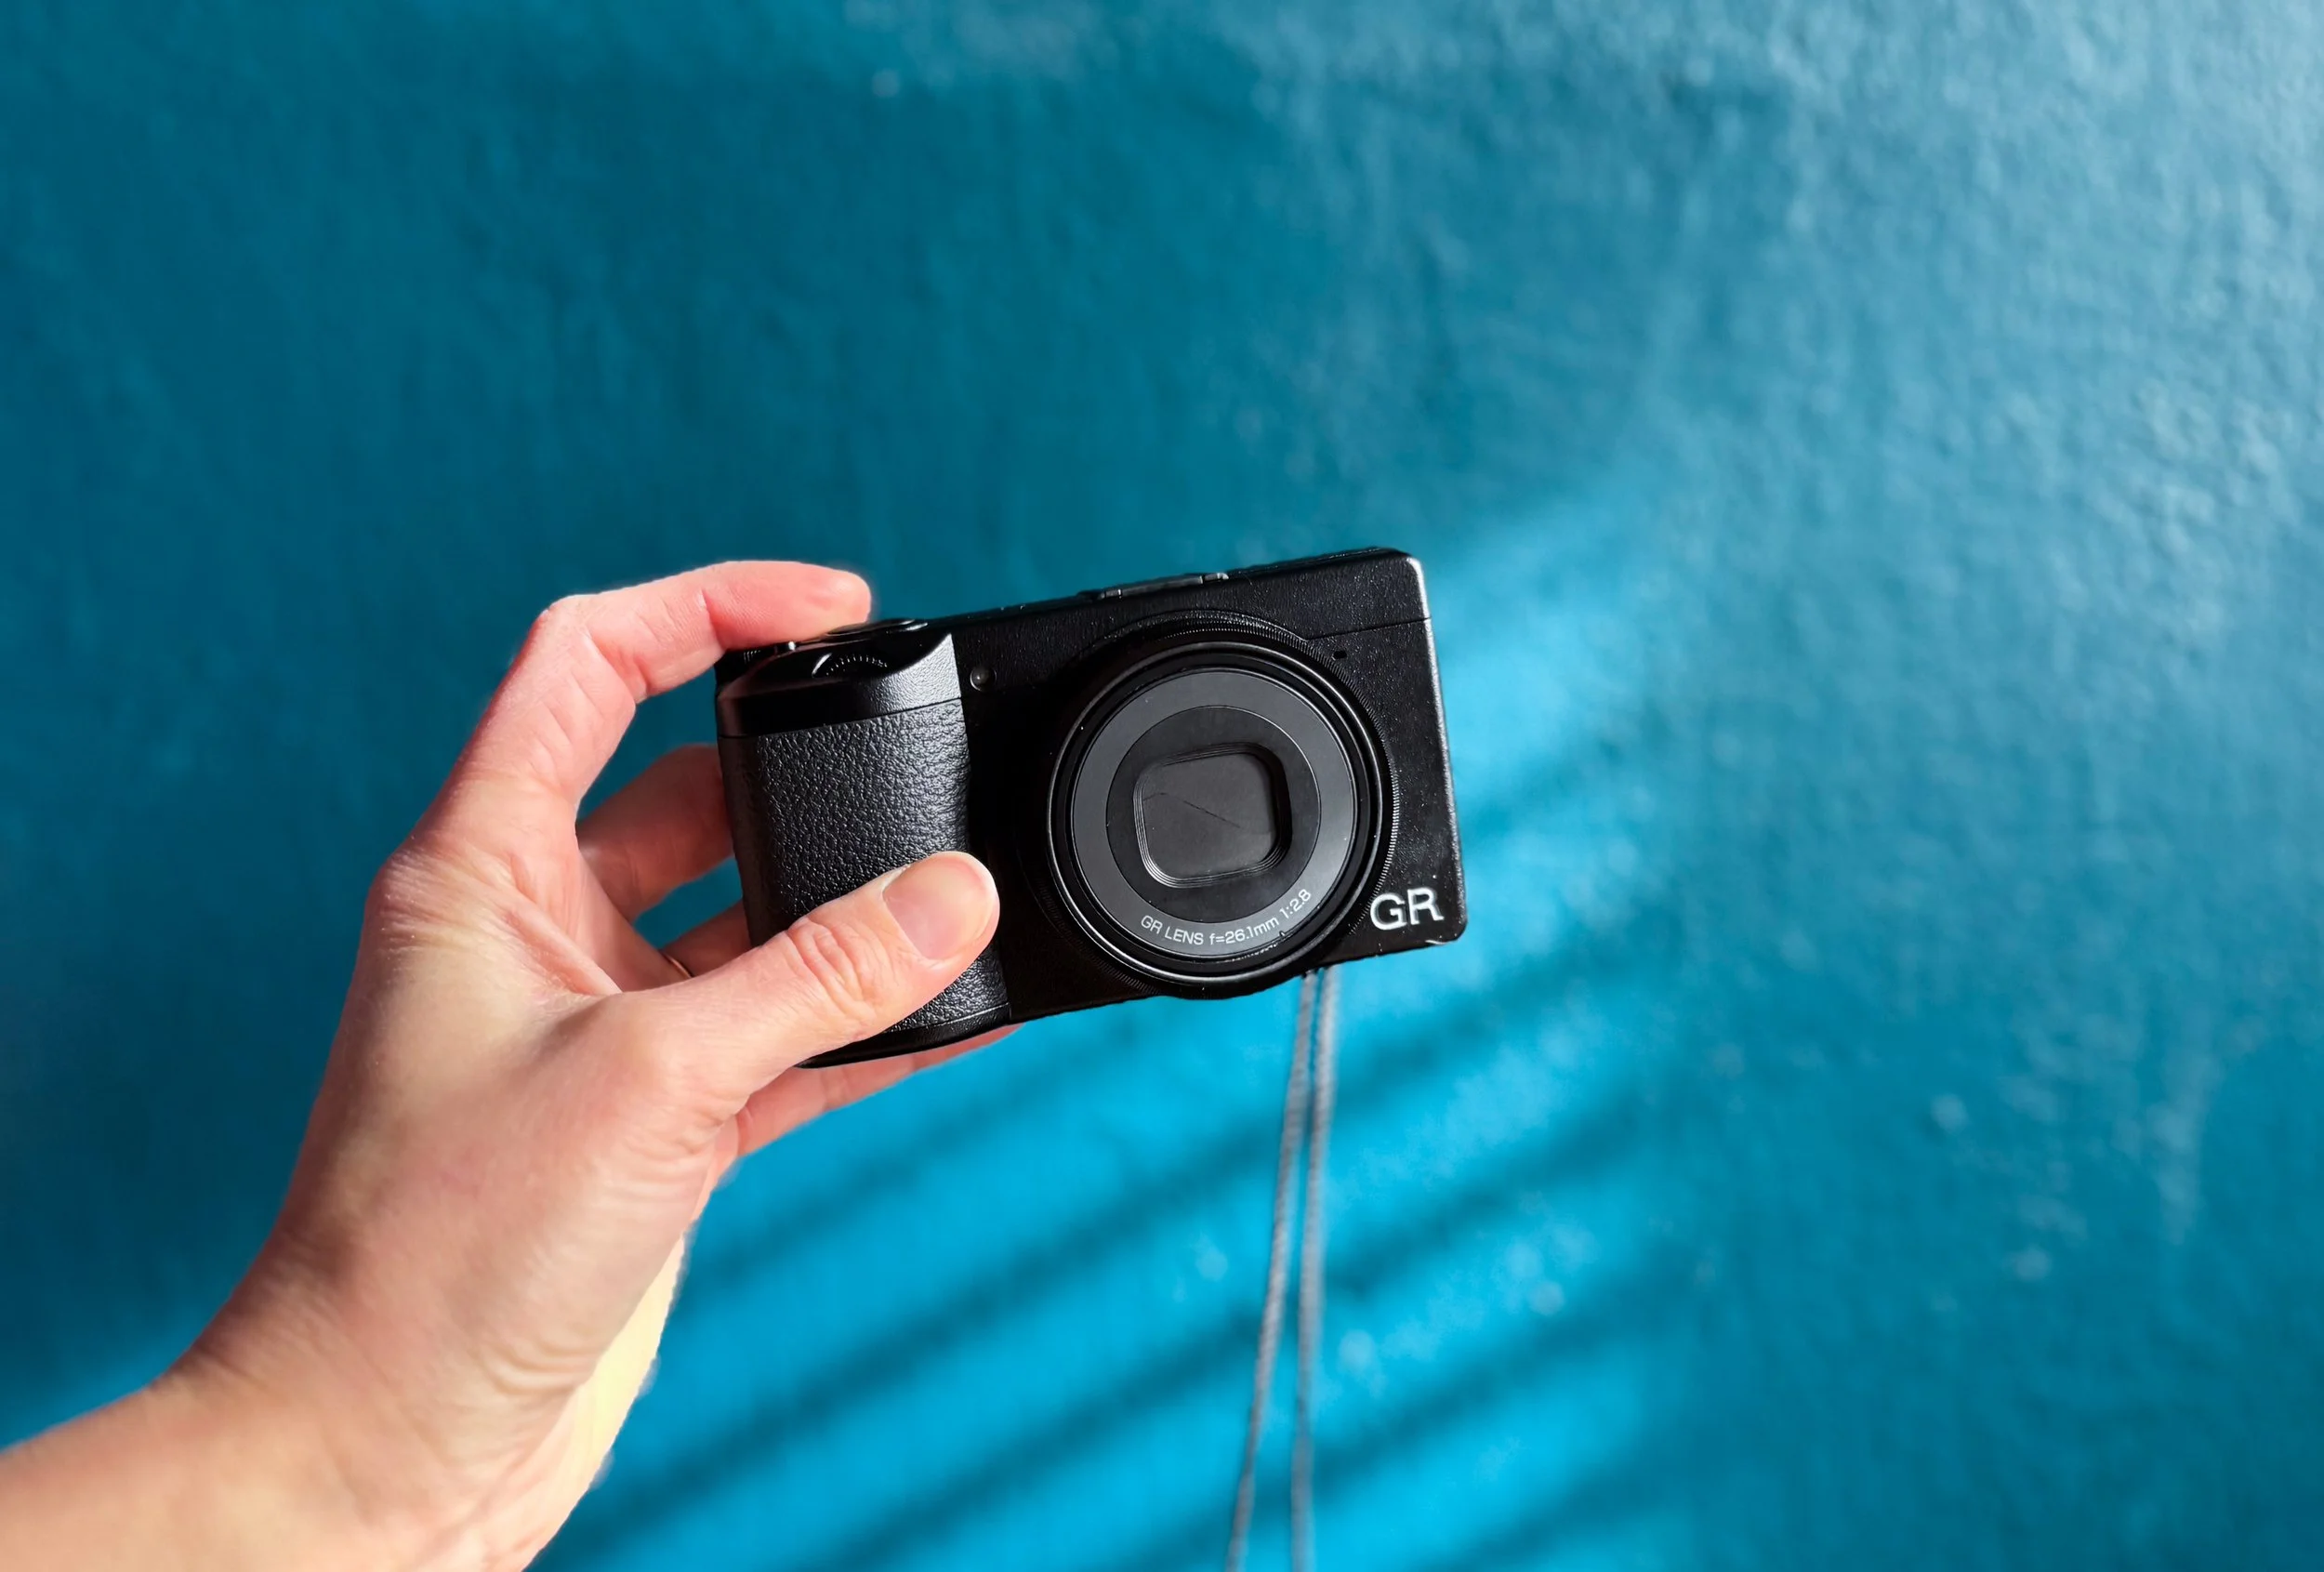
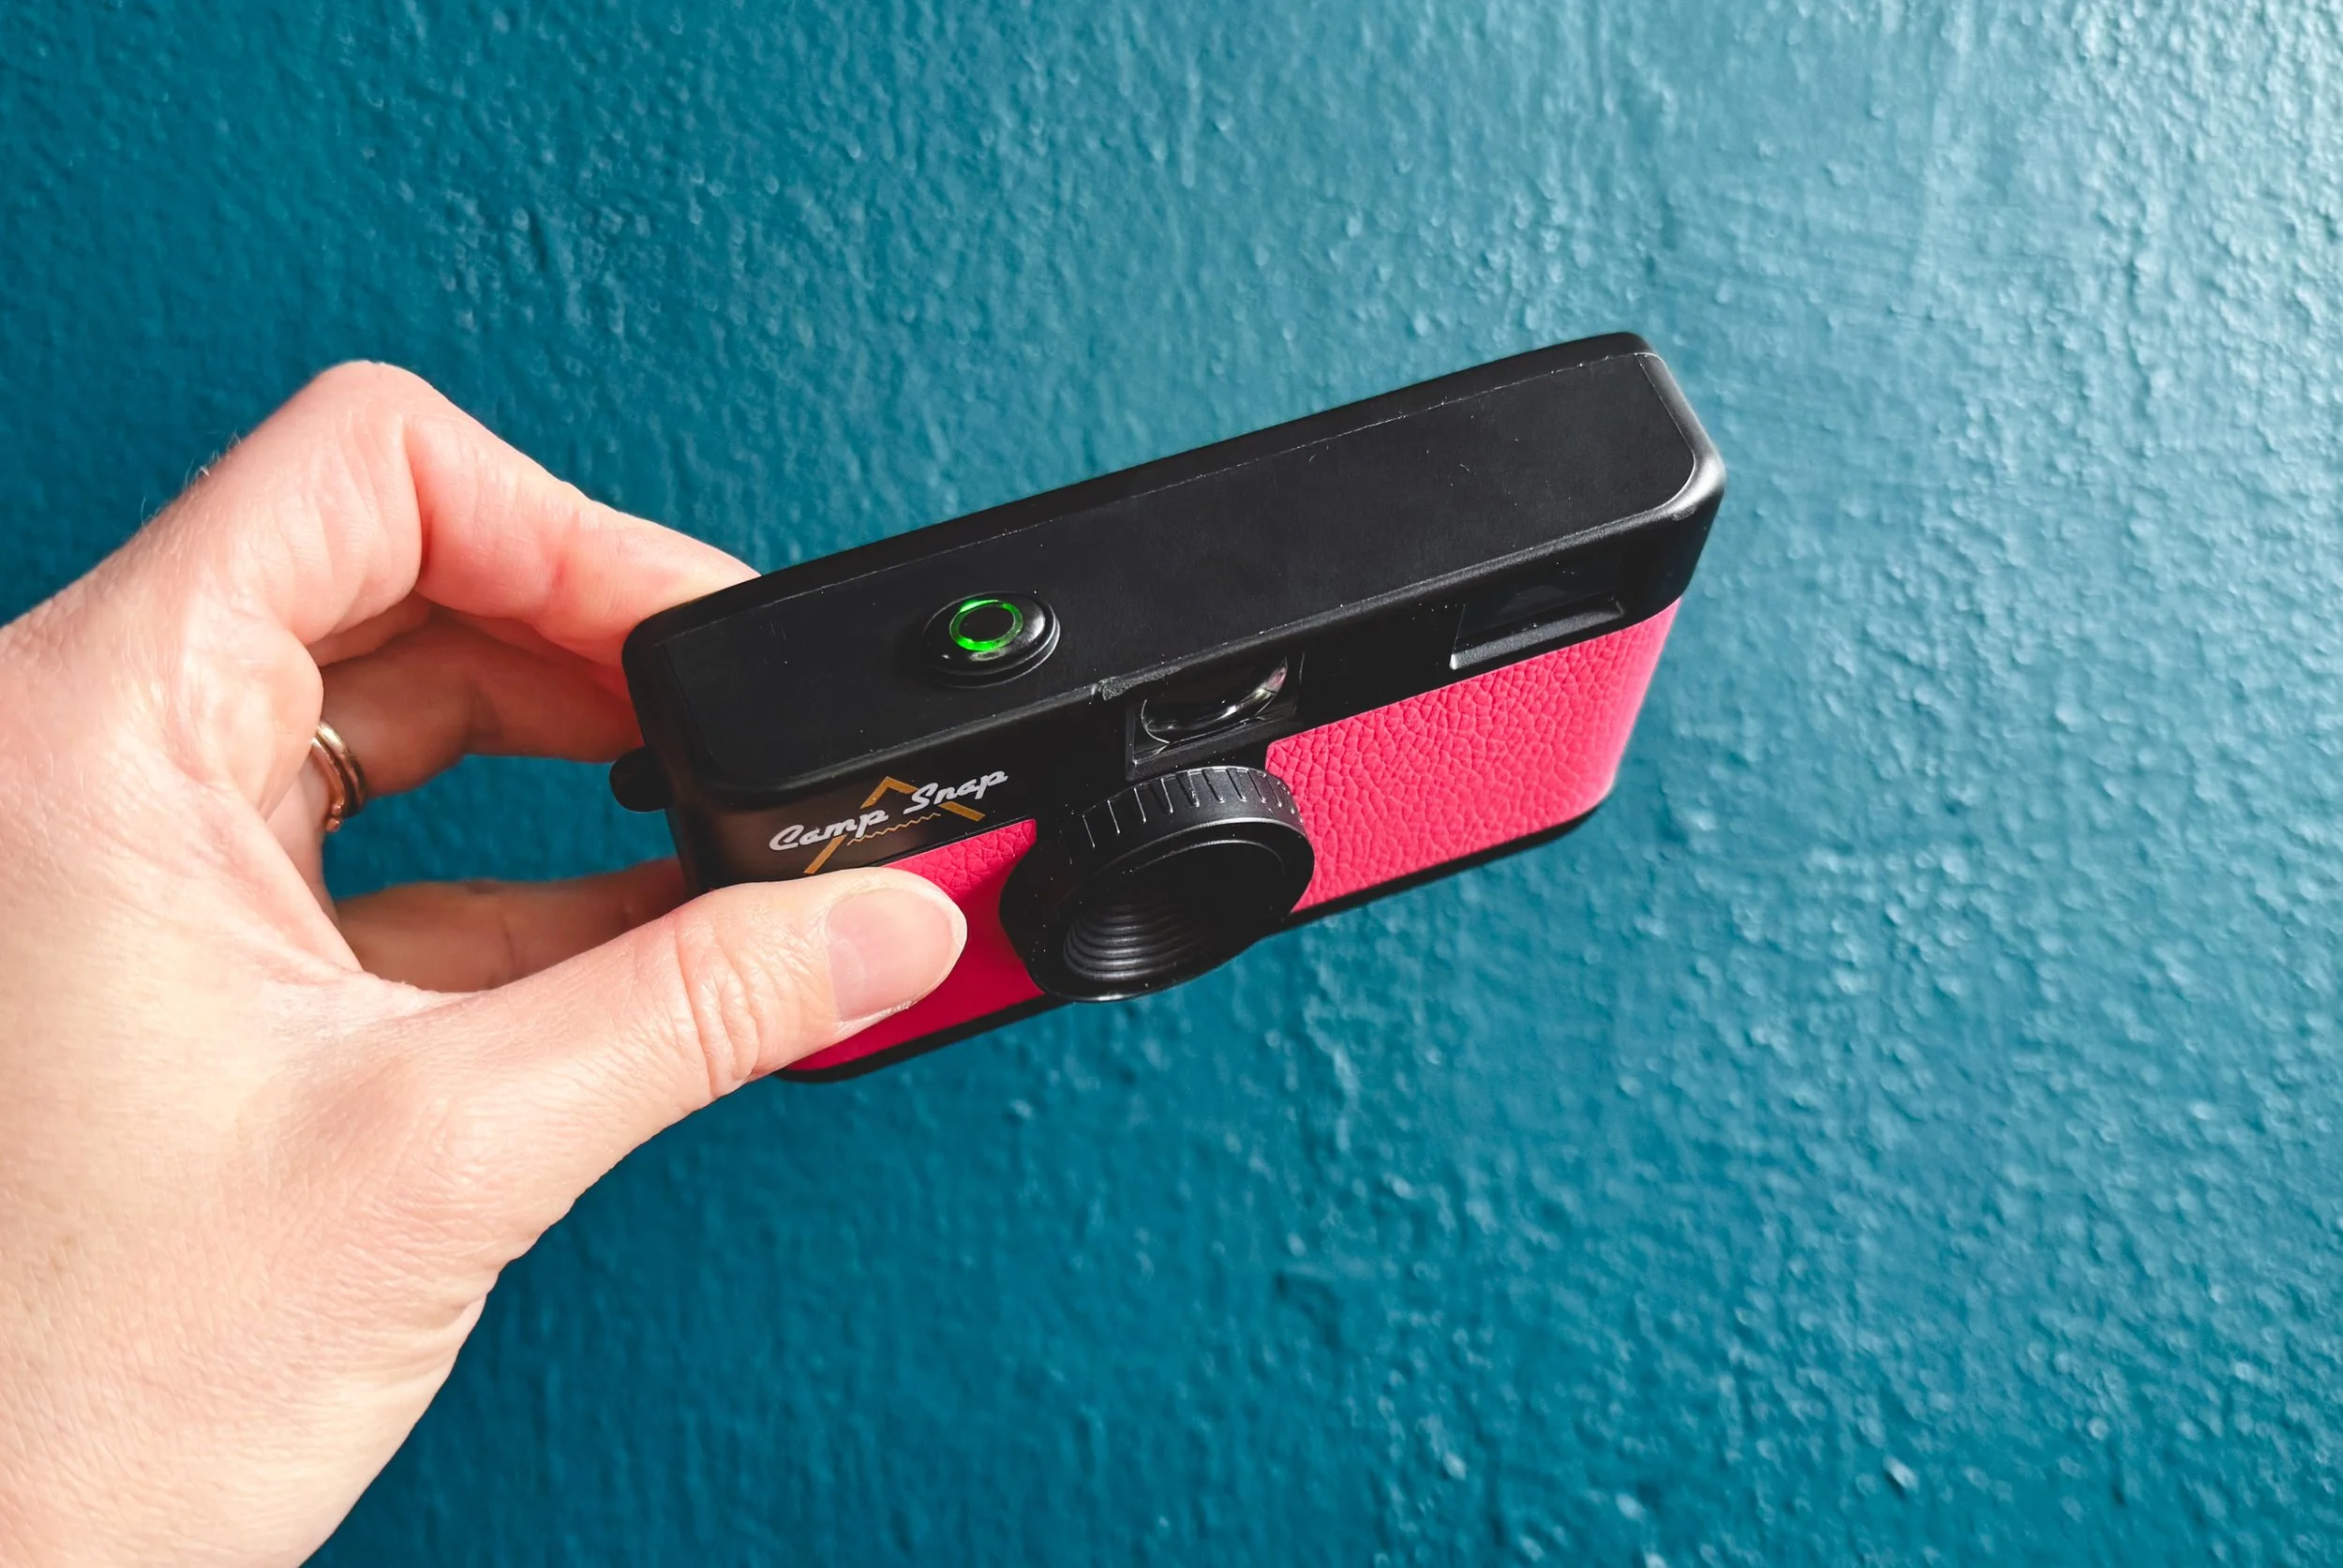
Another great feature is the fact that it weighs absolutely nothing. The inside of the camera is practically hollow except for a little digital computer board and a micro SD memory card. The only reason I know what the inside looks like is because I dropped it in a river and had to open up the inside to let it dry out! Surprise, surprise, I dropped my camera into a body of water. This isn’t the first time and it surely won’t be the last. I’ll never forget when I dropped my favorite film camera, the Holga GCFN, into a river in Japan and my husband had to fish it out for me. Lucky for me, since the Camp Snap camera is just filled with air, it floated right on top of the water and we were able to push it back to us with a stick. Ugh, story of my life! Miraculously, my Camp Snap camera still works even after all that!
Since I travel a lot, the weight and size of a camera is incredibly important to me because I usually bring 5 or 6 cameras at a time everywhere I go. The Camp Snap camera doesn’t take up any space at all in my camera bag and I was even able to fit it in my purse when we’d go out at night. It might be the most mobile and lightweight camera I own, which is a major plus for me.
I also love that it has a flash. The old disposable cameras have flashes too, and it’s part of the whole aesthetic when you’re taking photos. What’s nice is that you can choose whether you want it on or not. There’s a switch on the back that has the options “on”, “off”, or “flash”. It’s not the brightest flash in the world, and I’d say it’s a little less powerful than the flashes on disposable cameras but it’s still nice to have if you’re inside a restaurant or something and want to take photos of your friends or family.
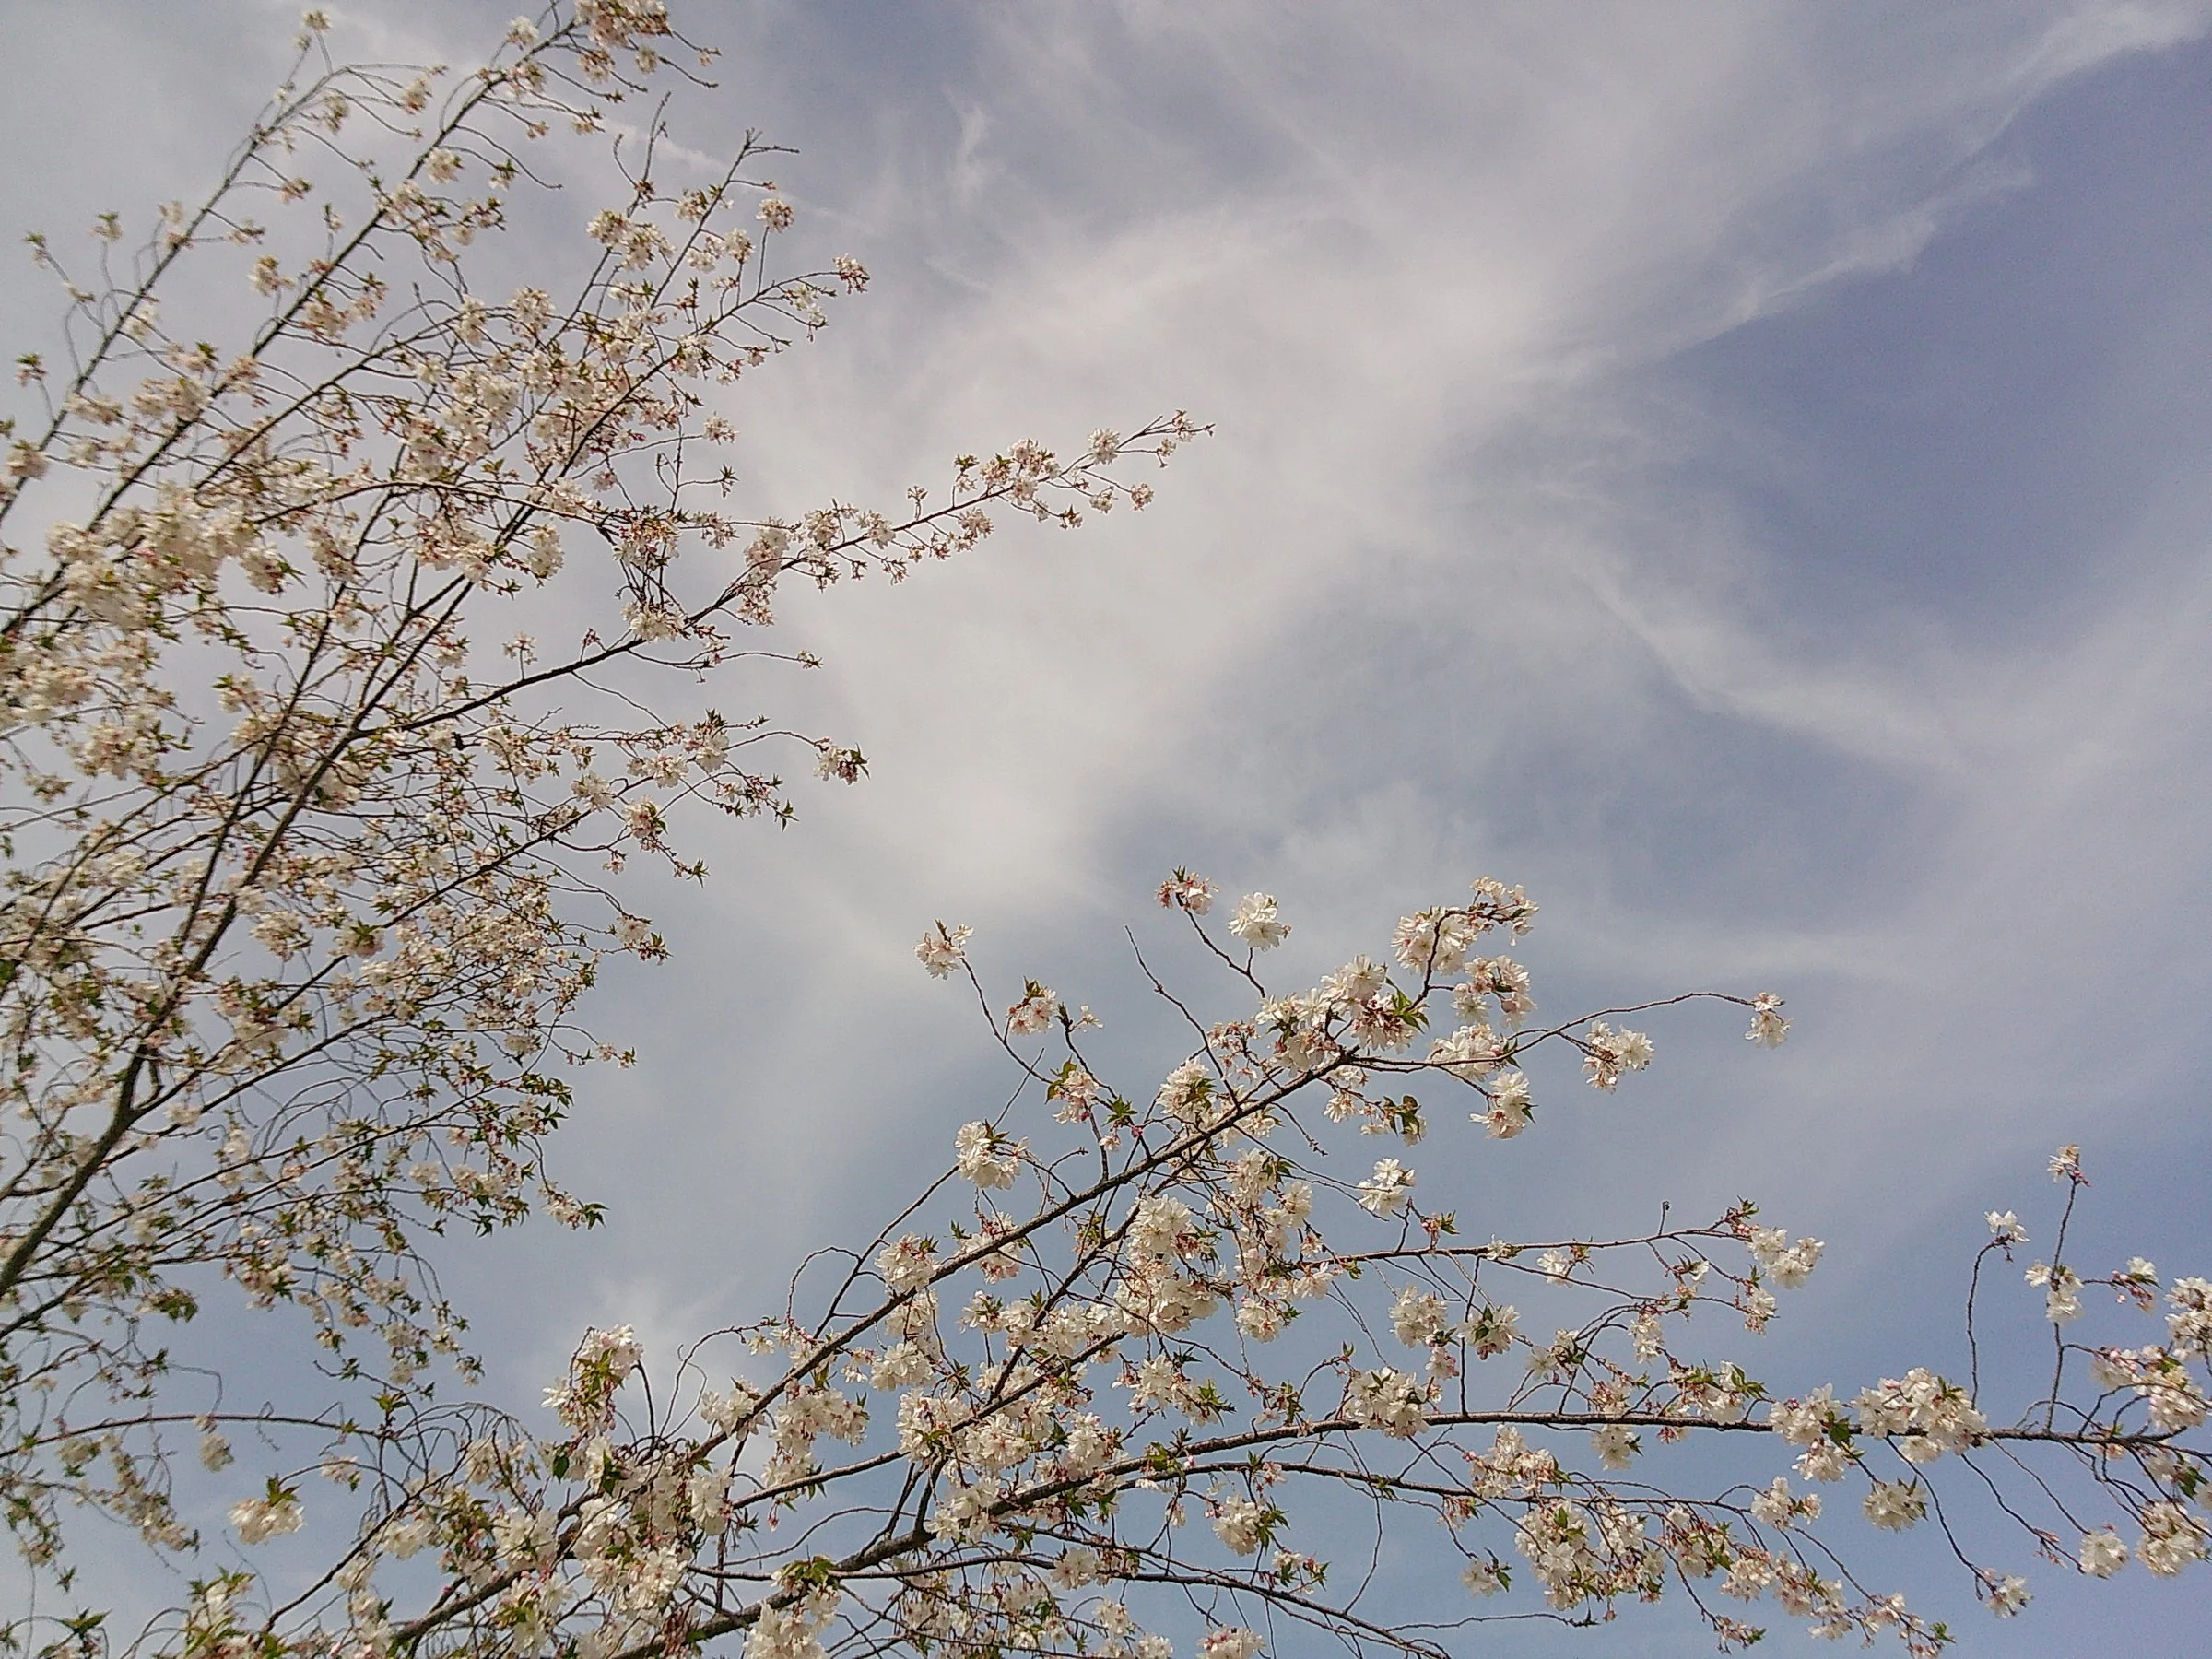
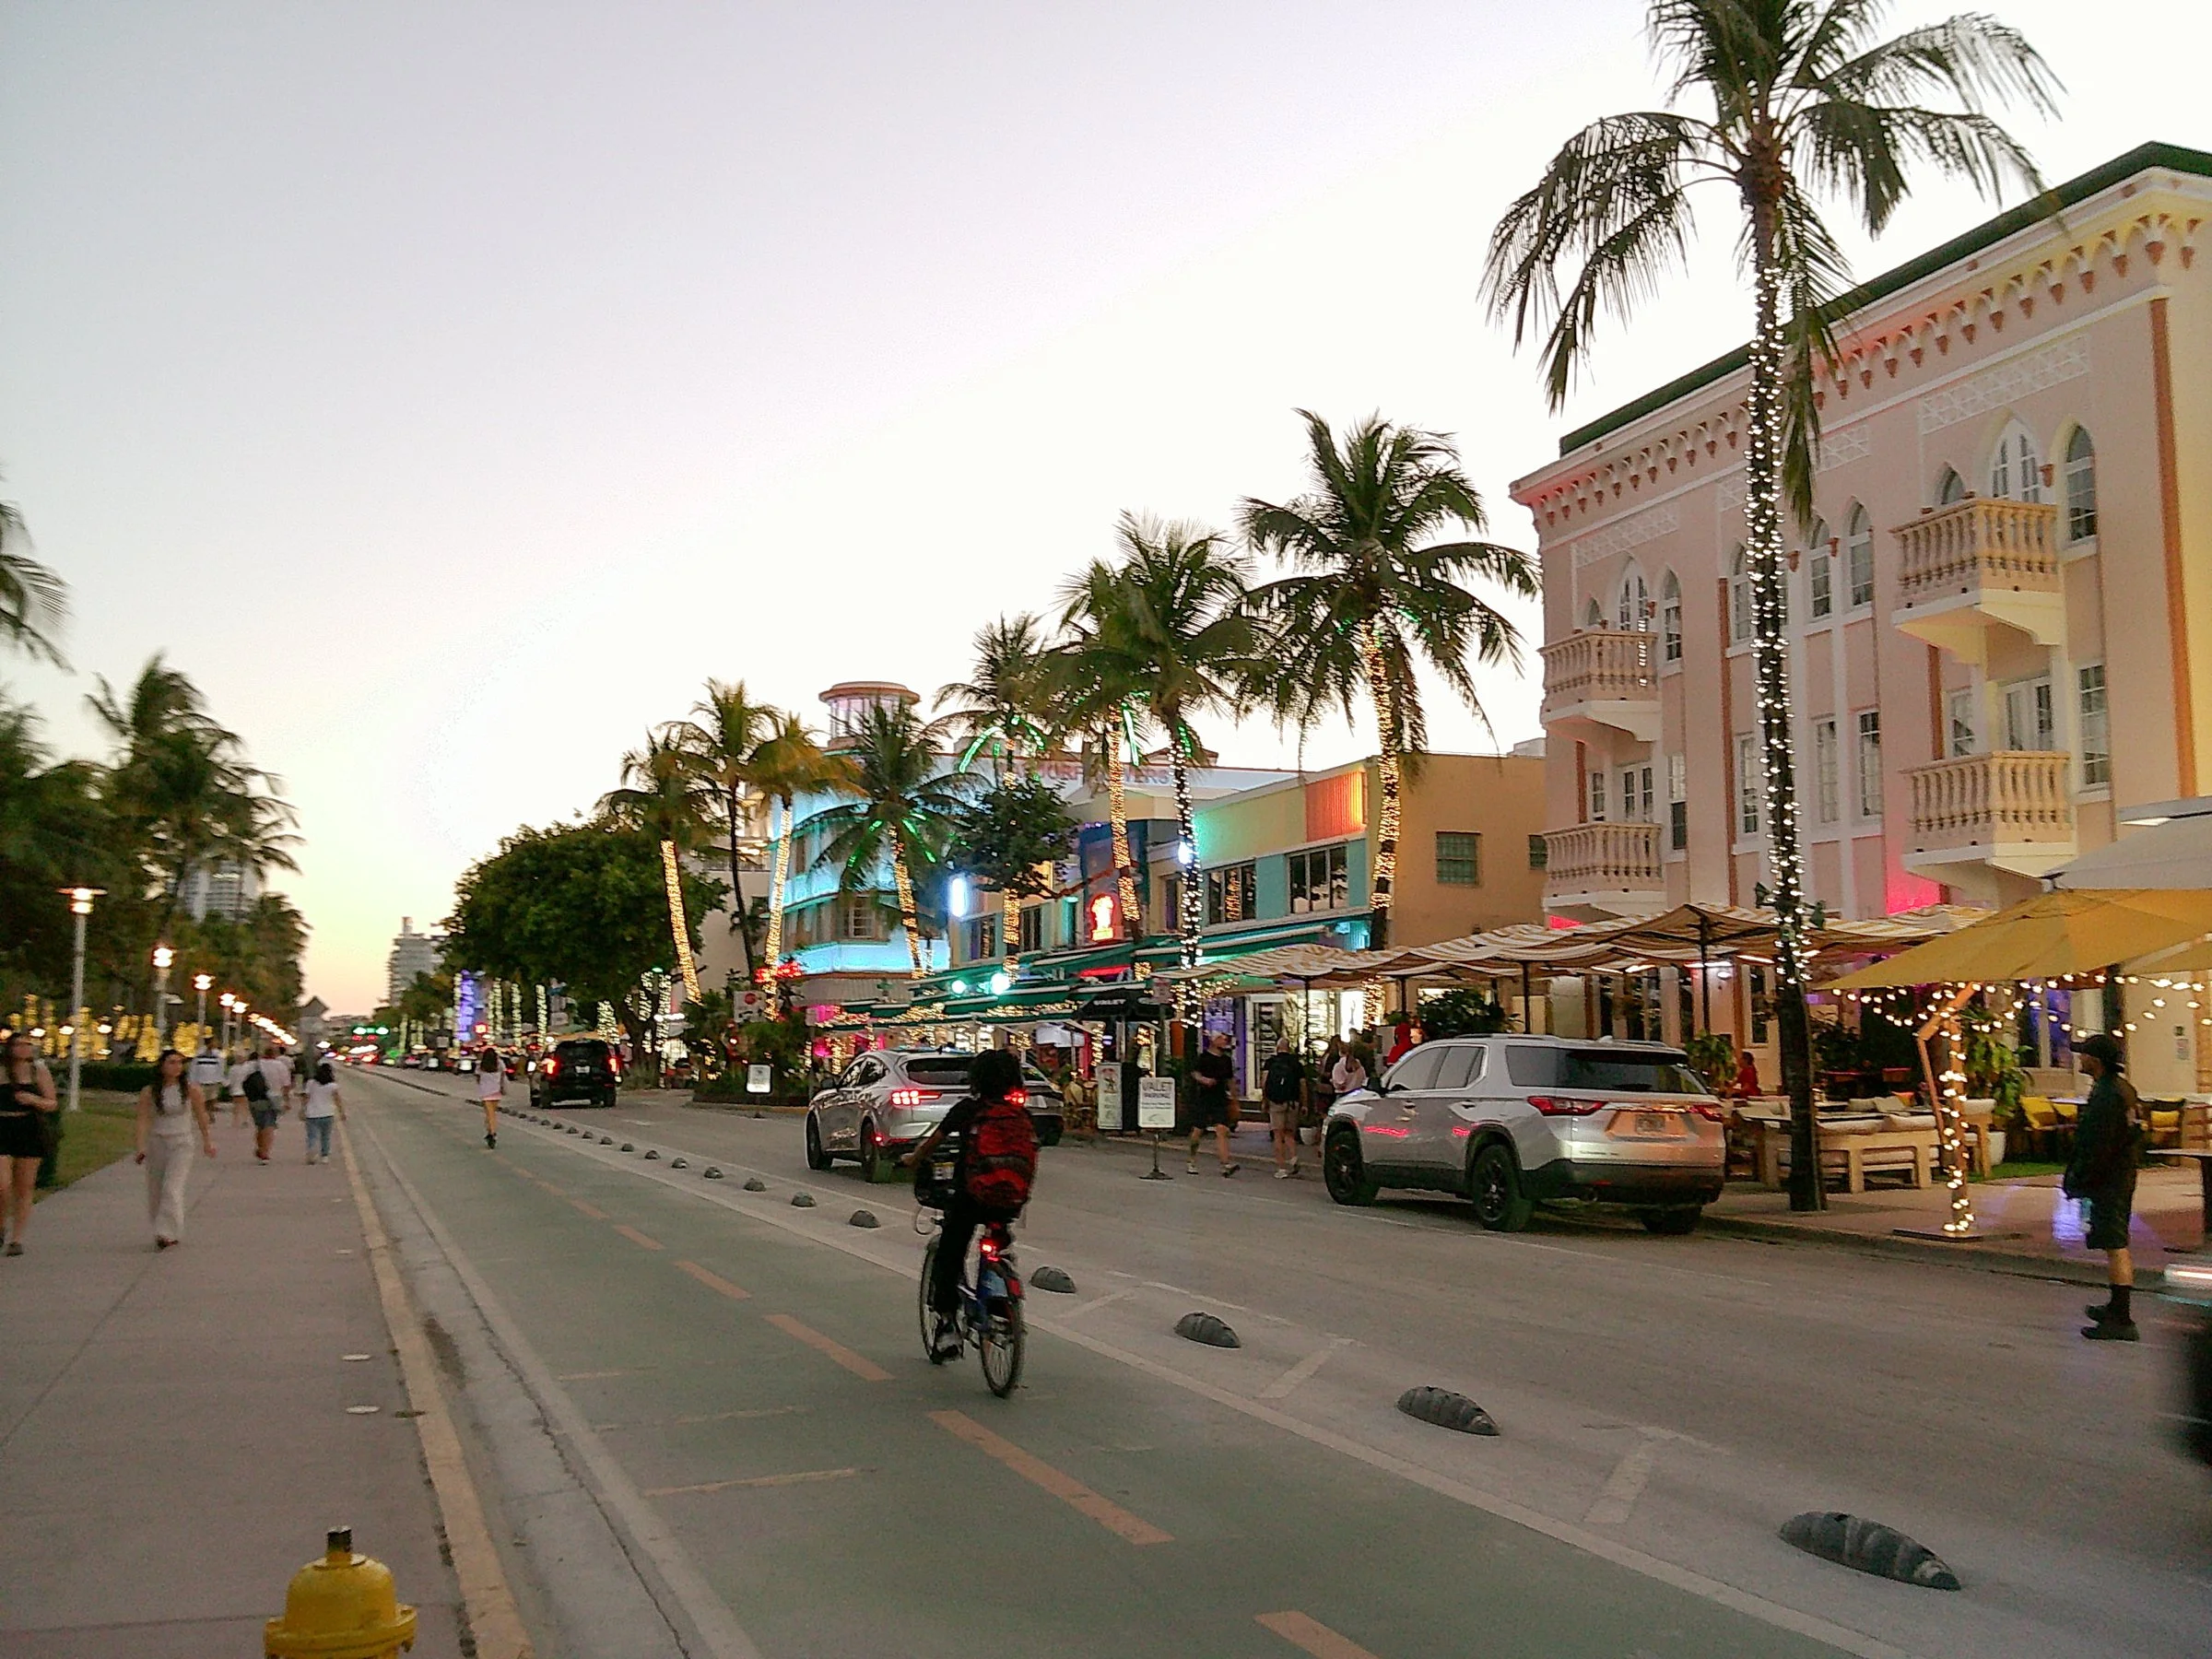
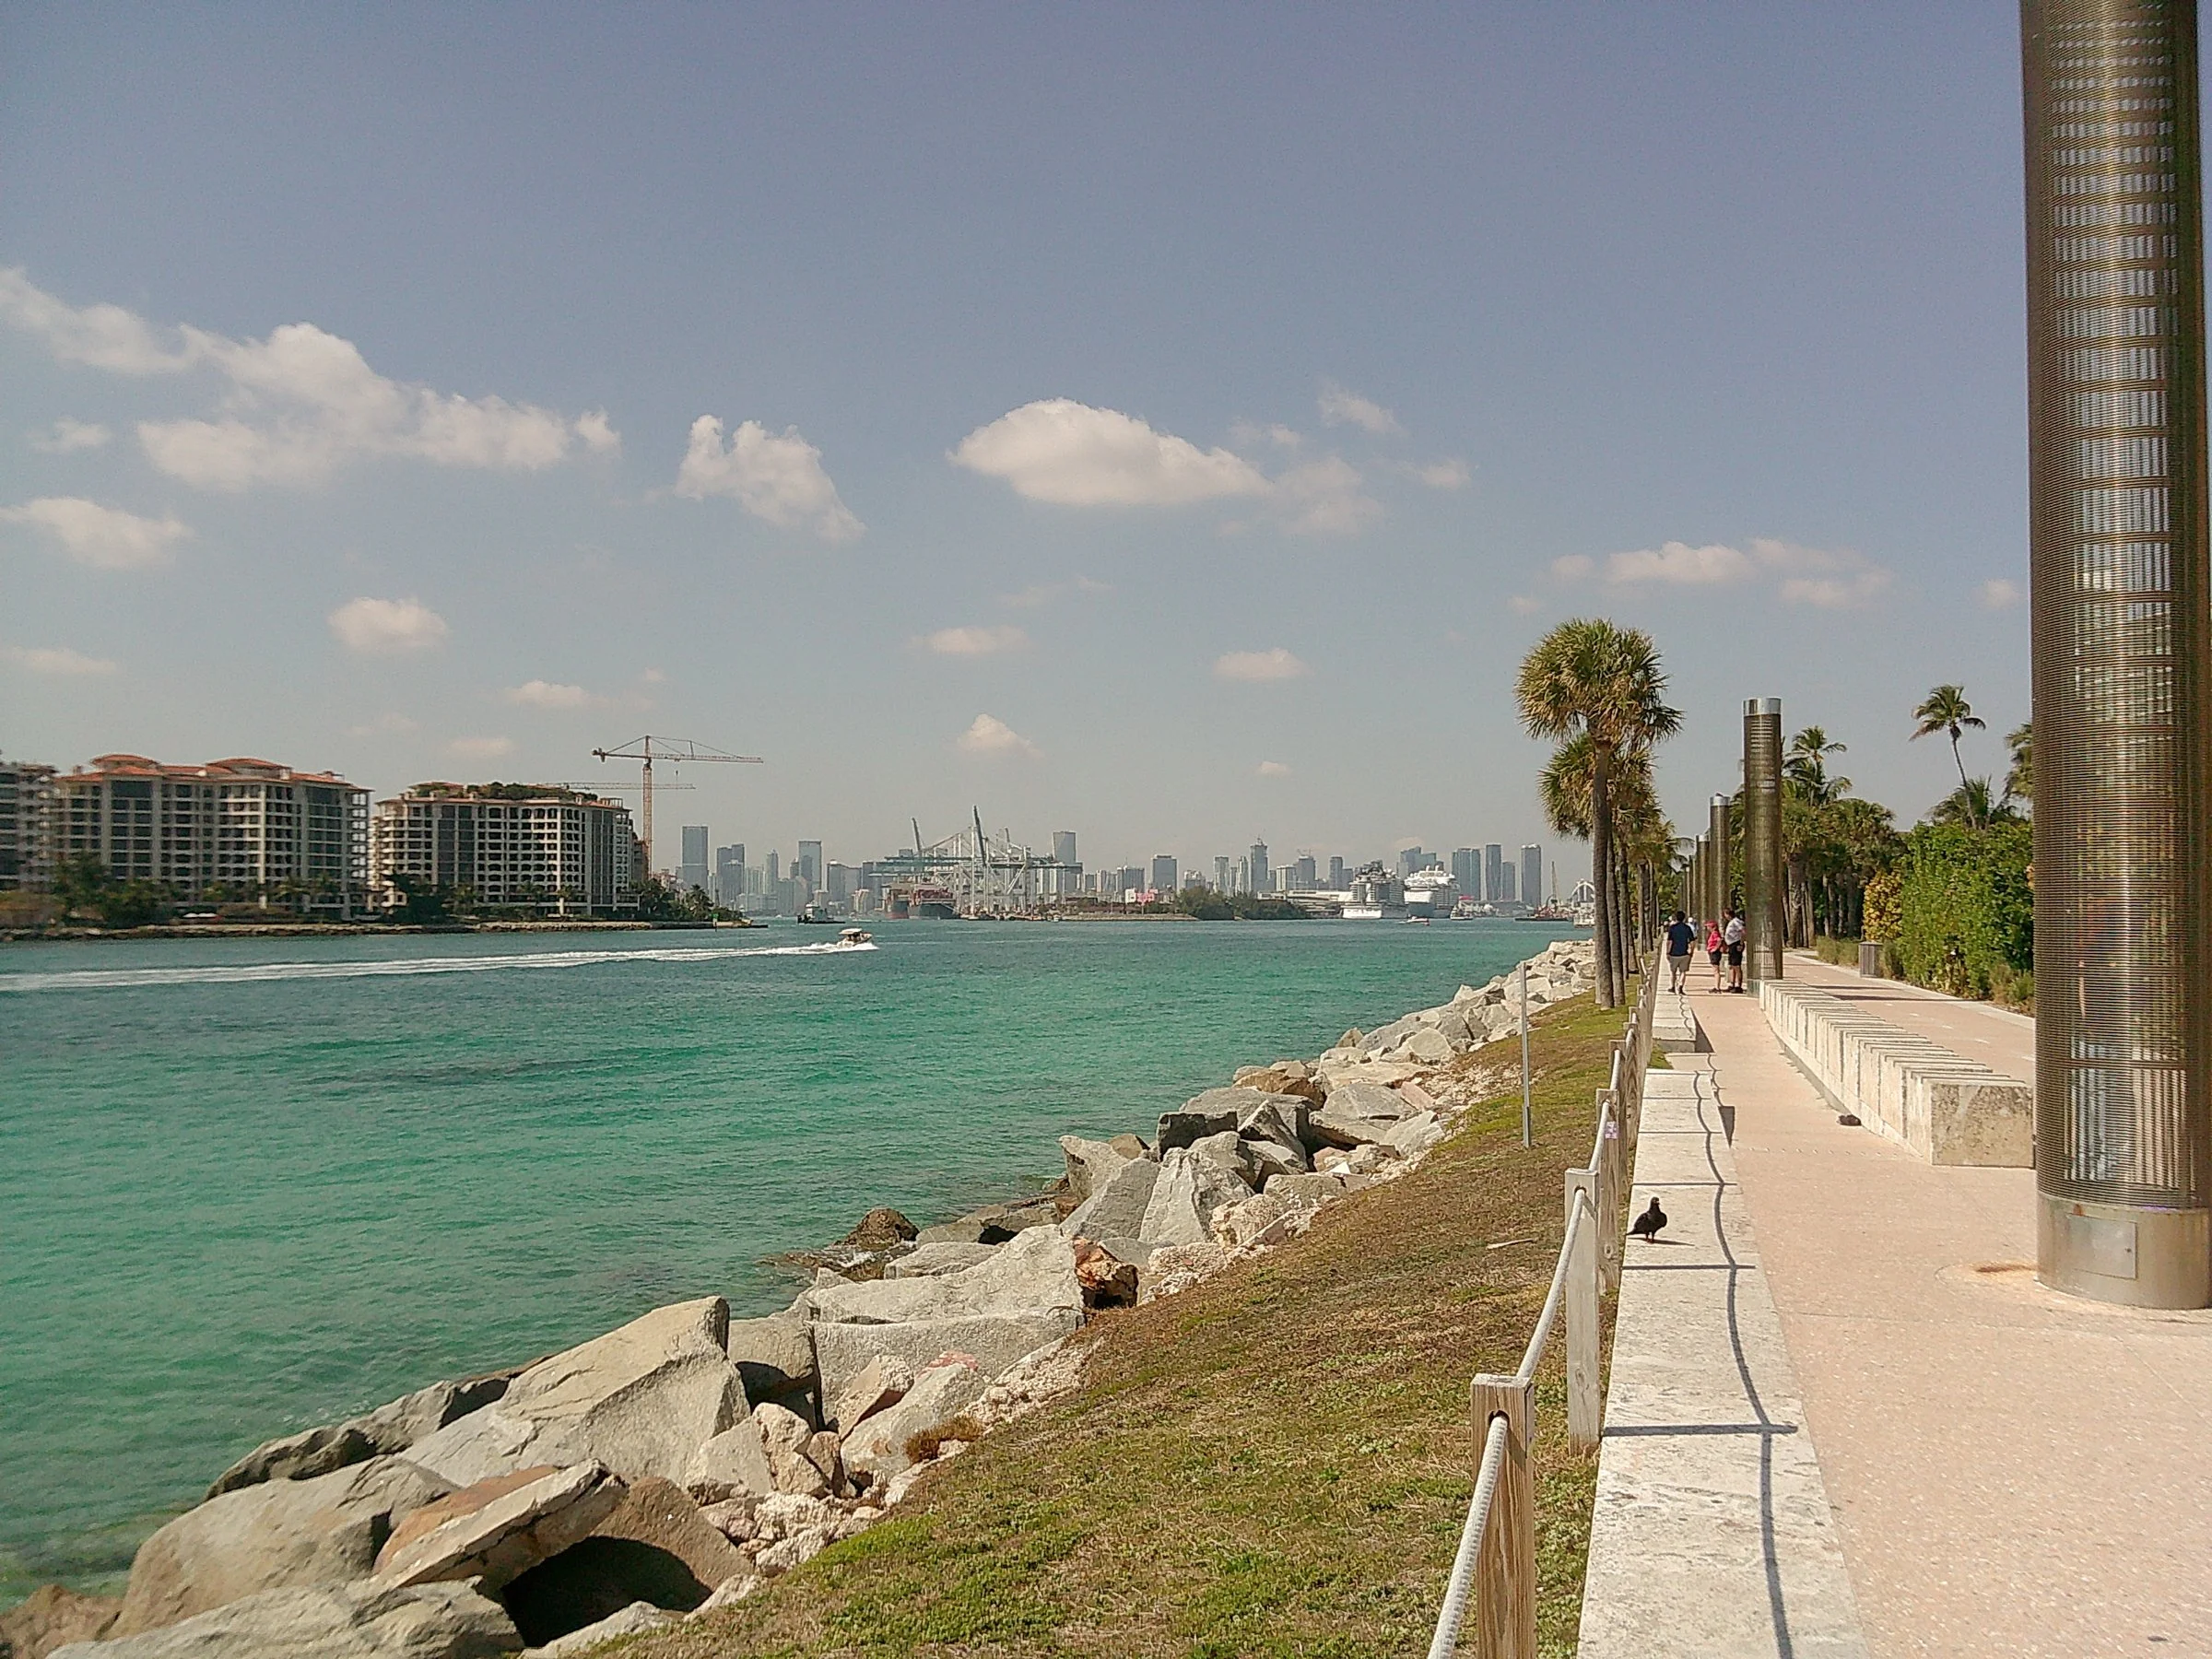
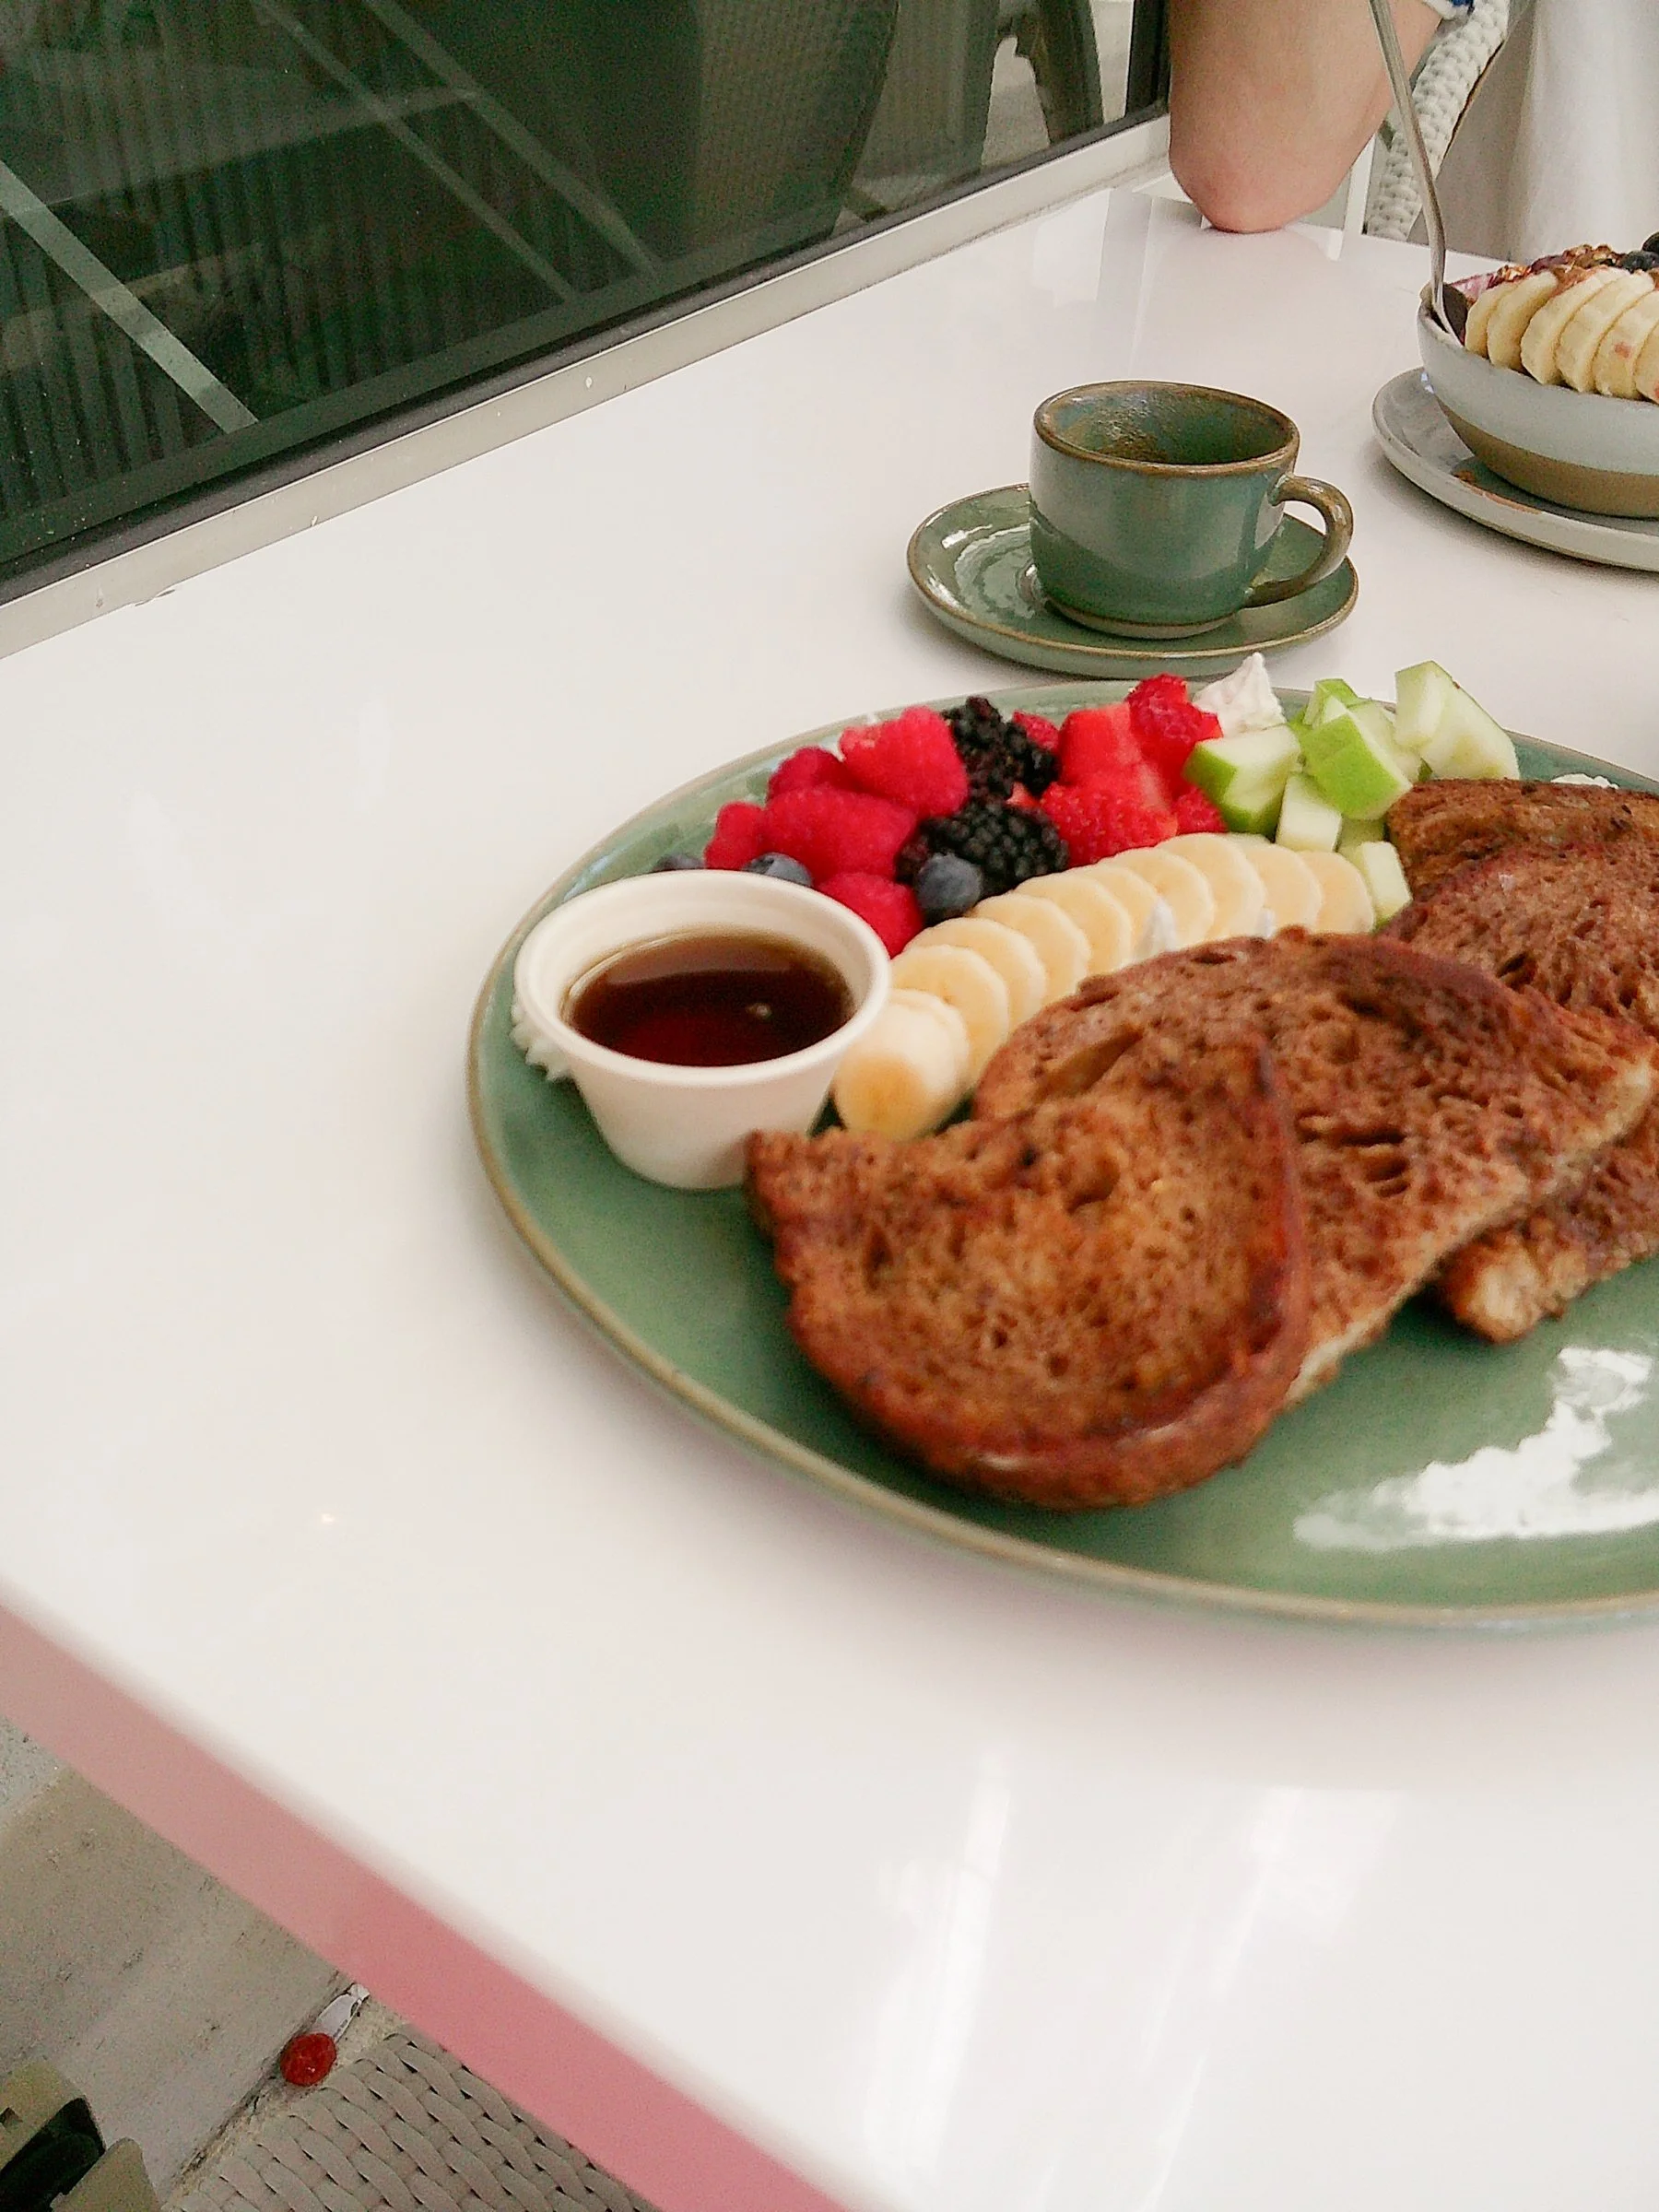
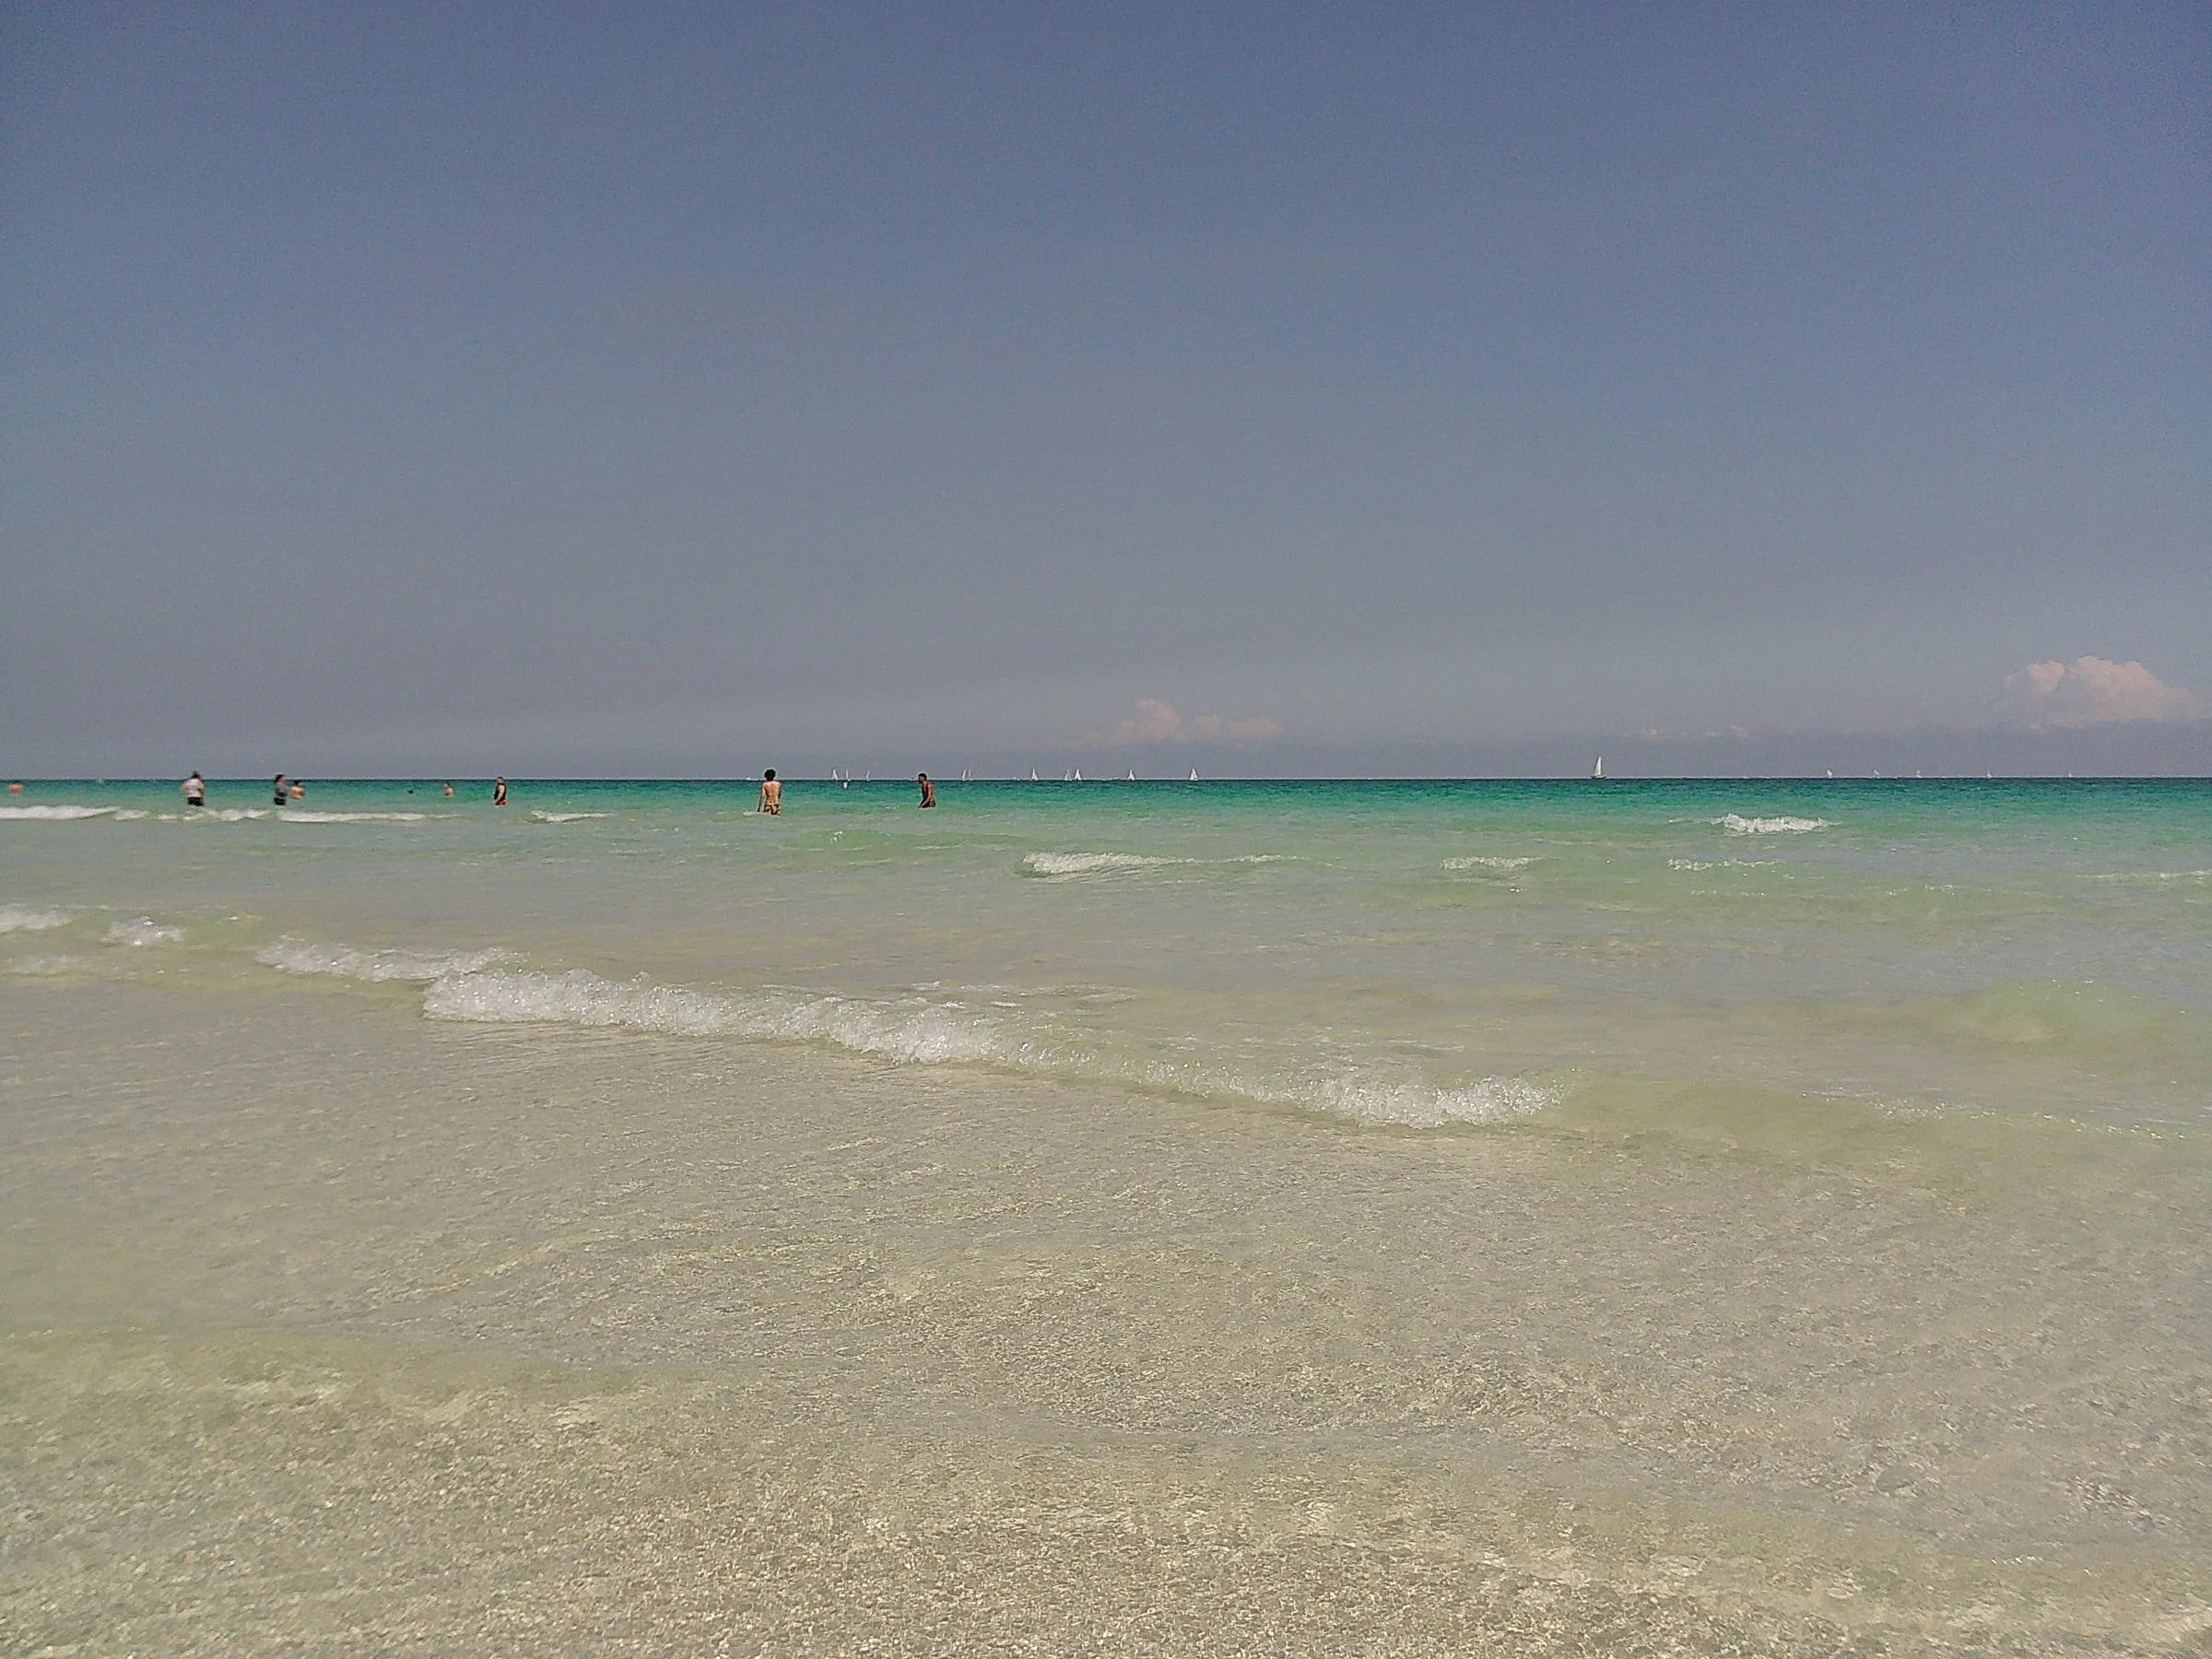
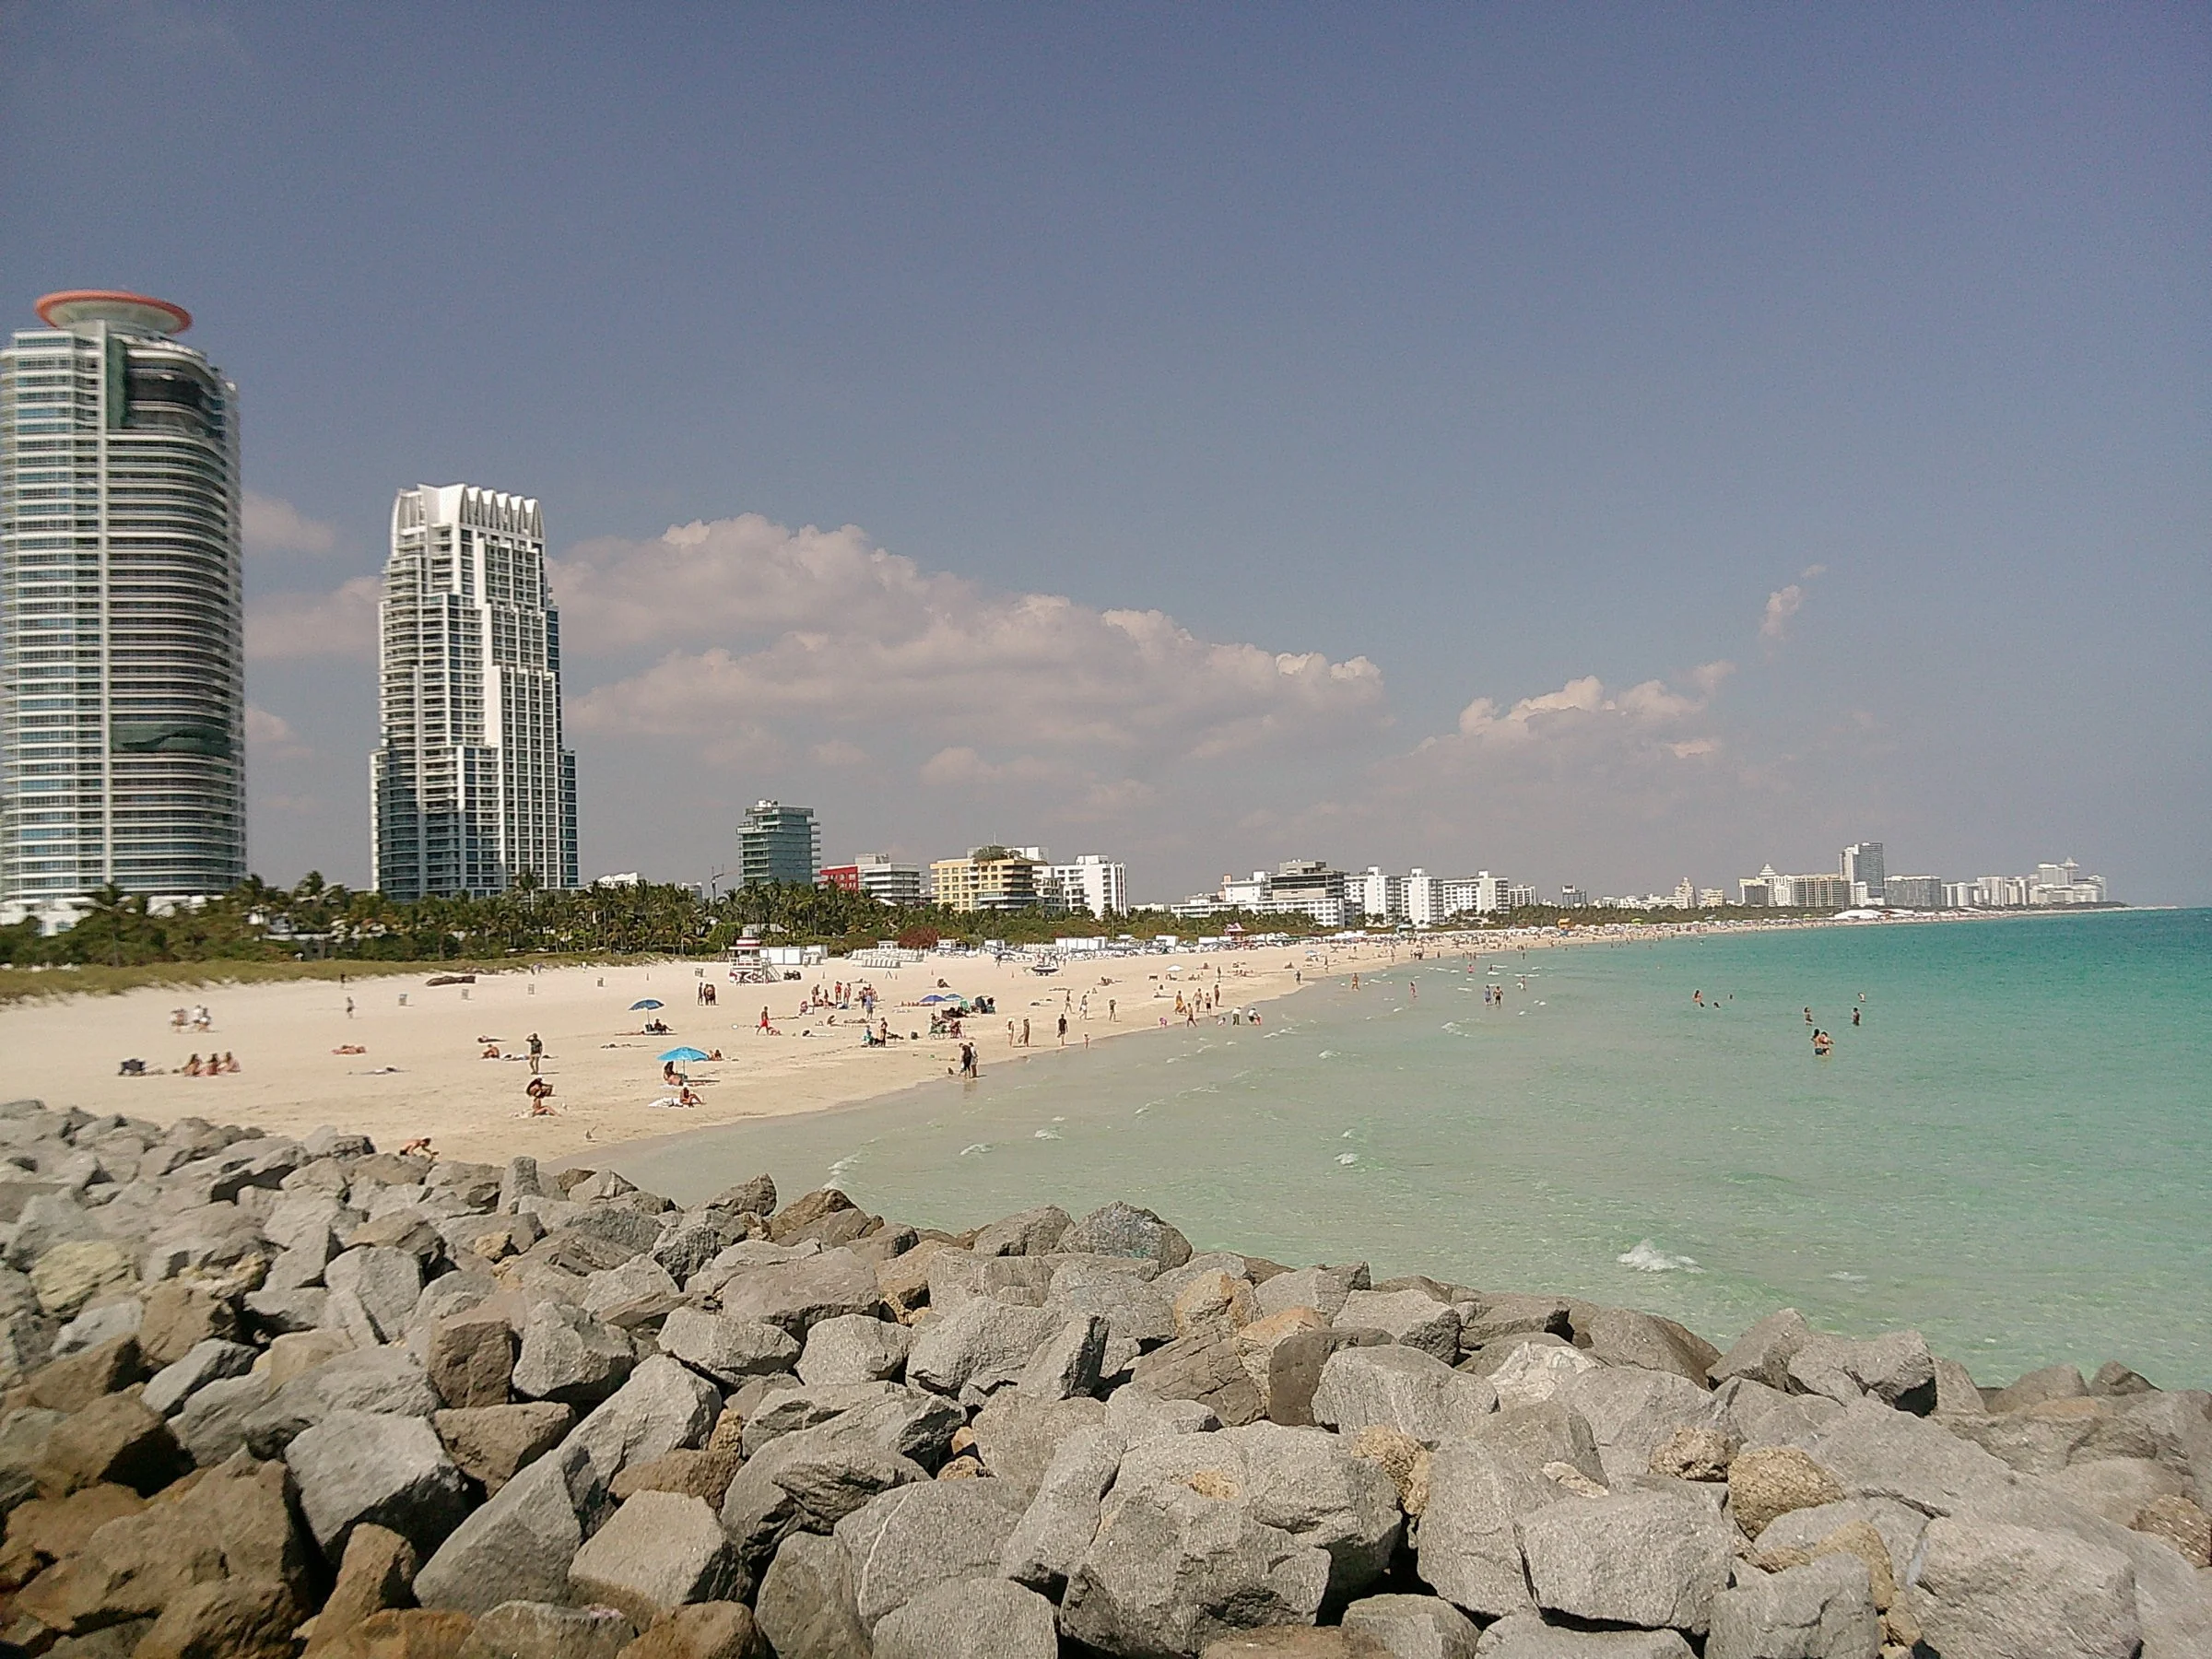
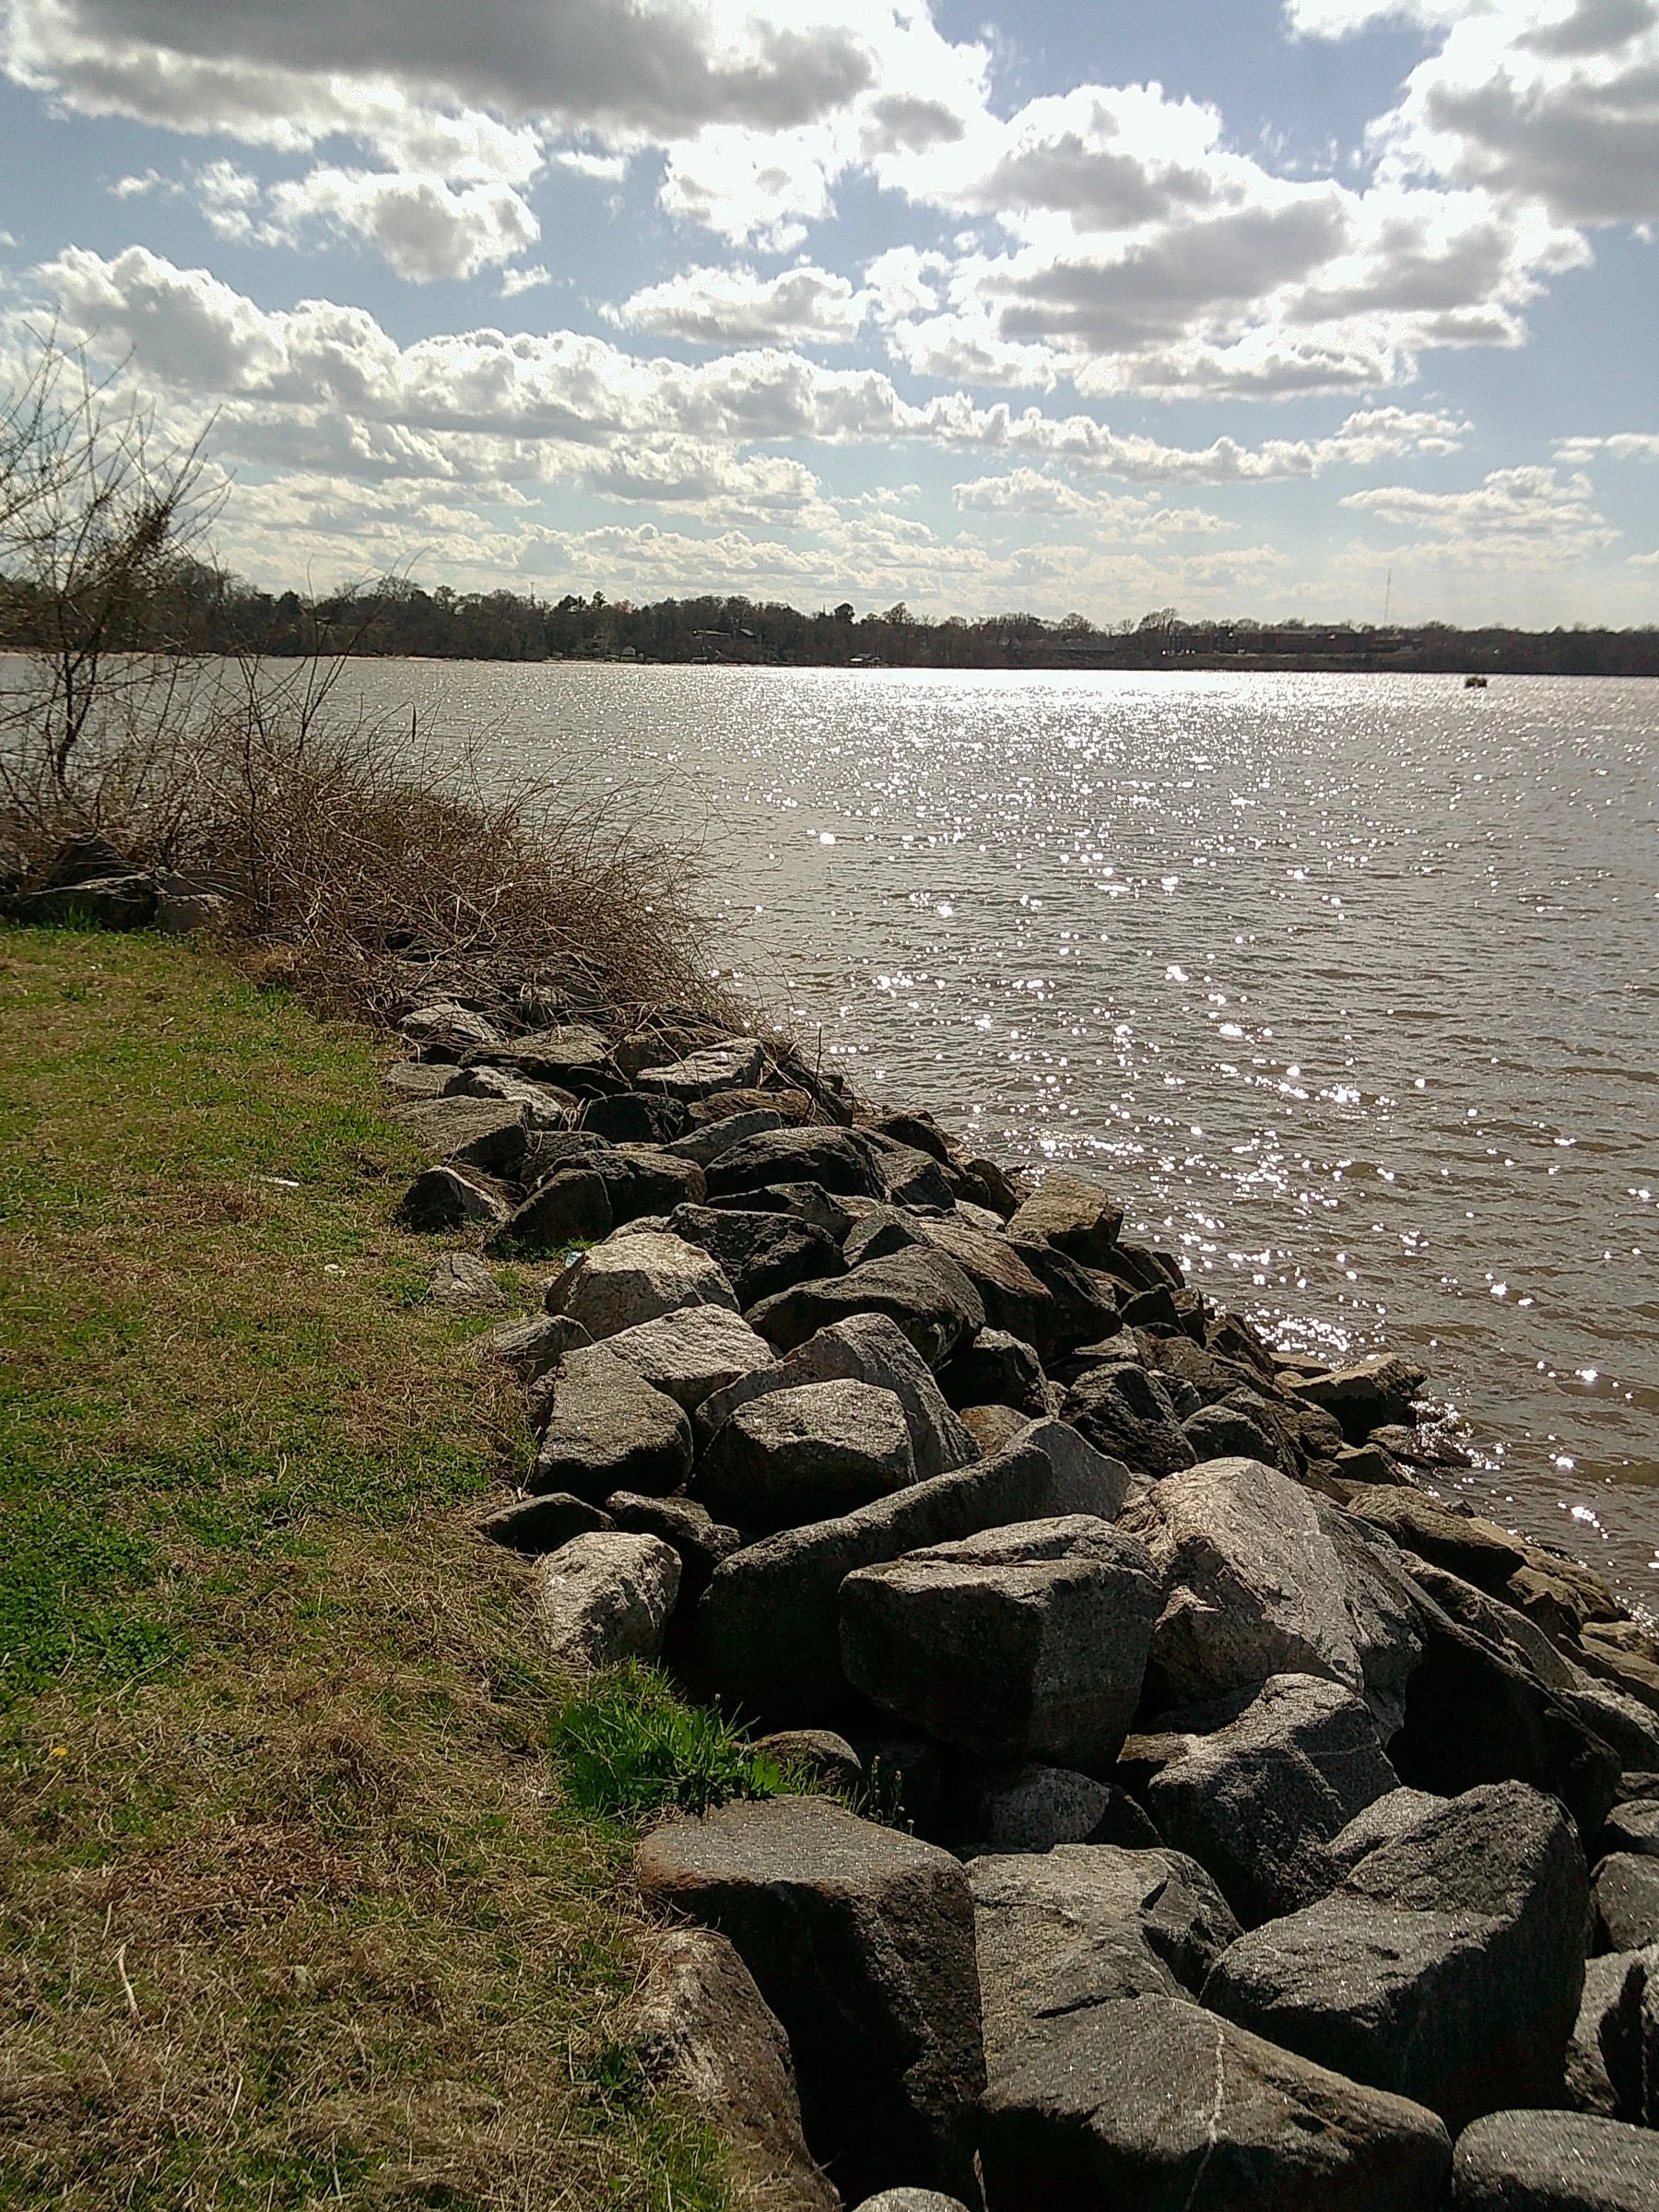
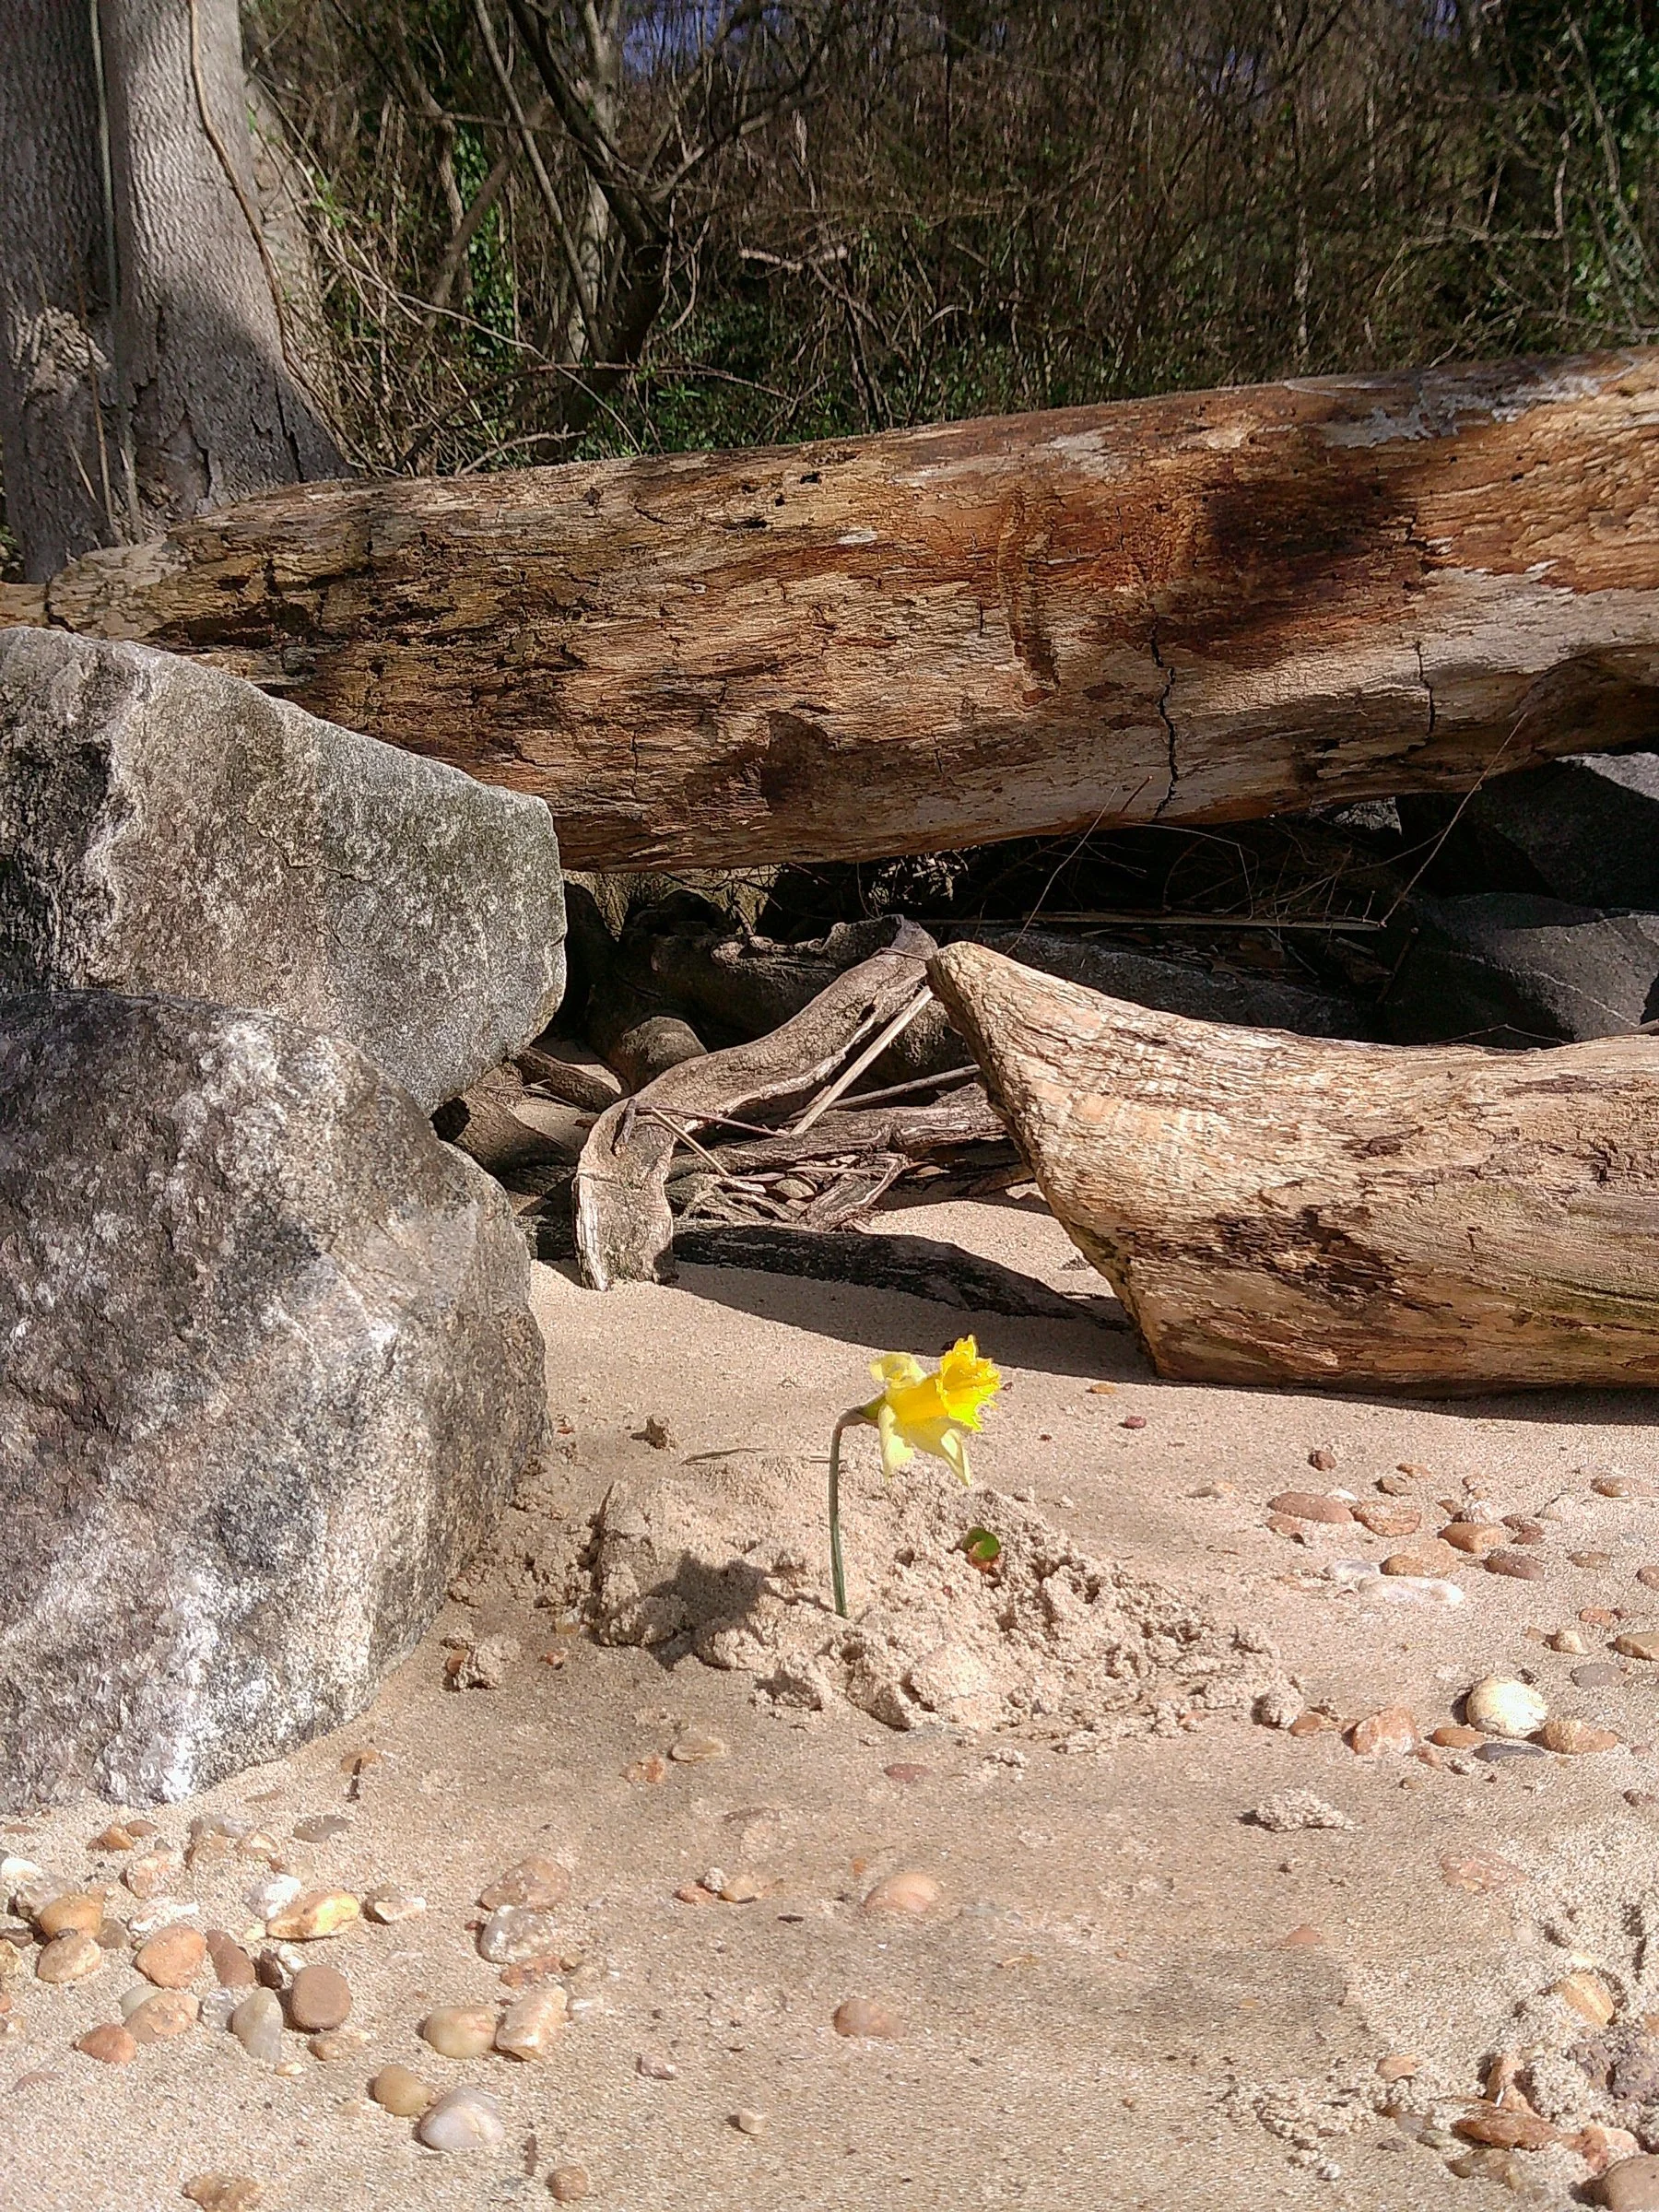
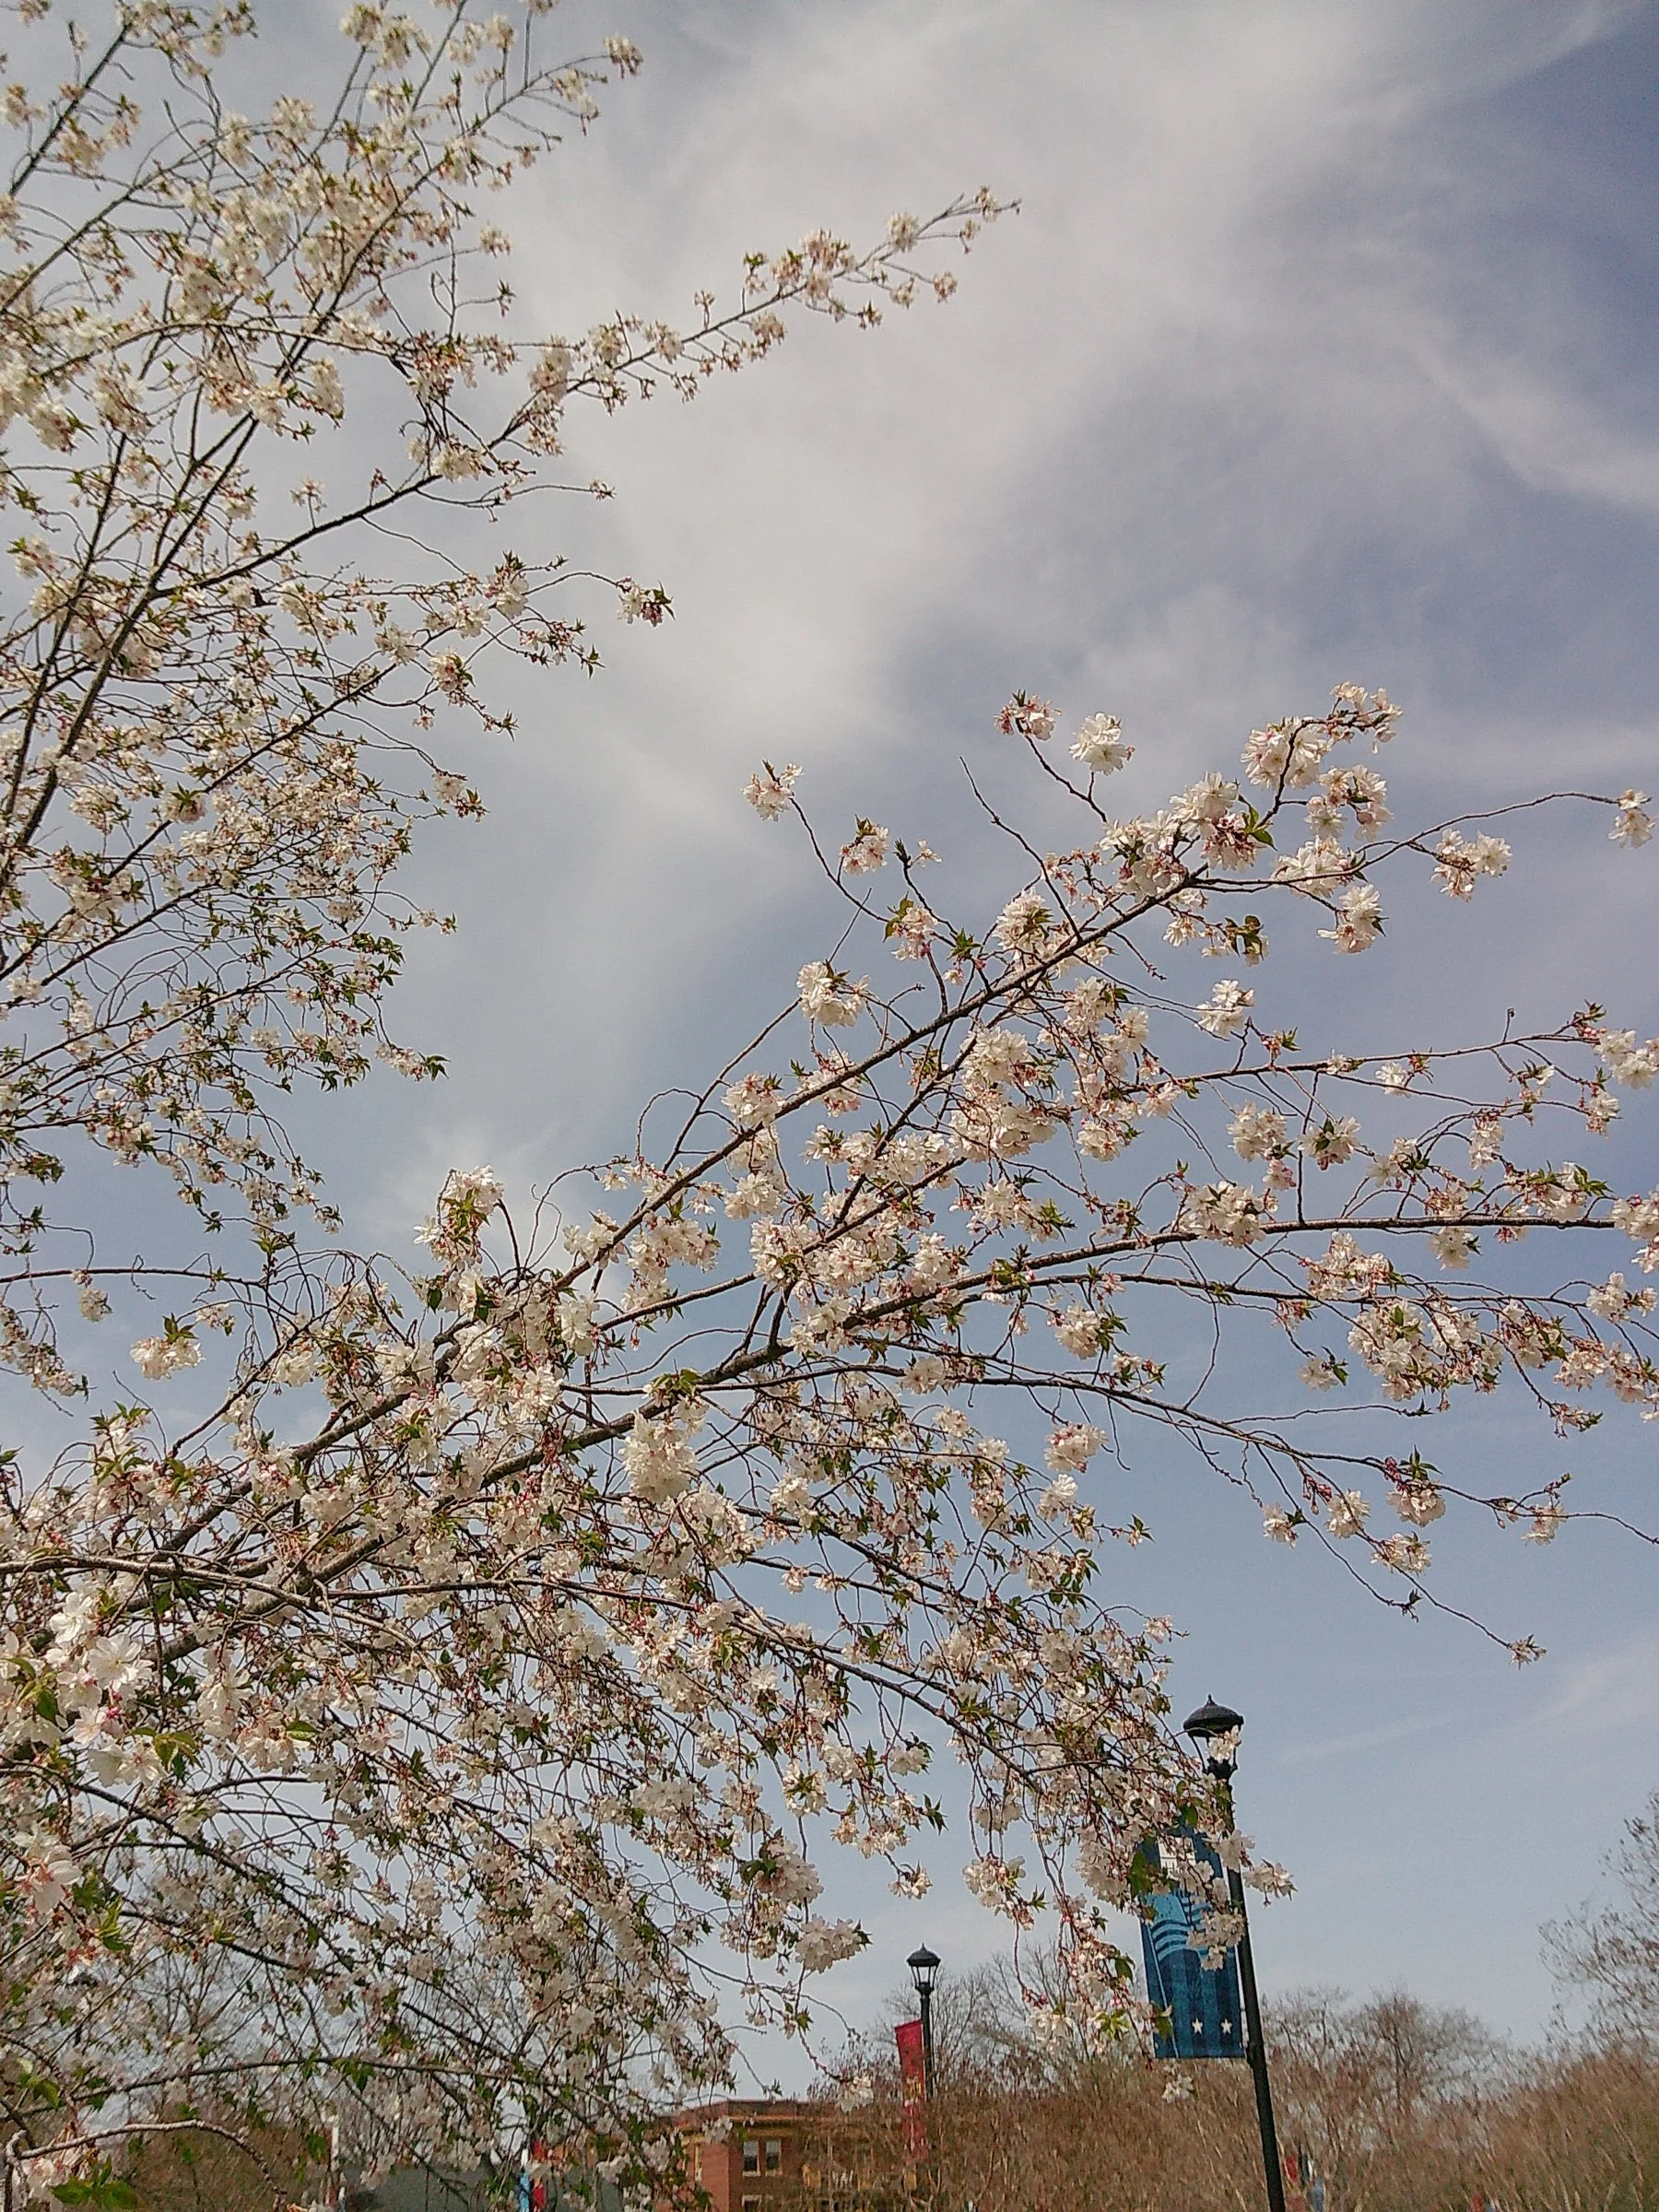
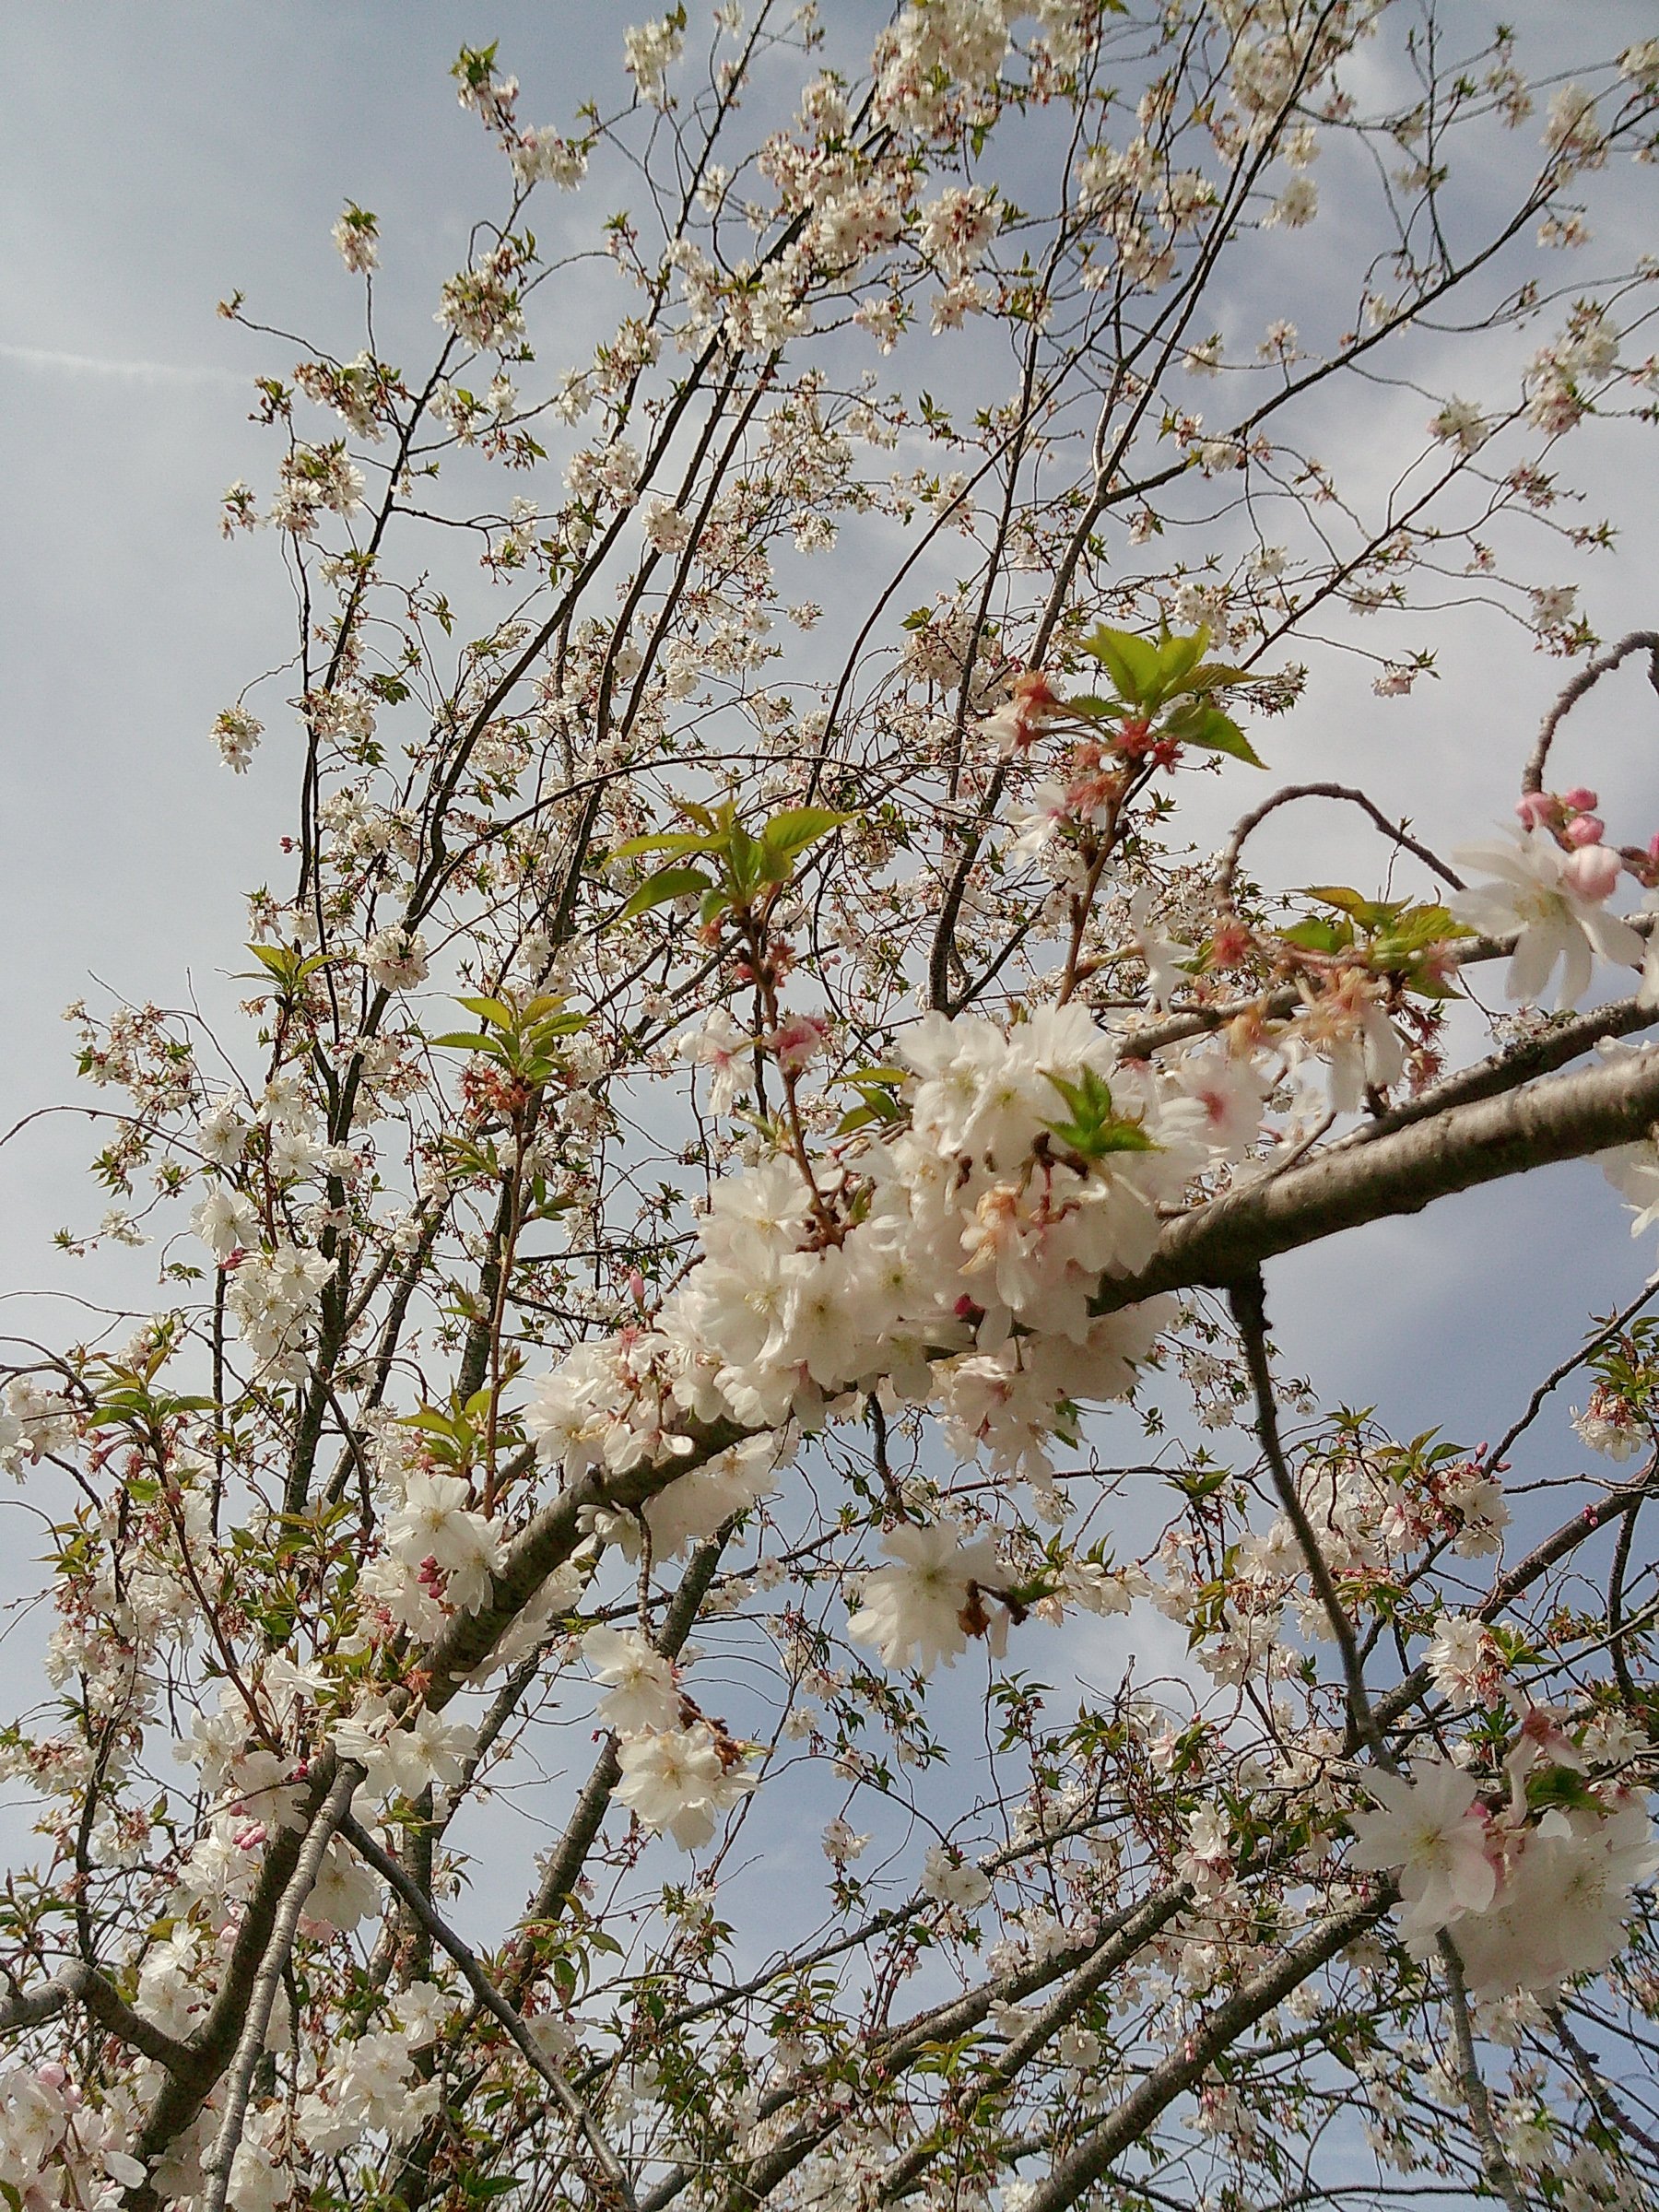
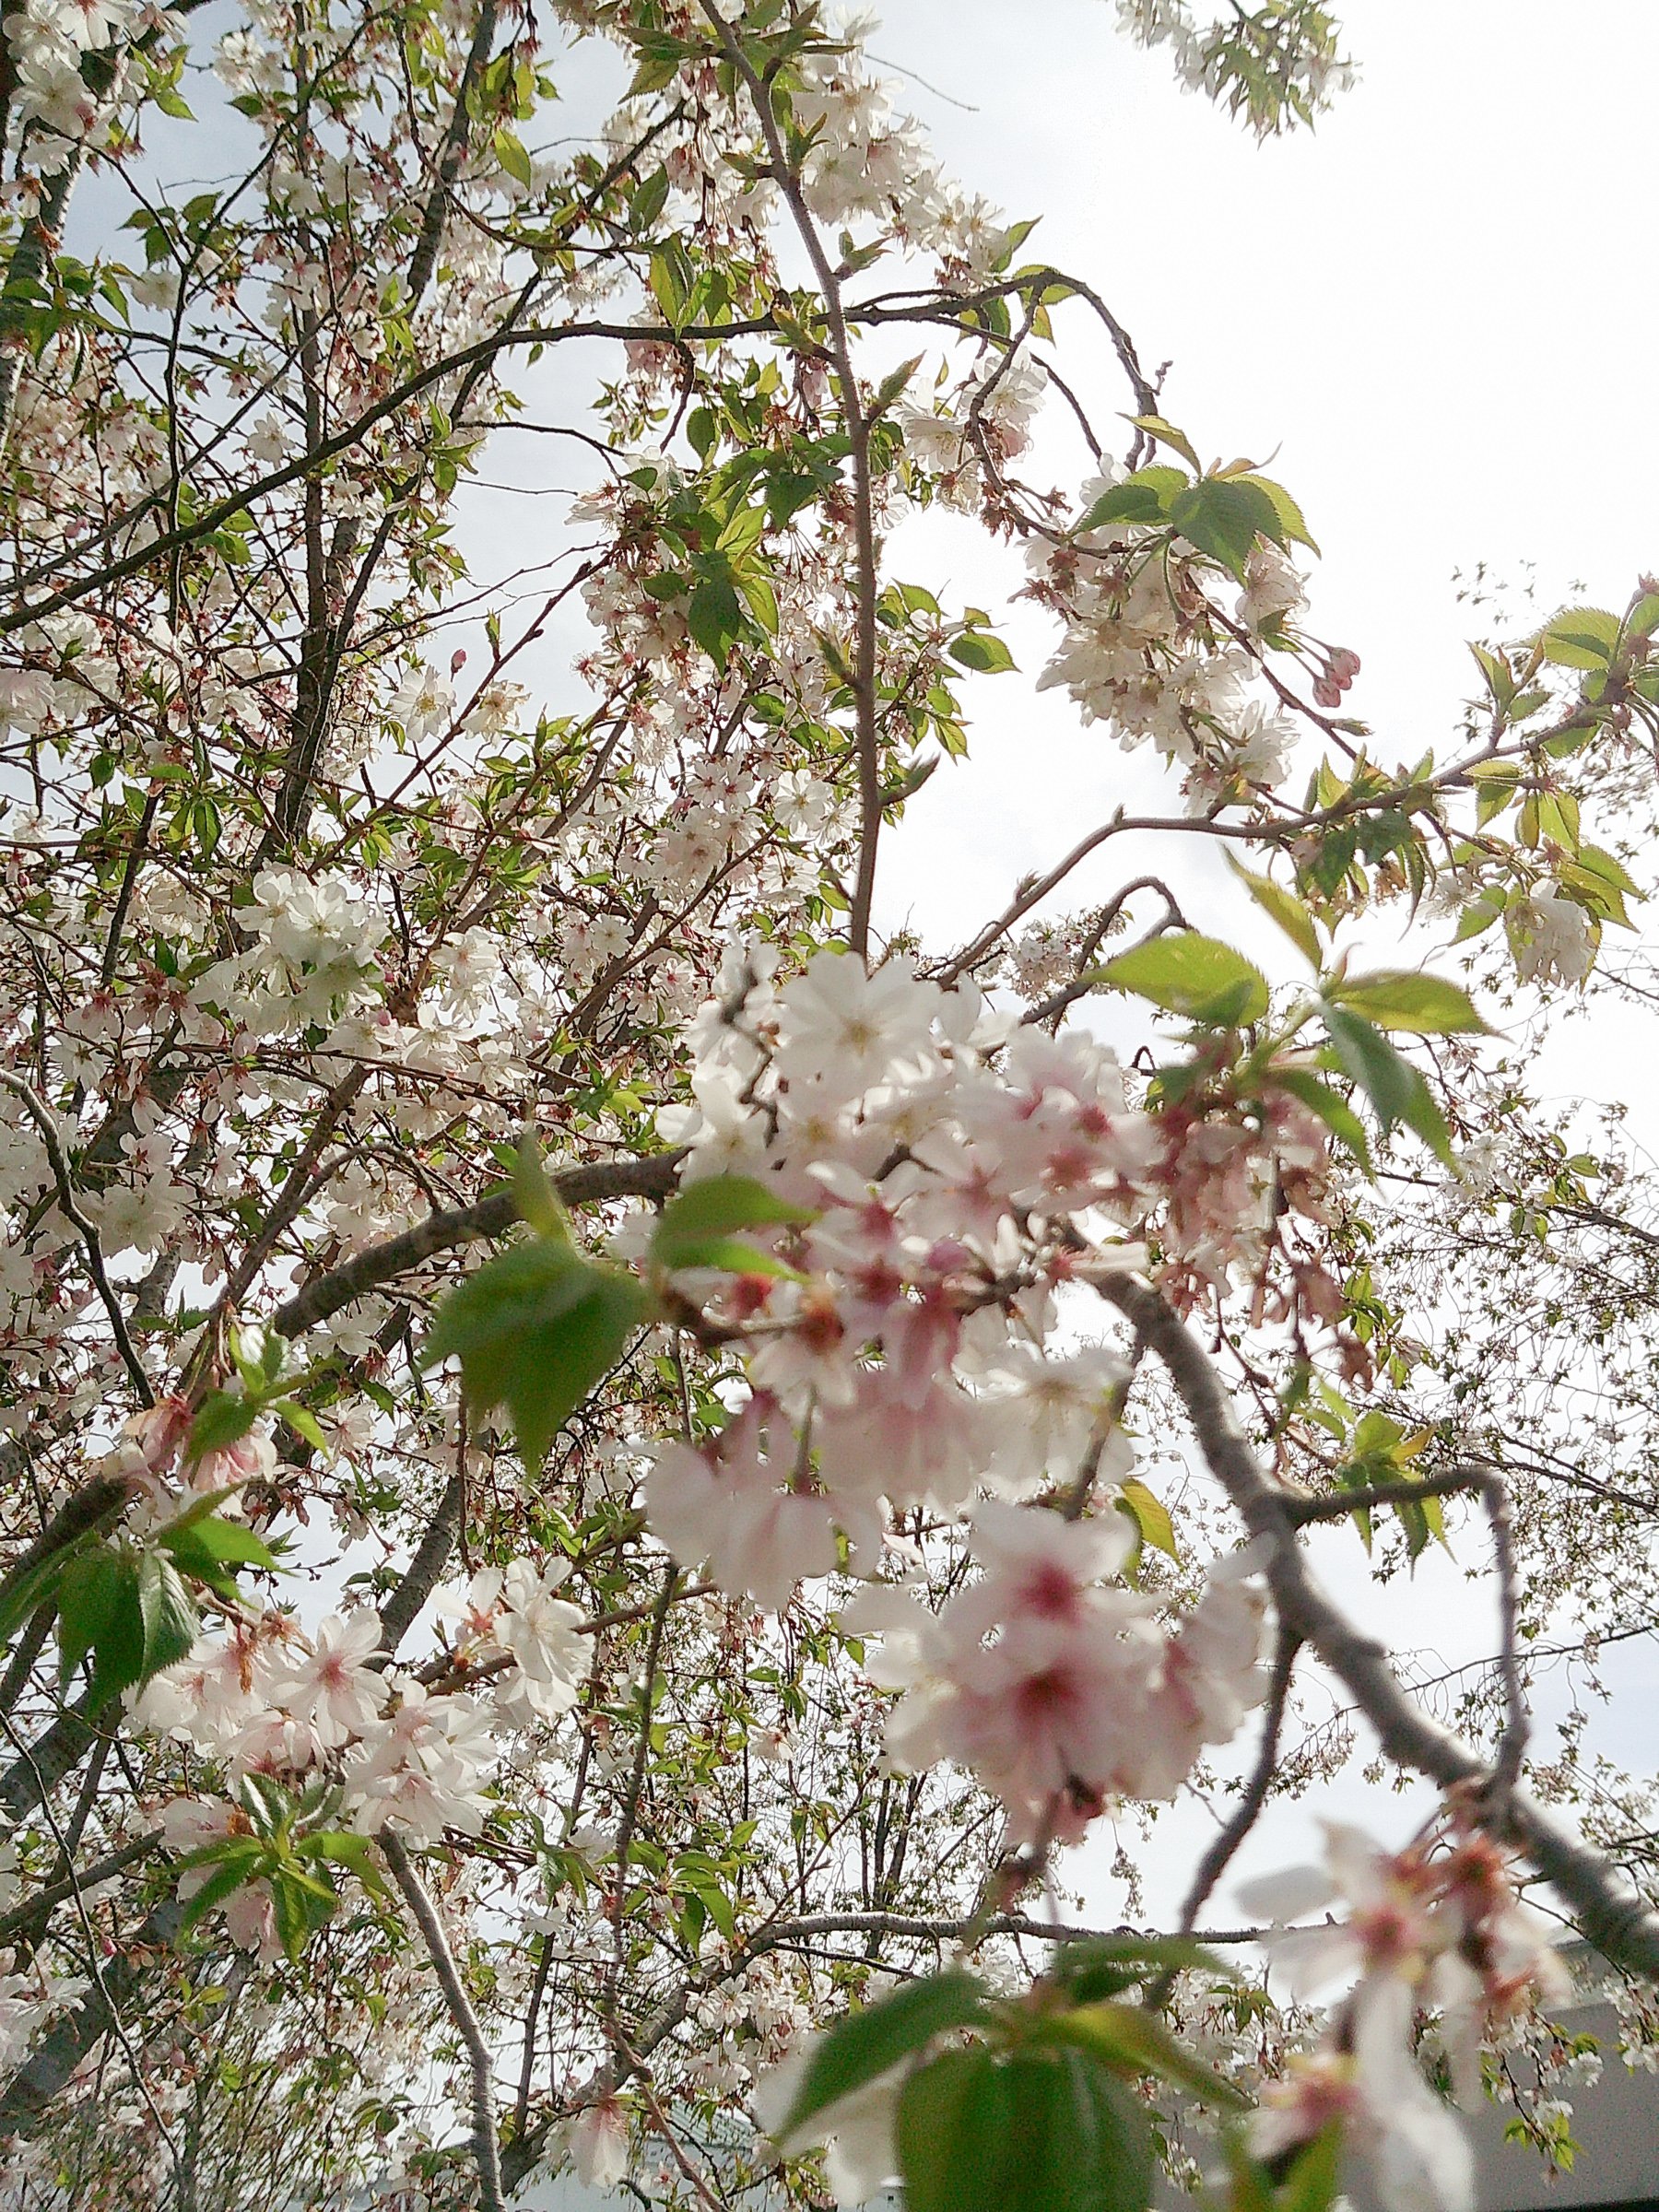
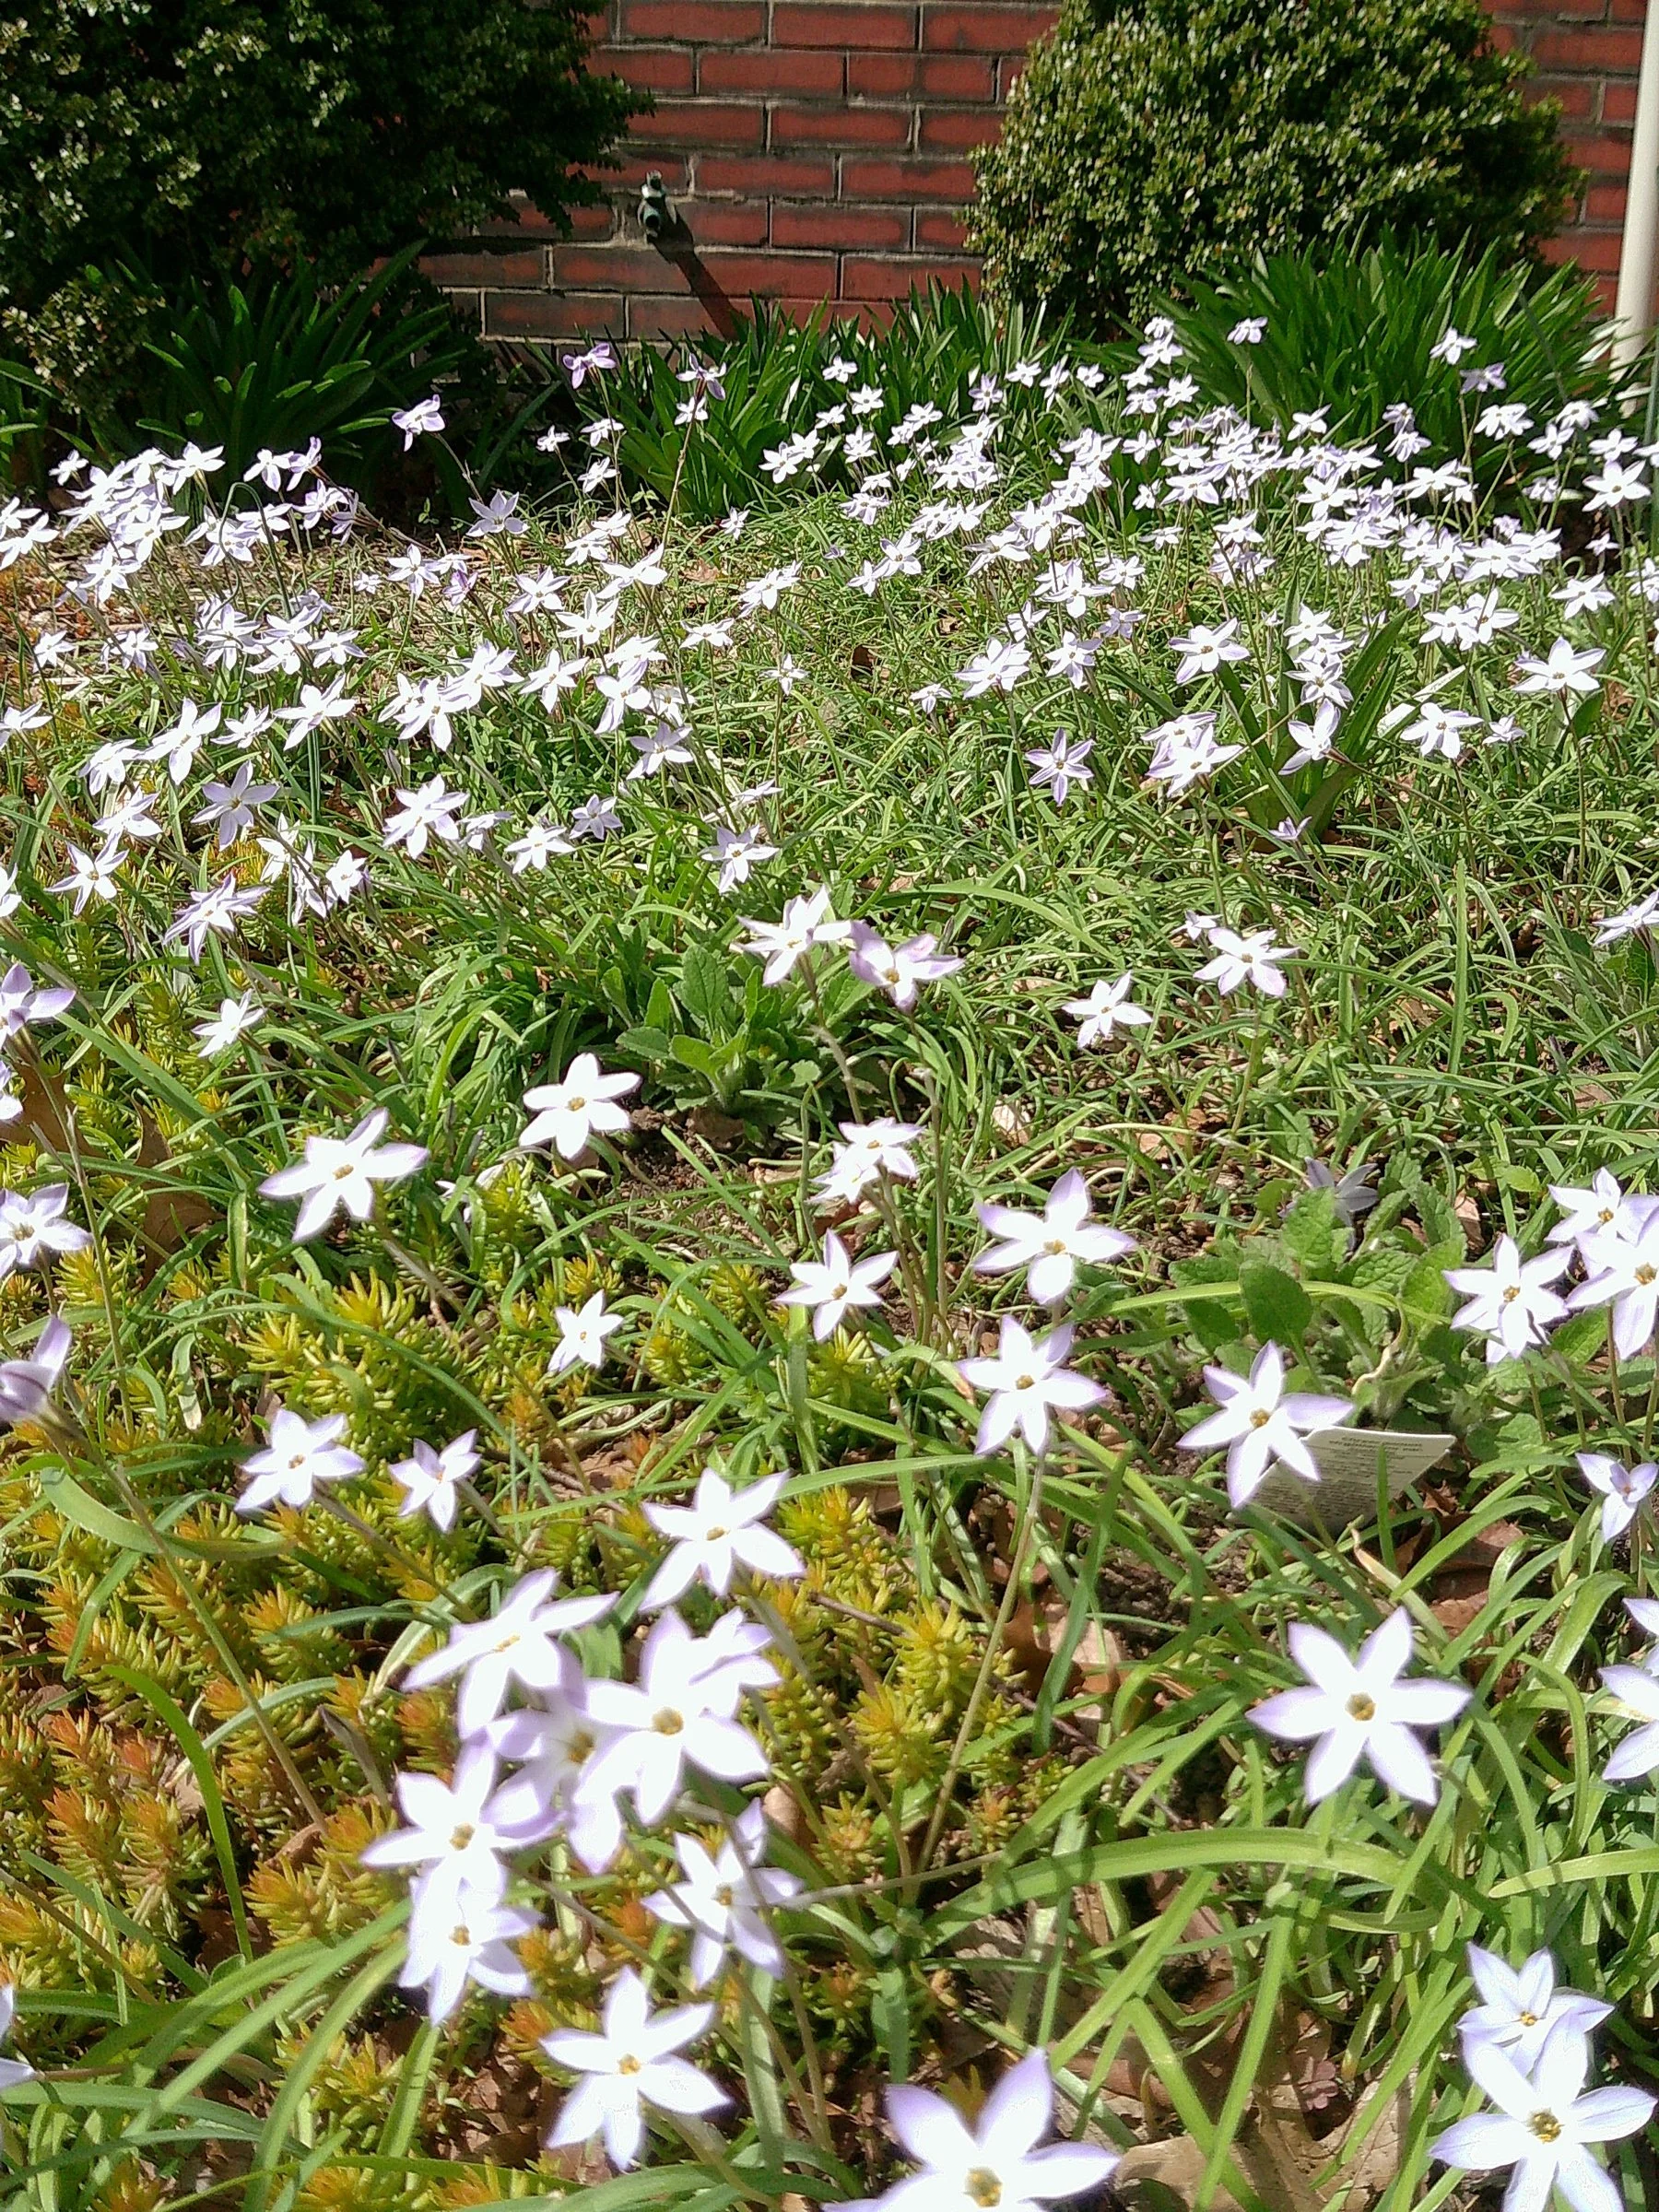
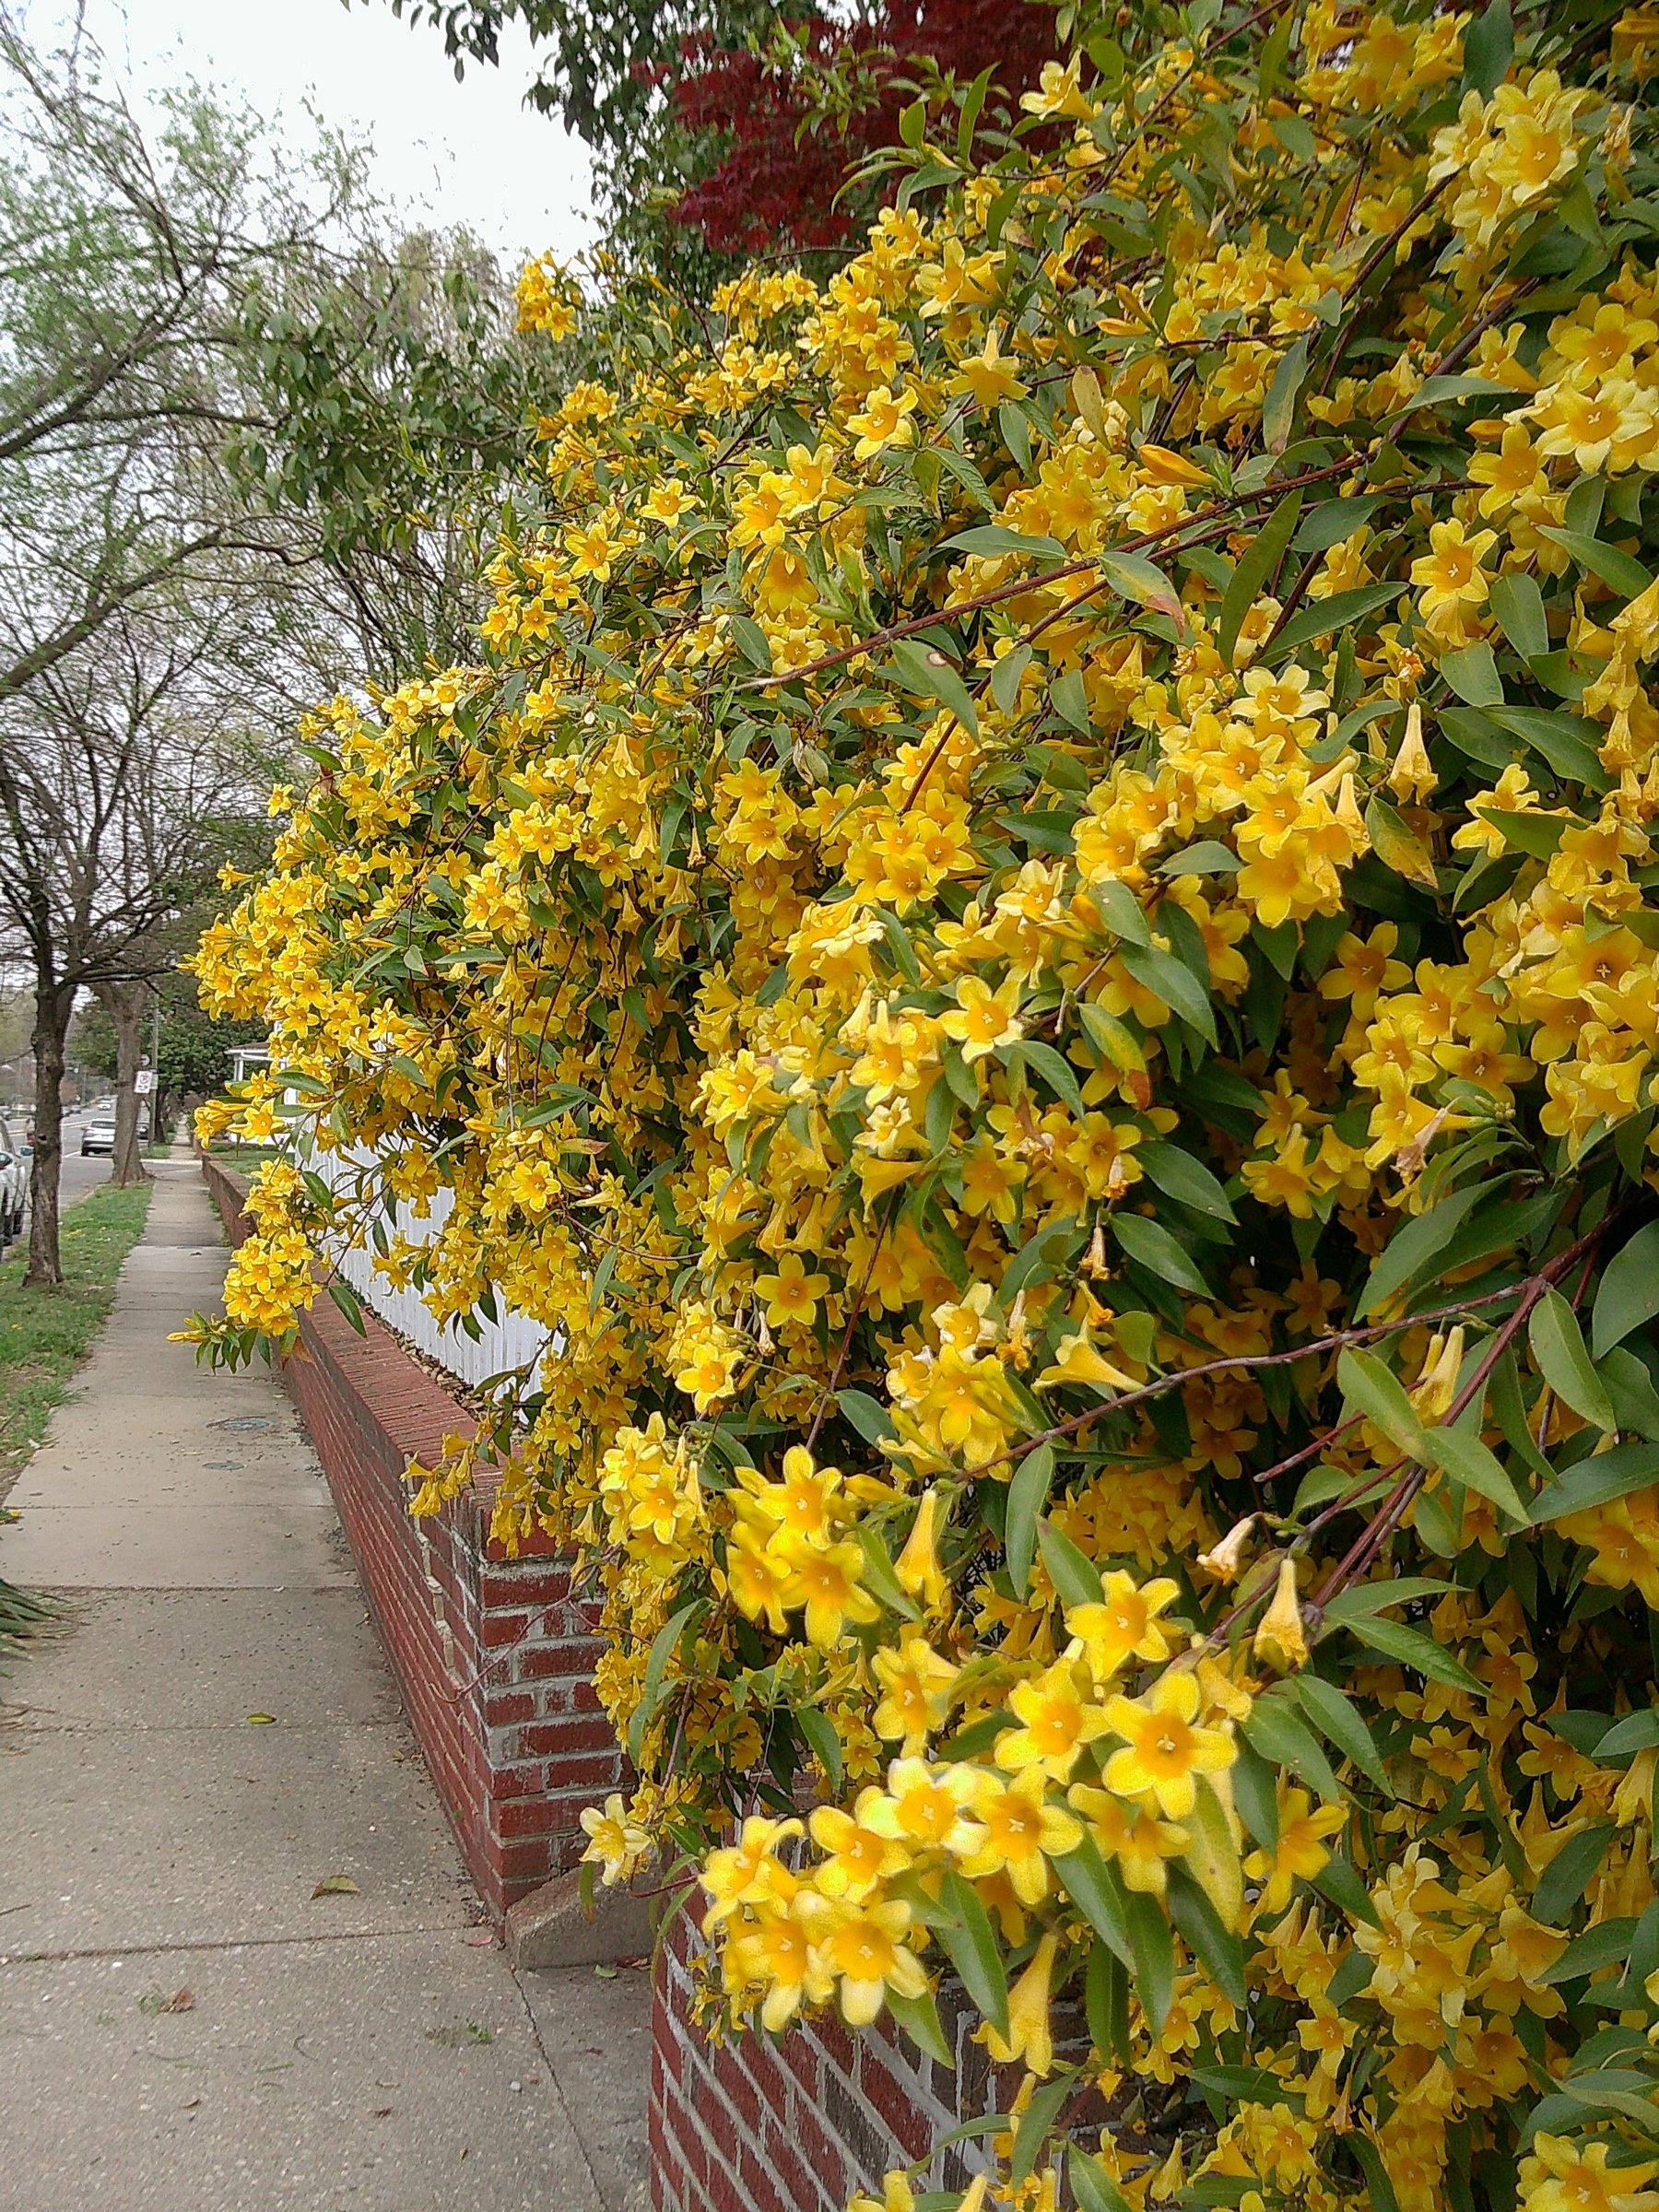
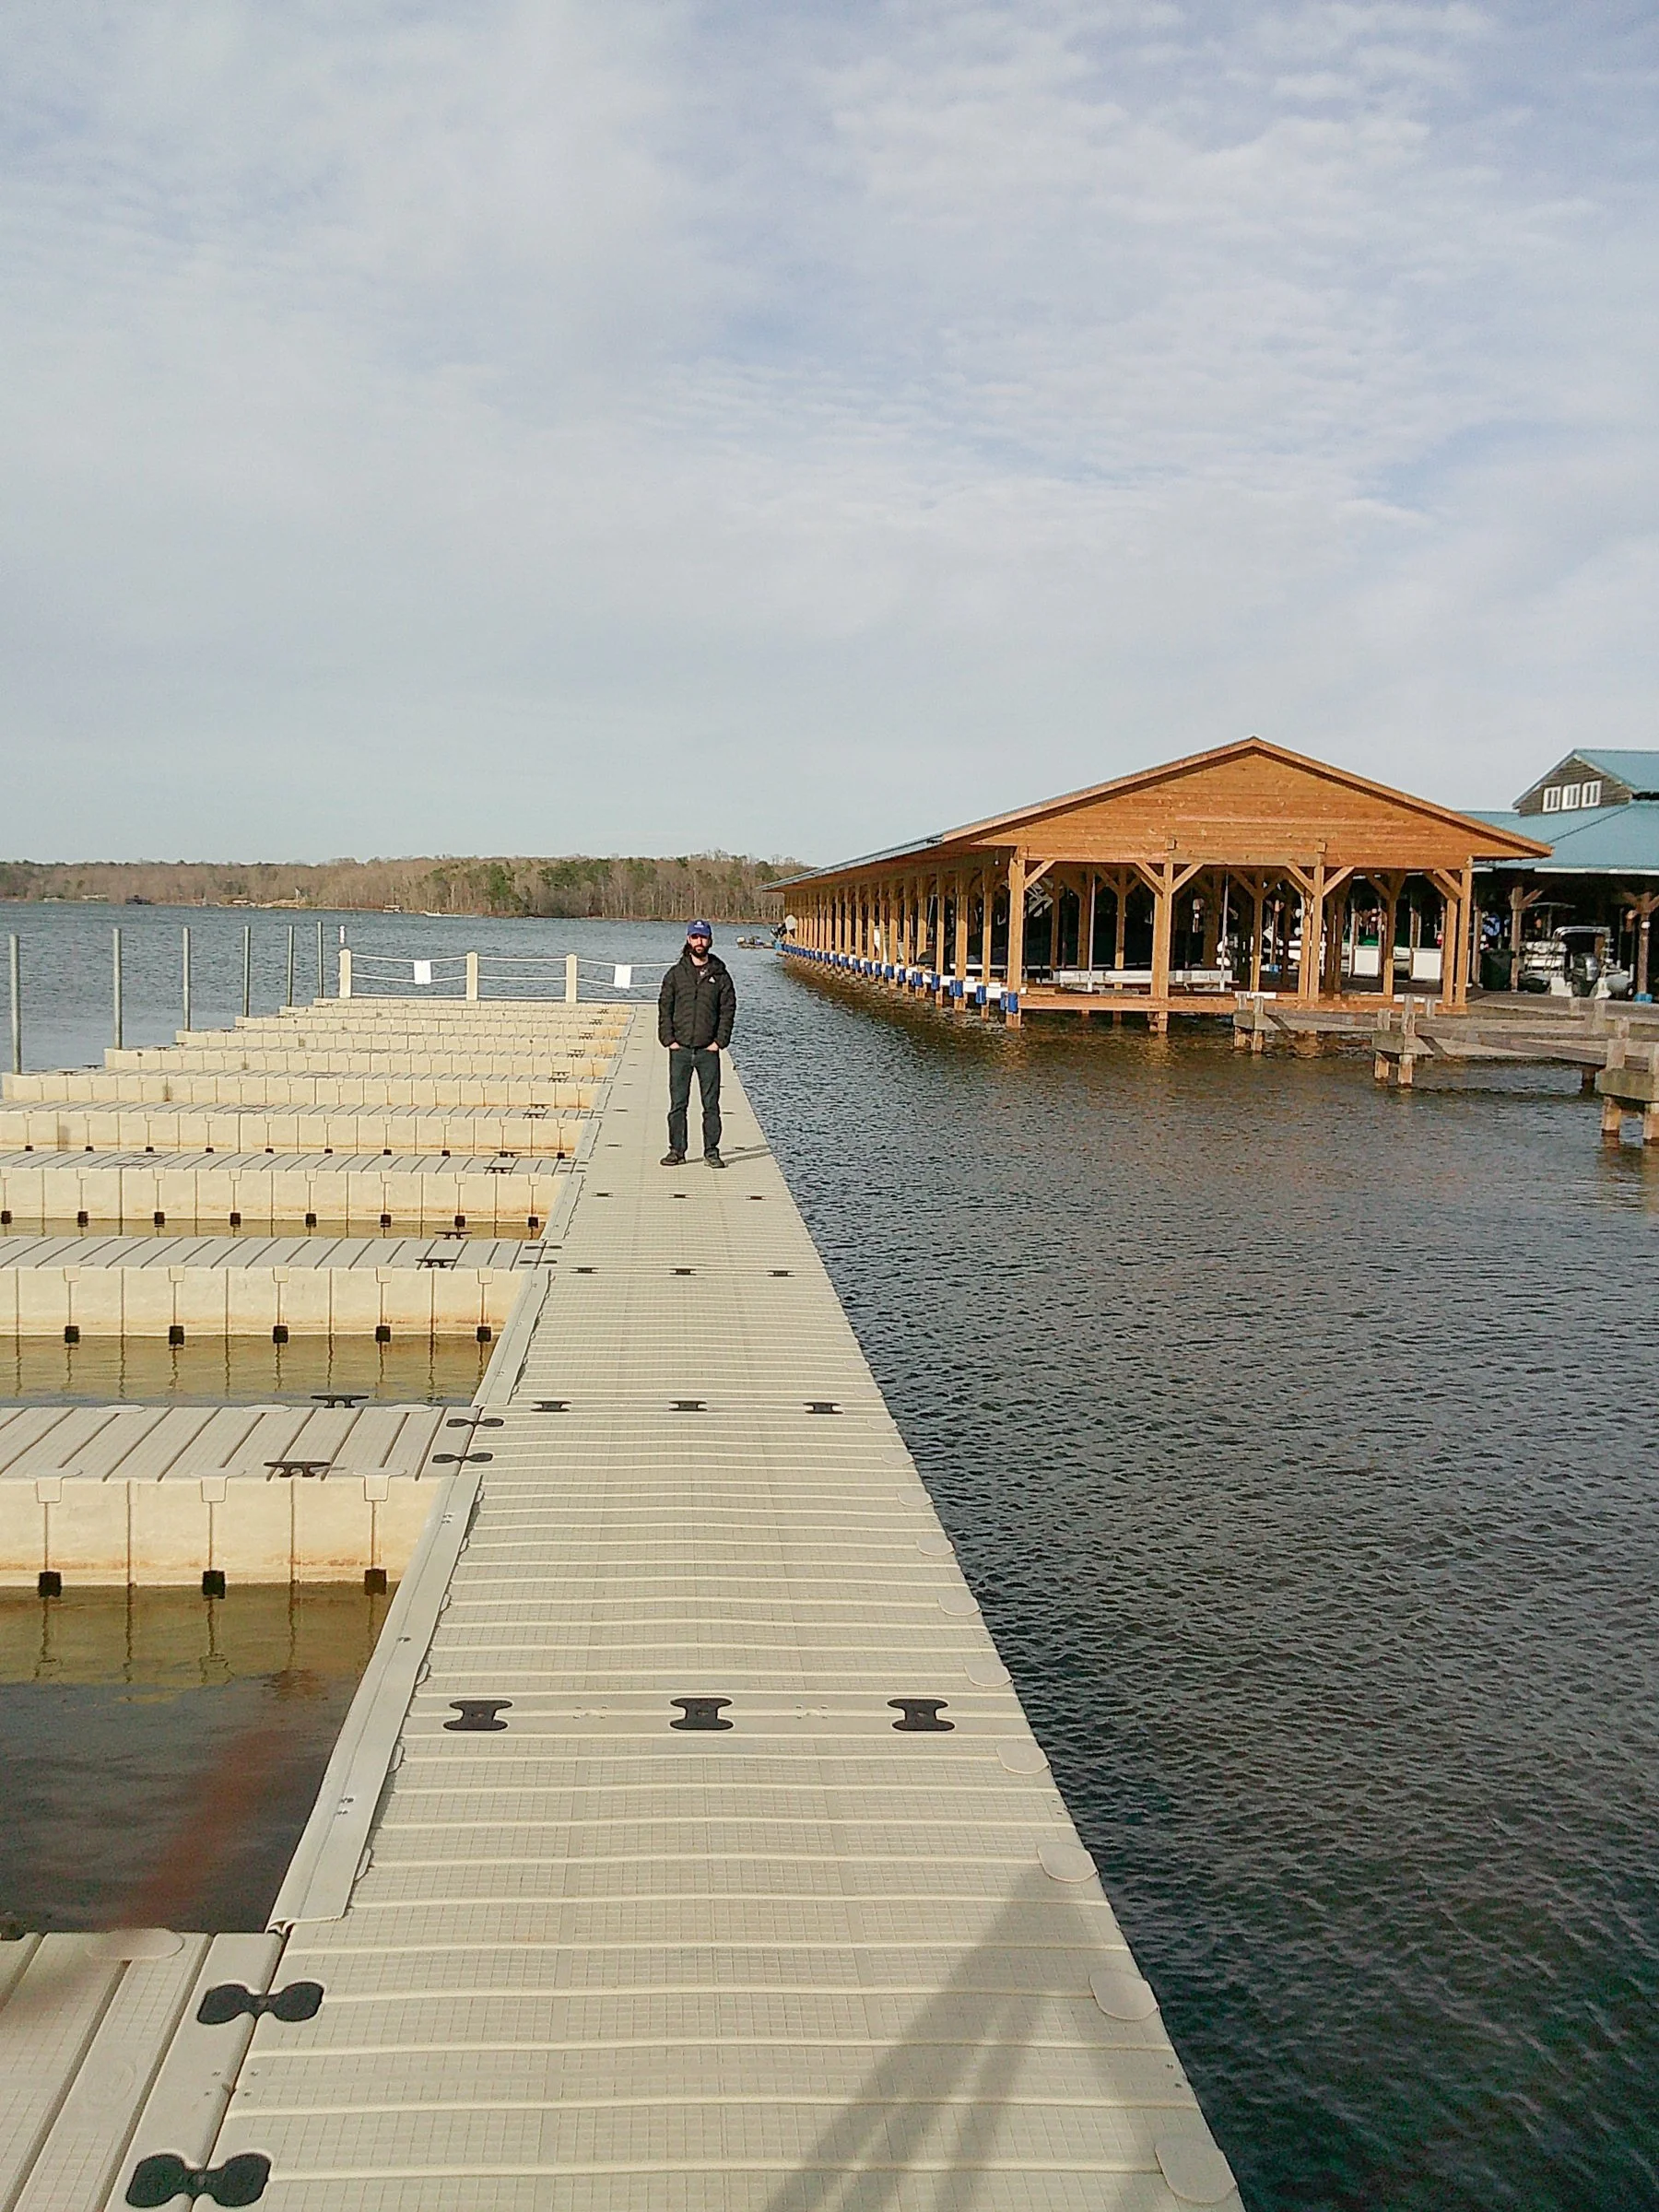
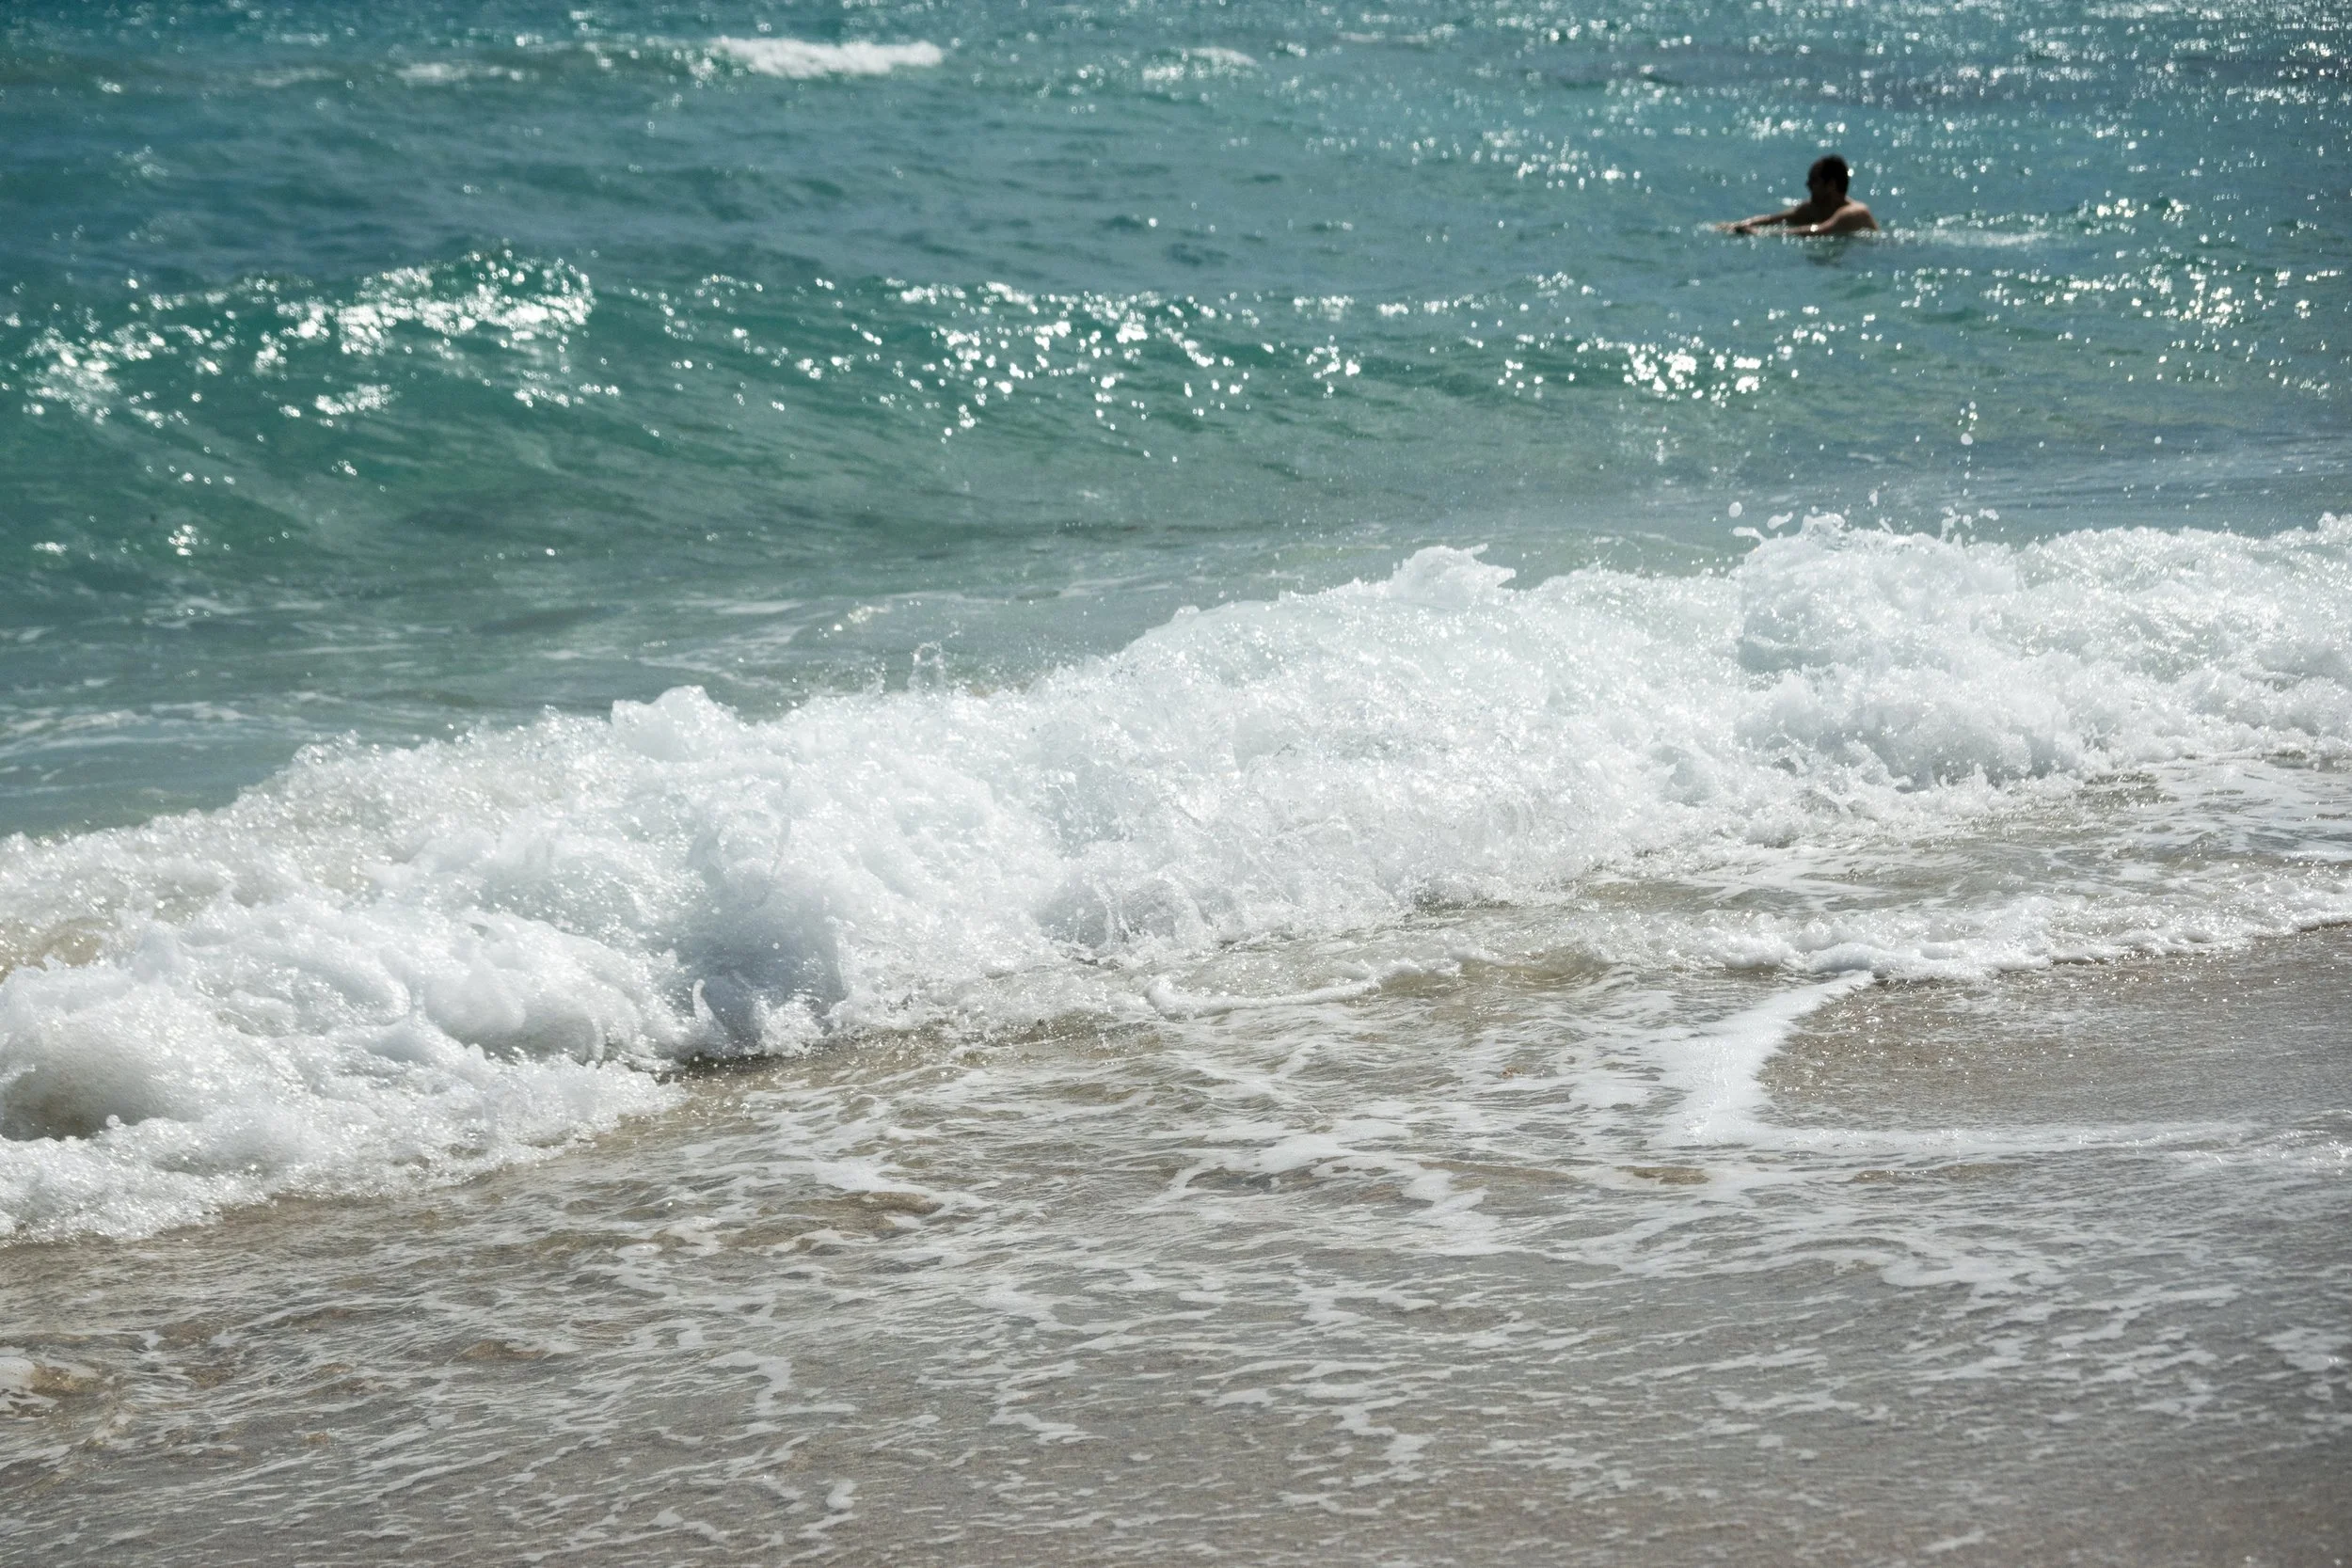
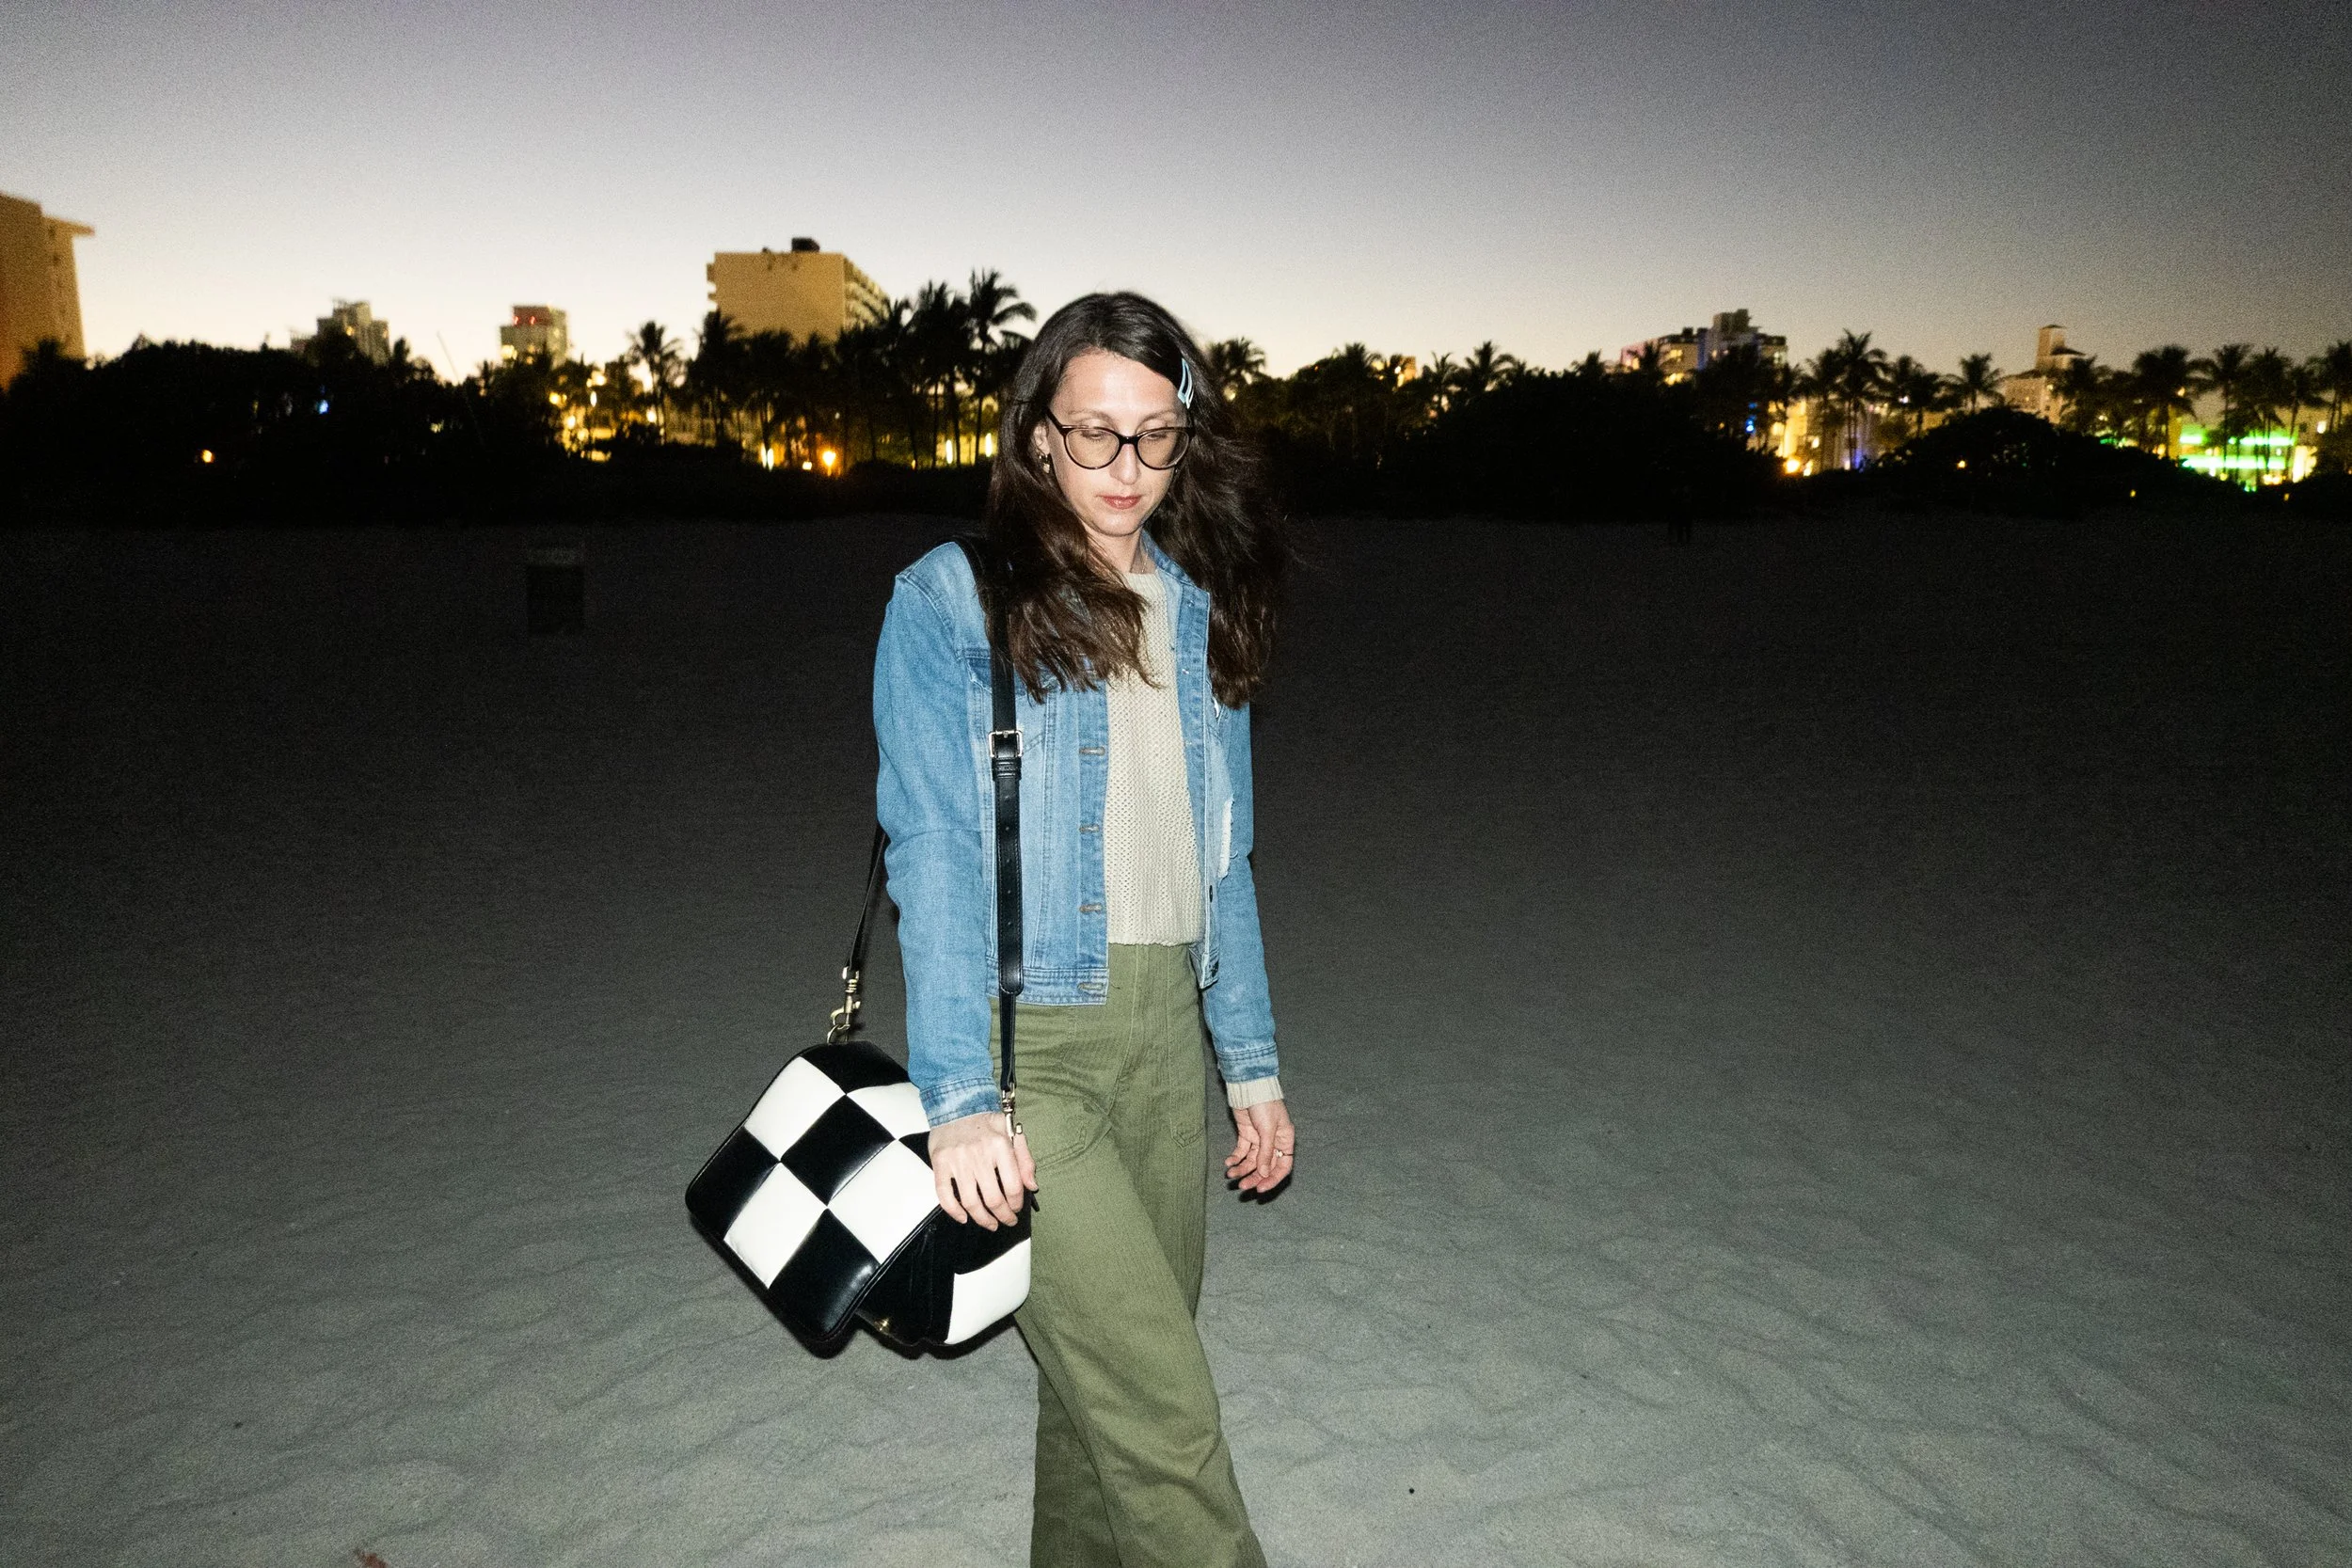
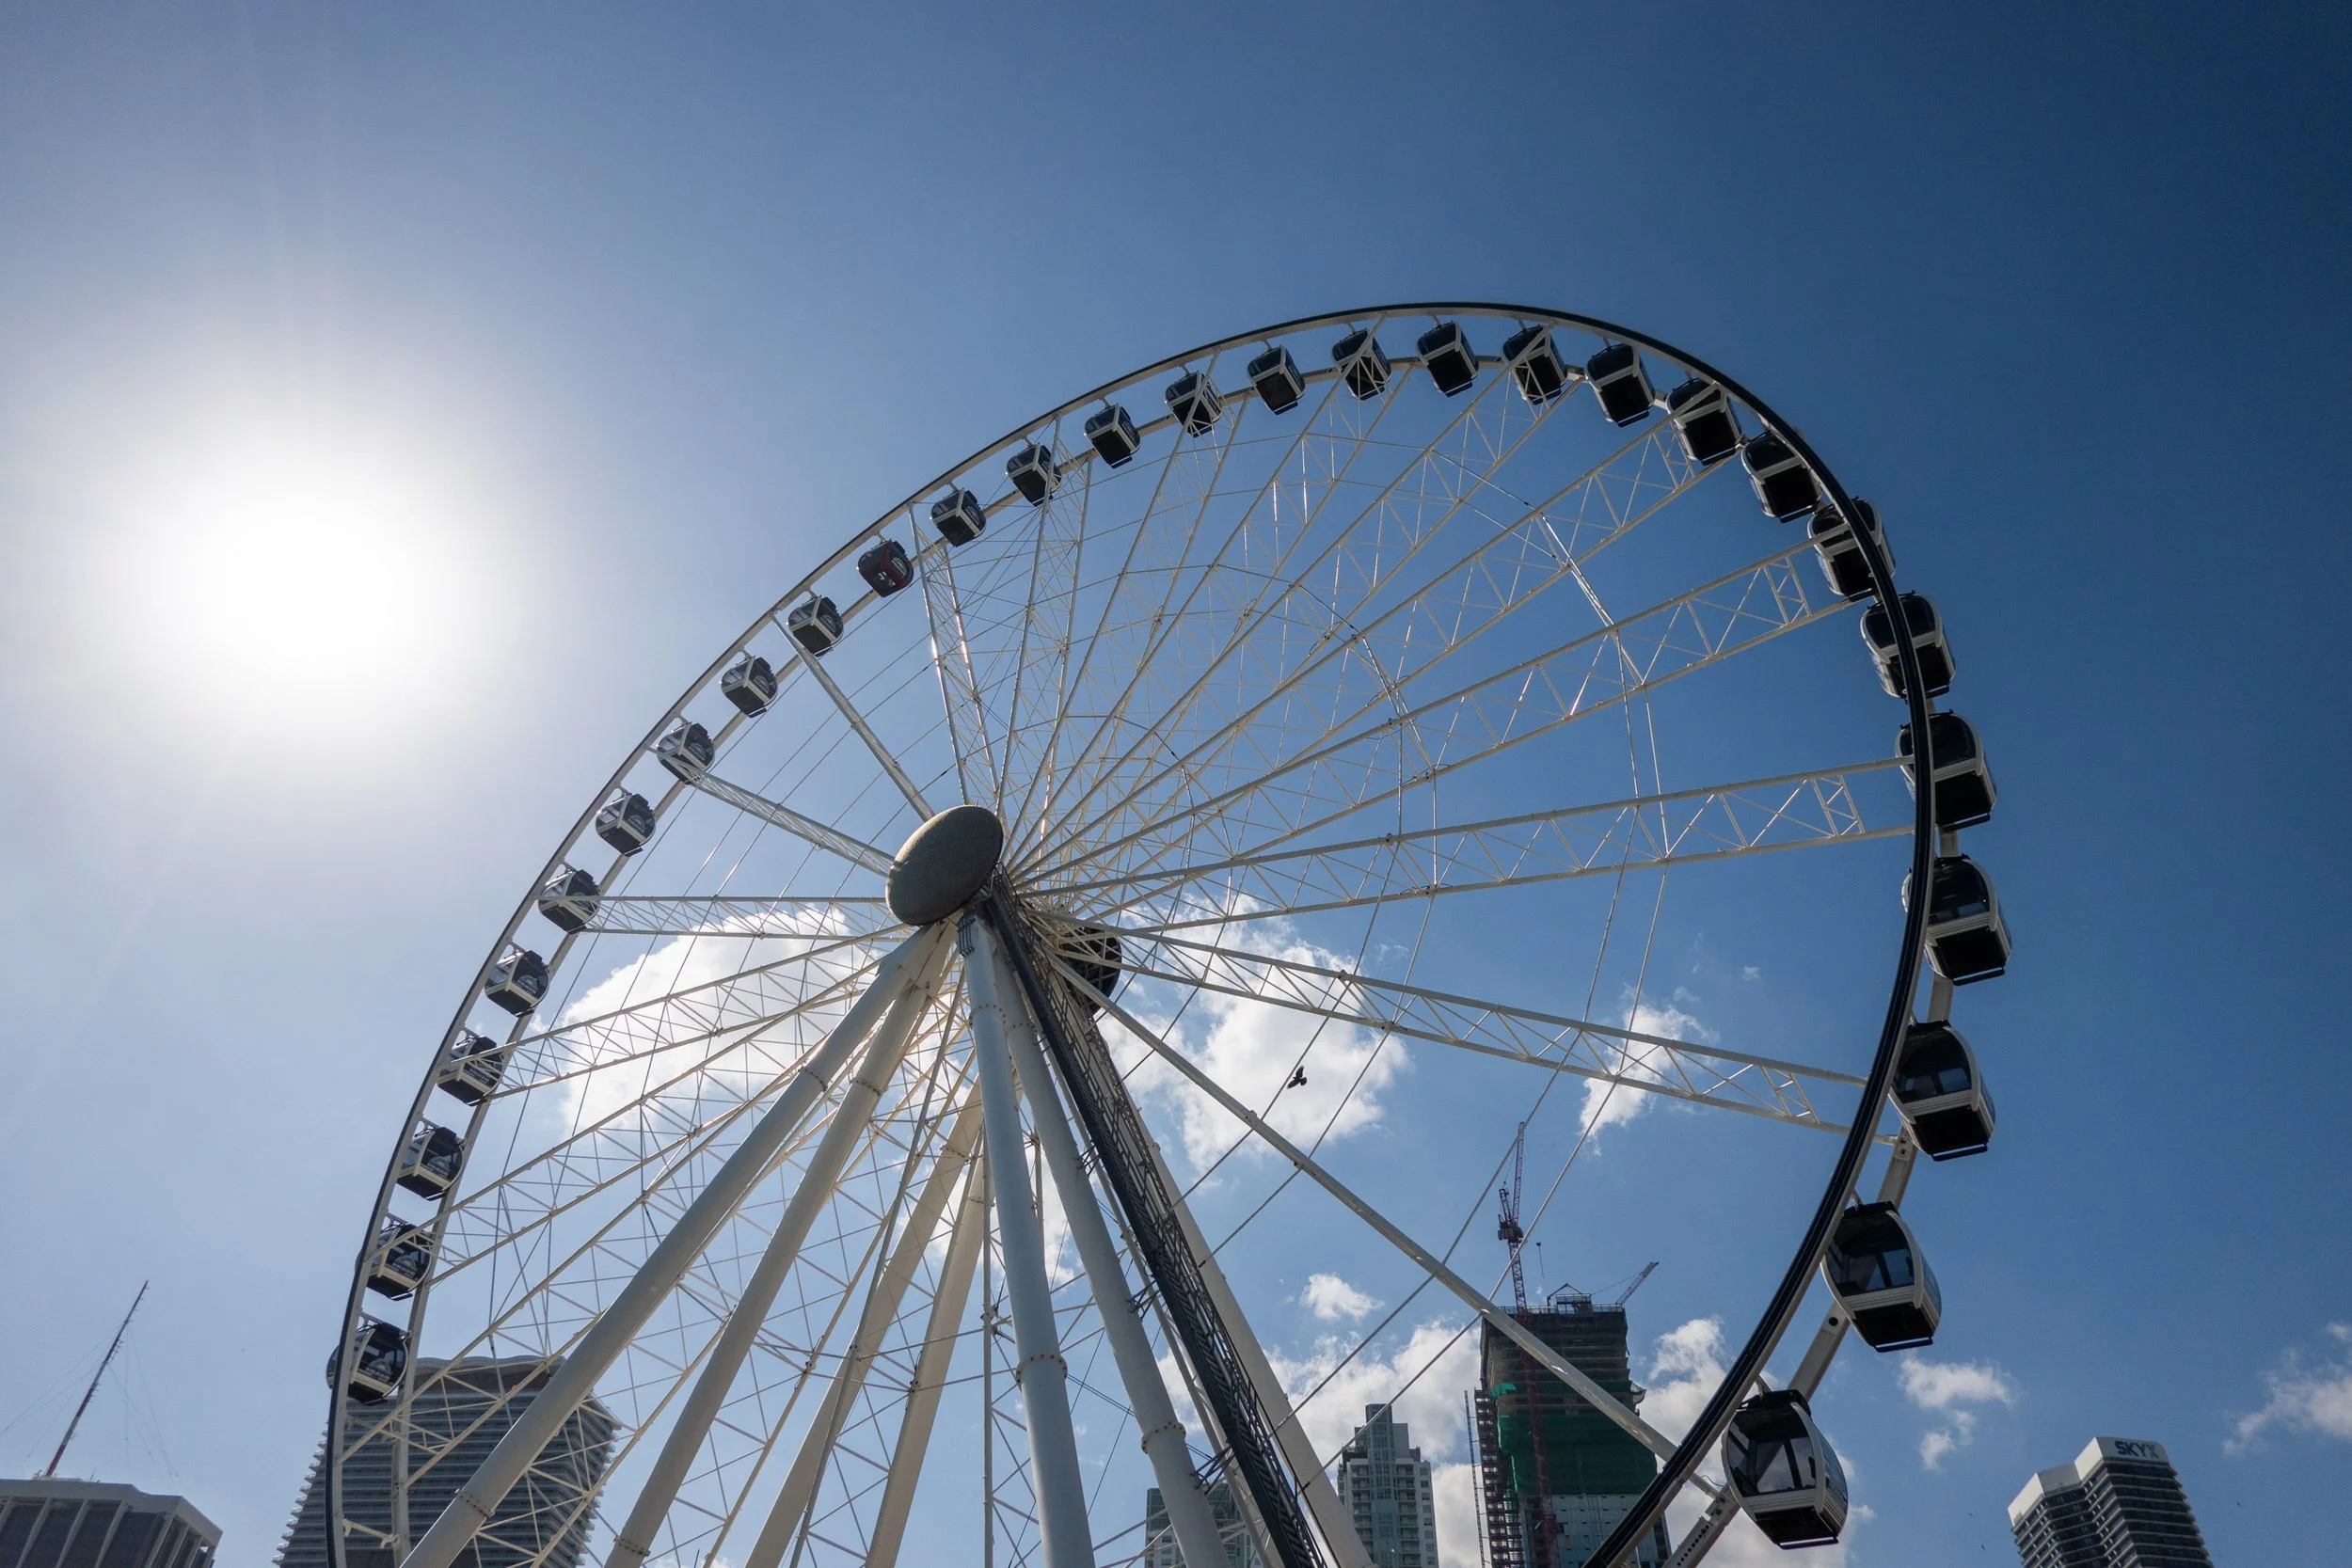
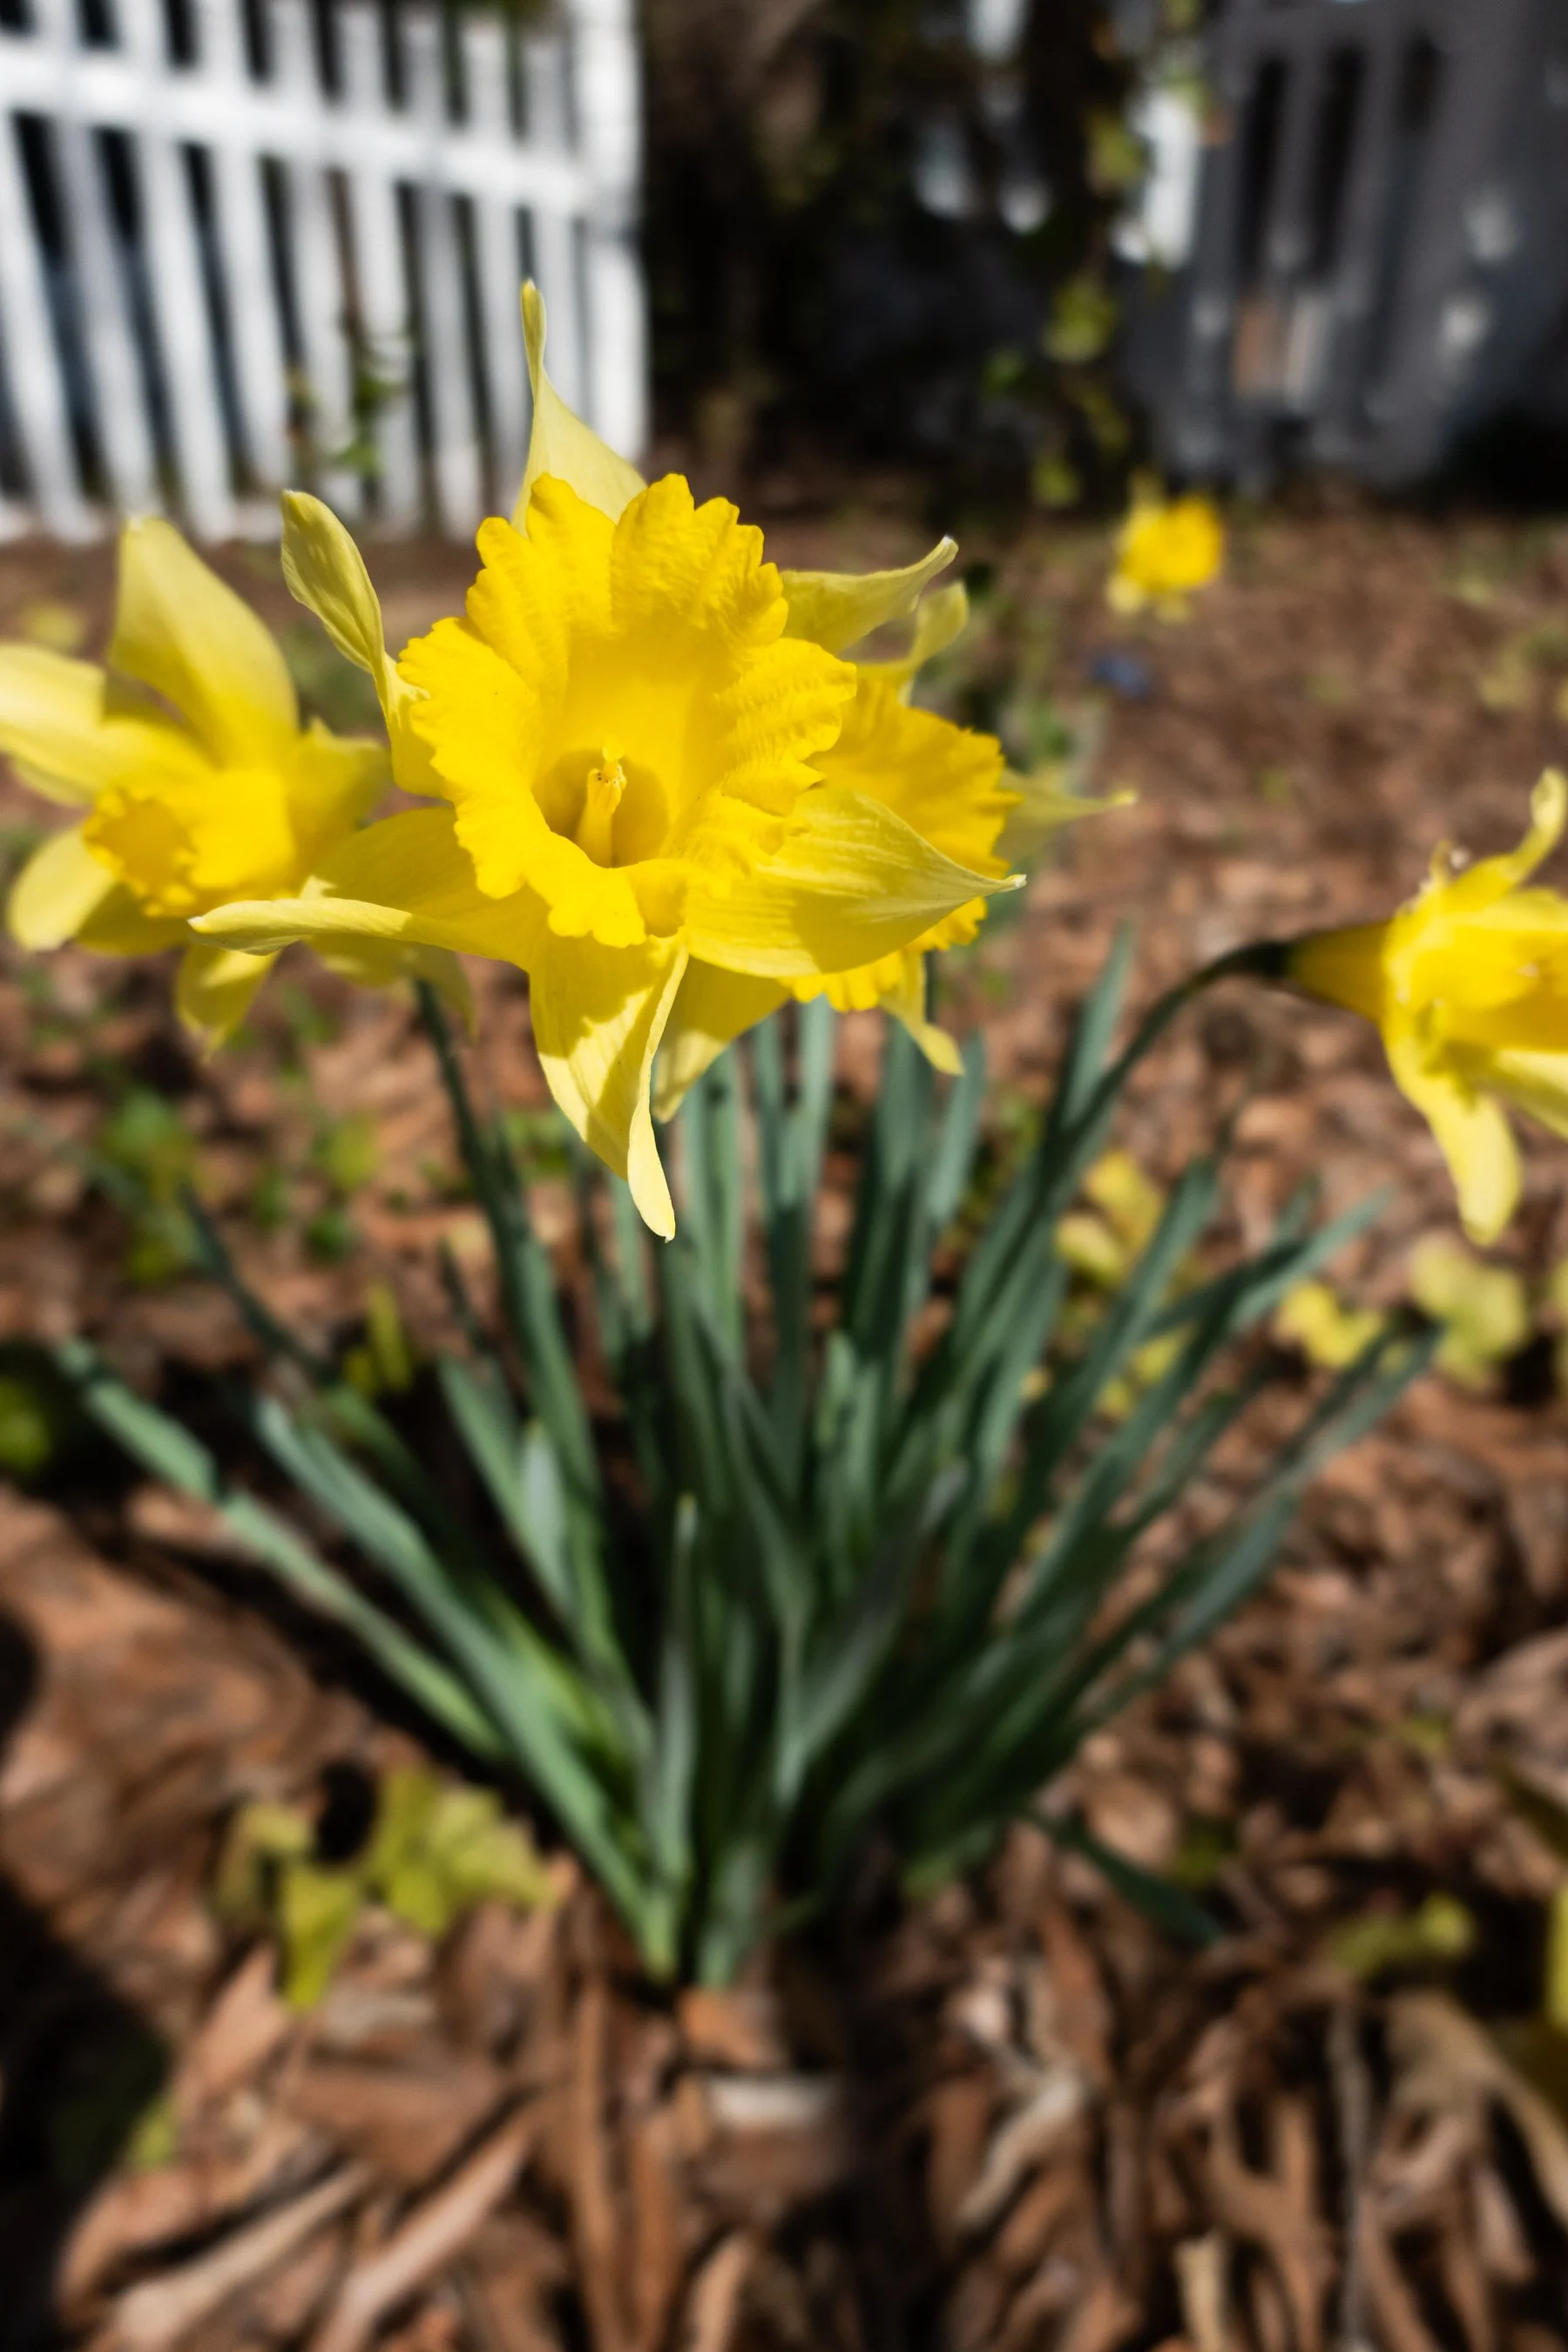
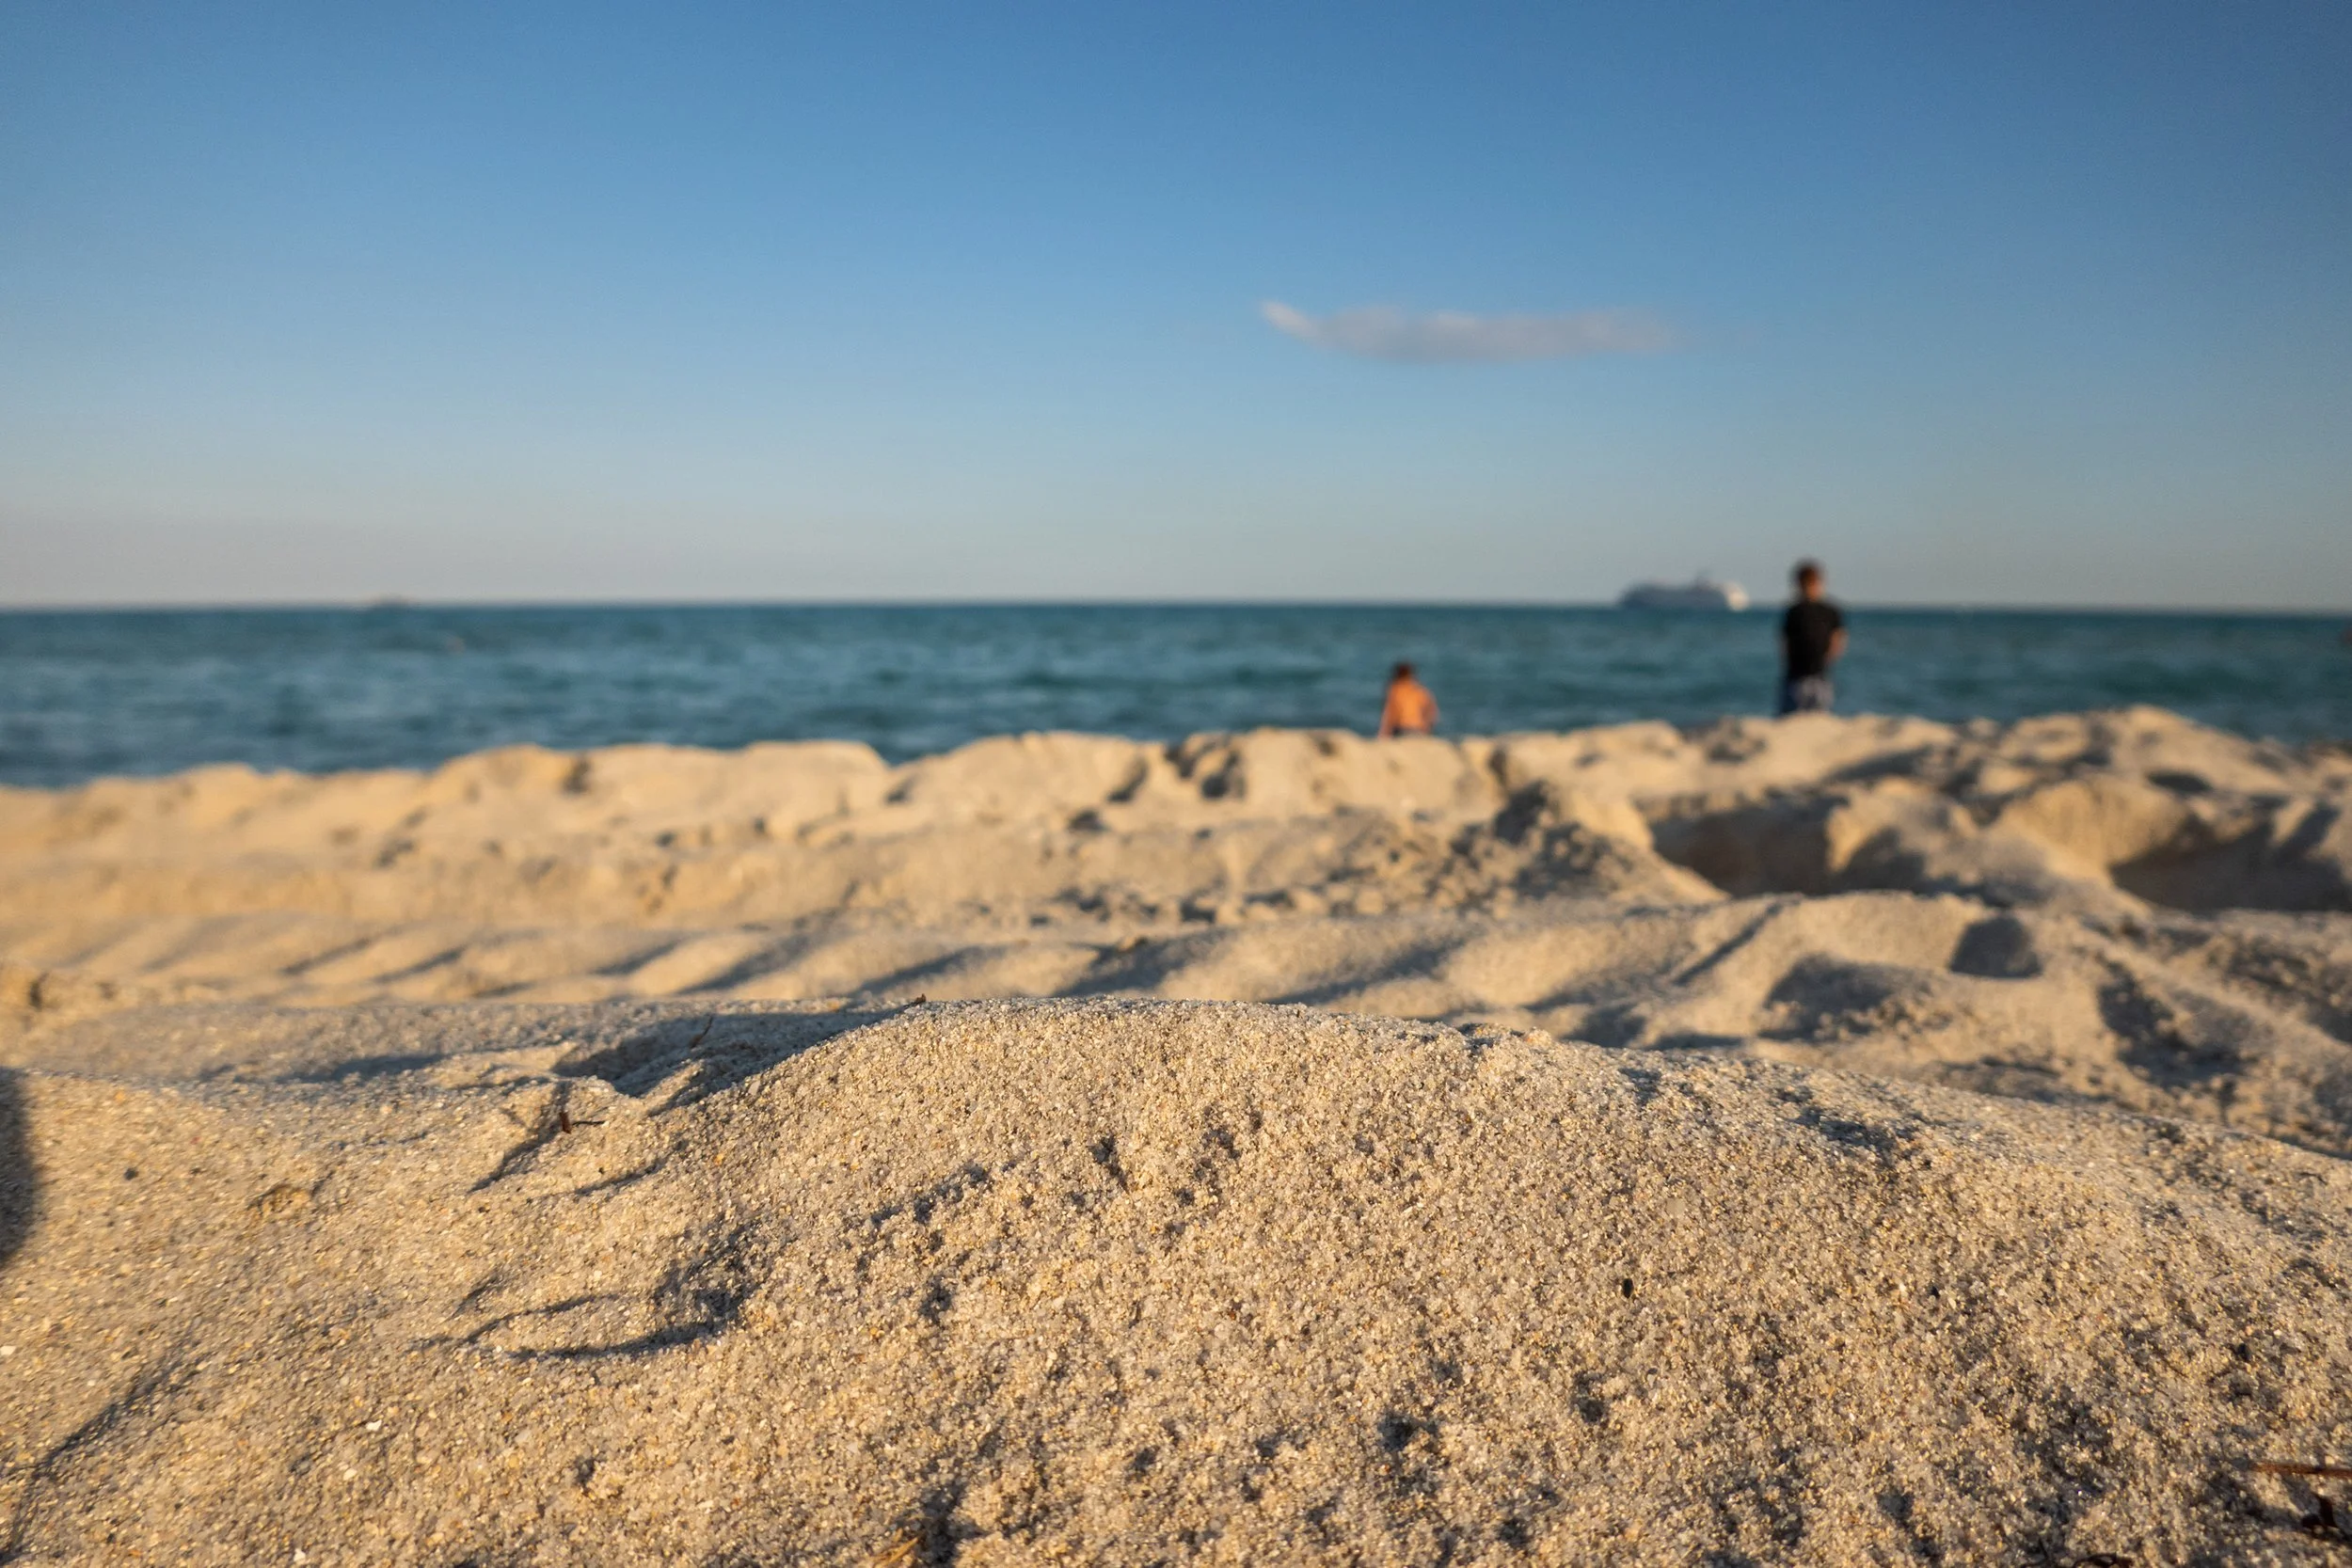
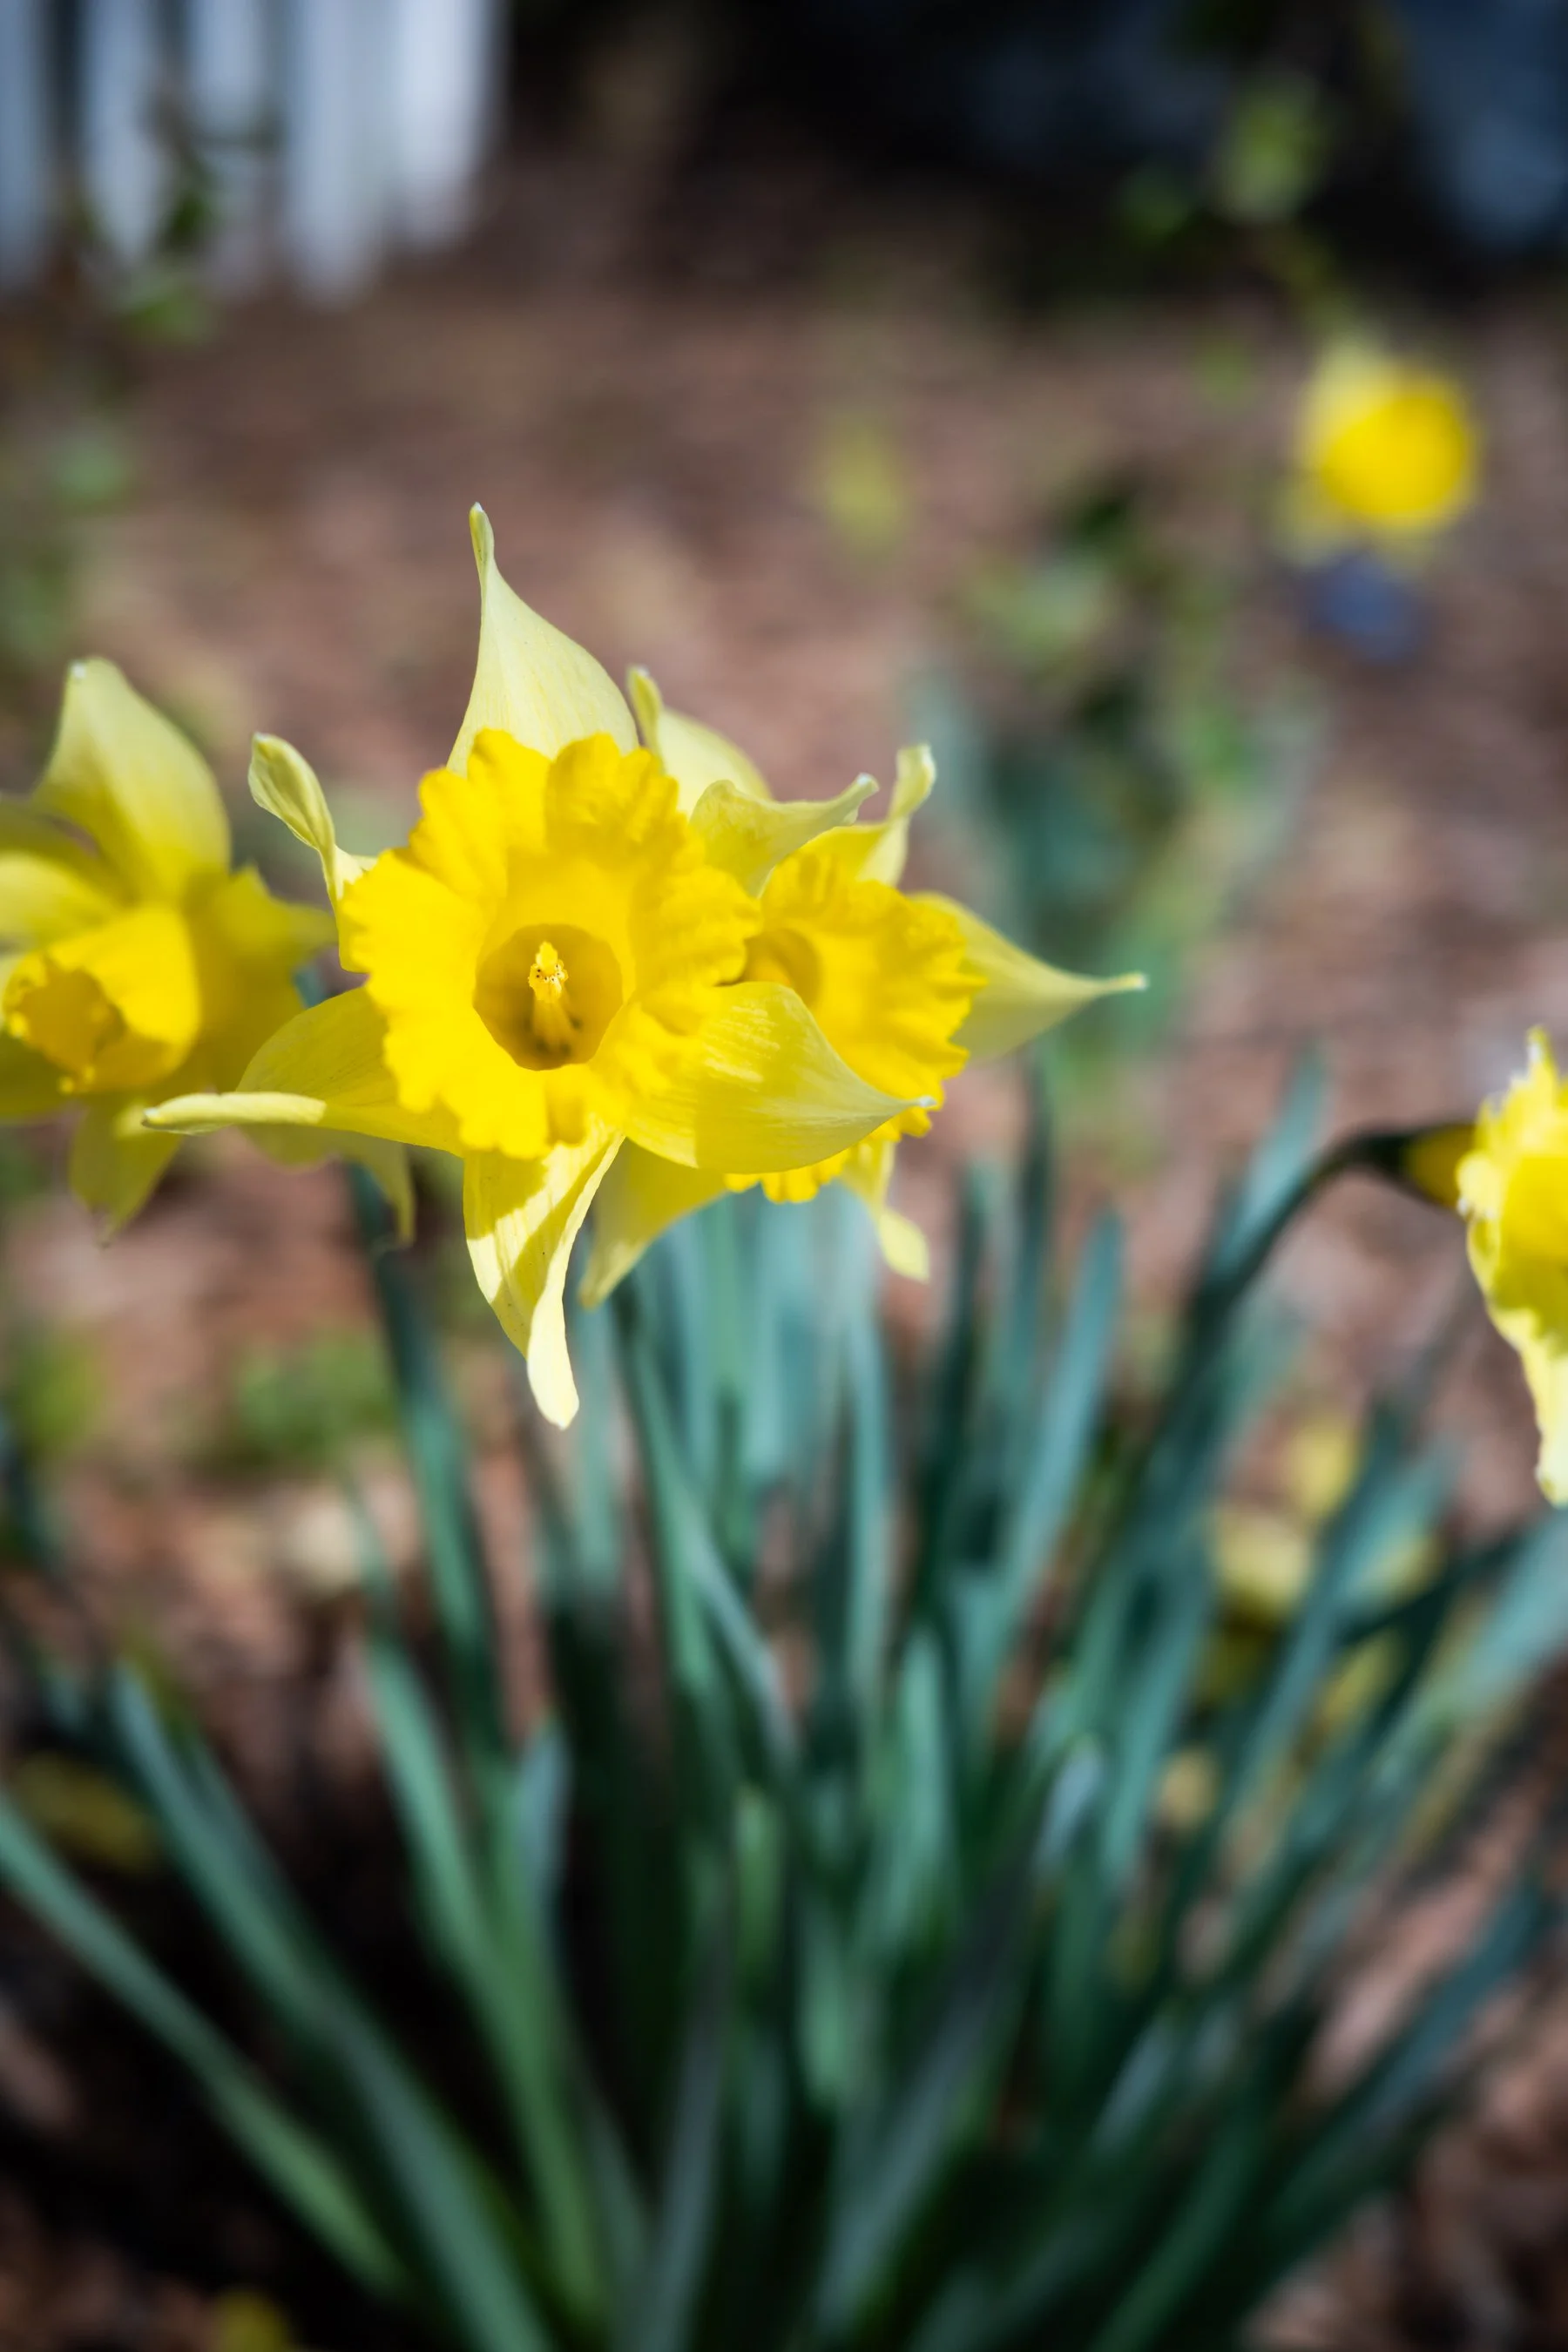
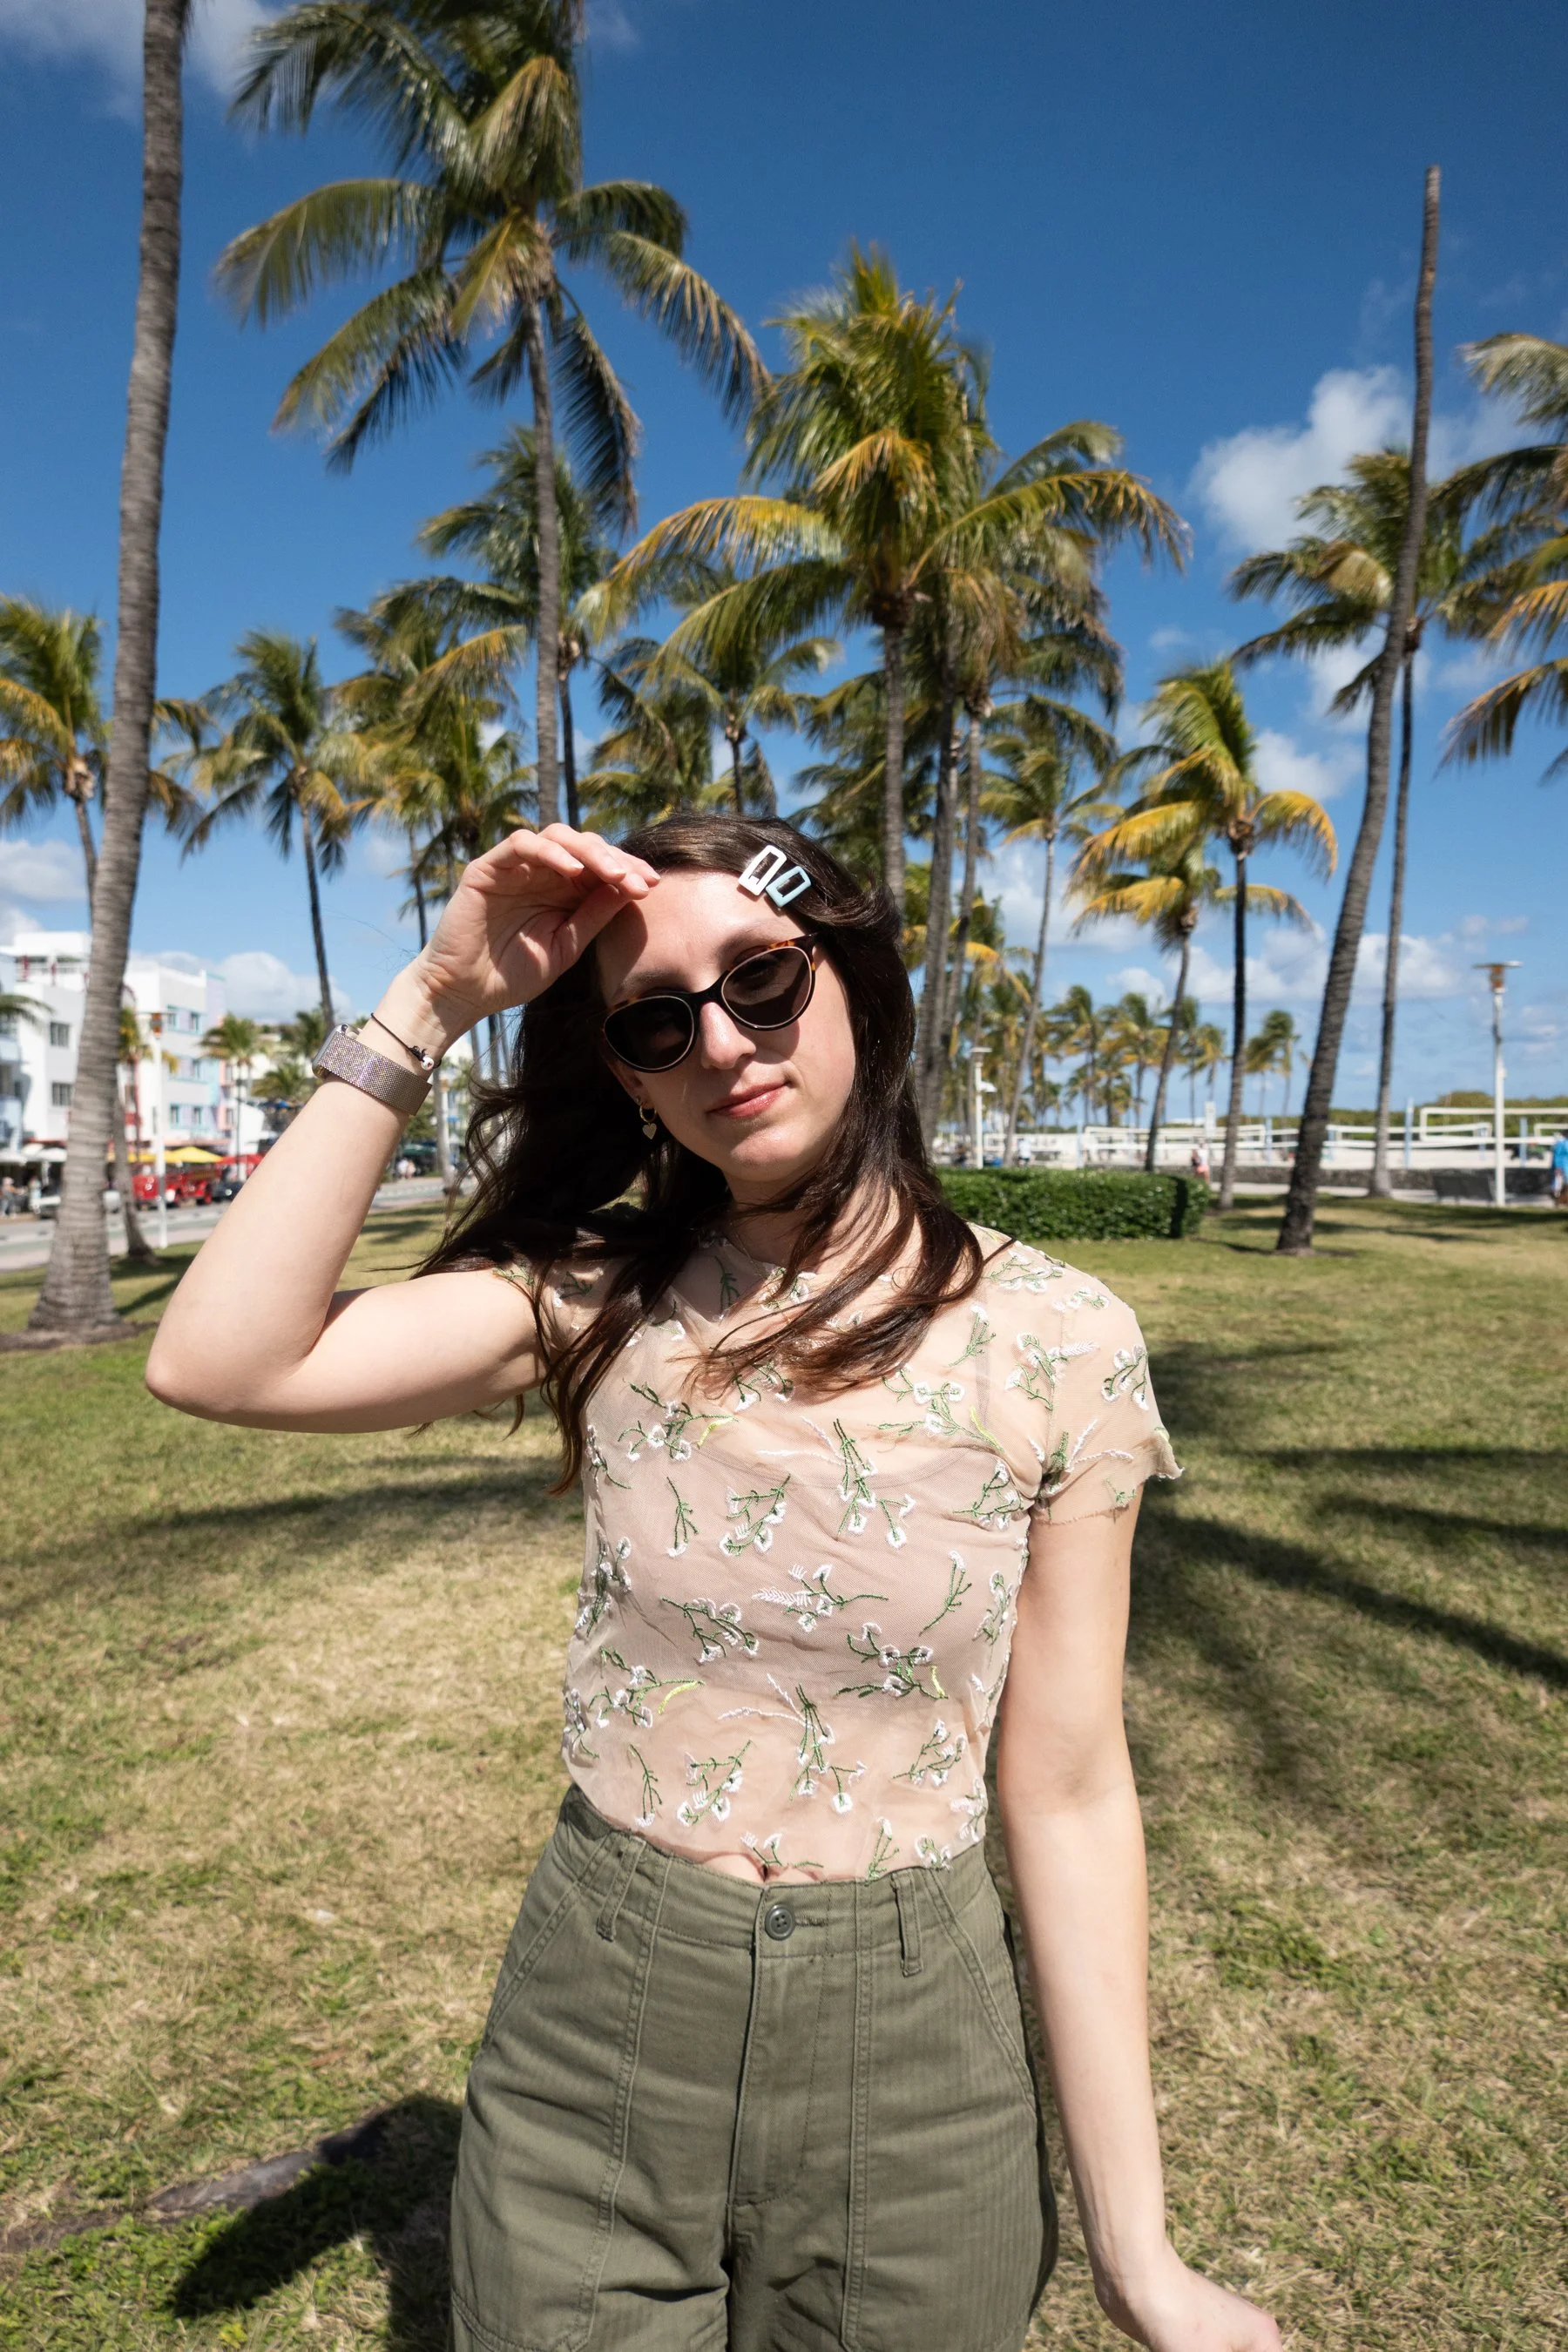
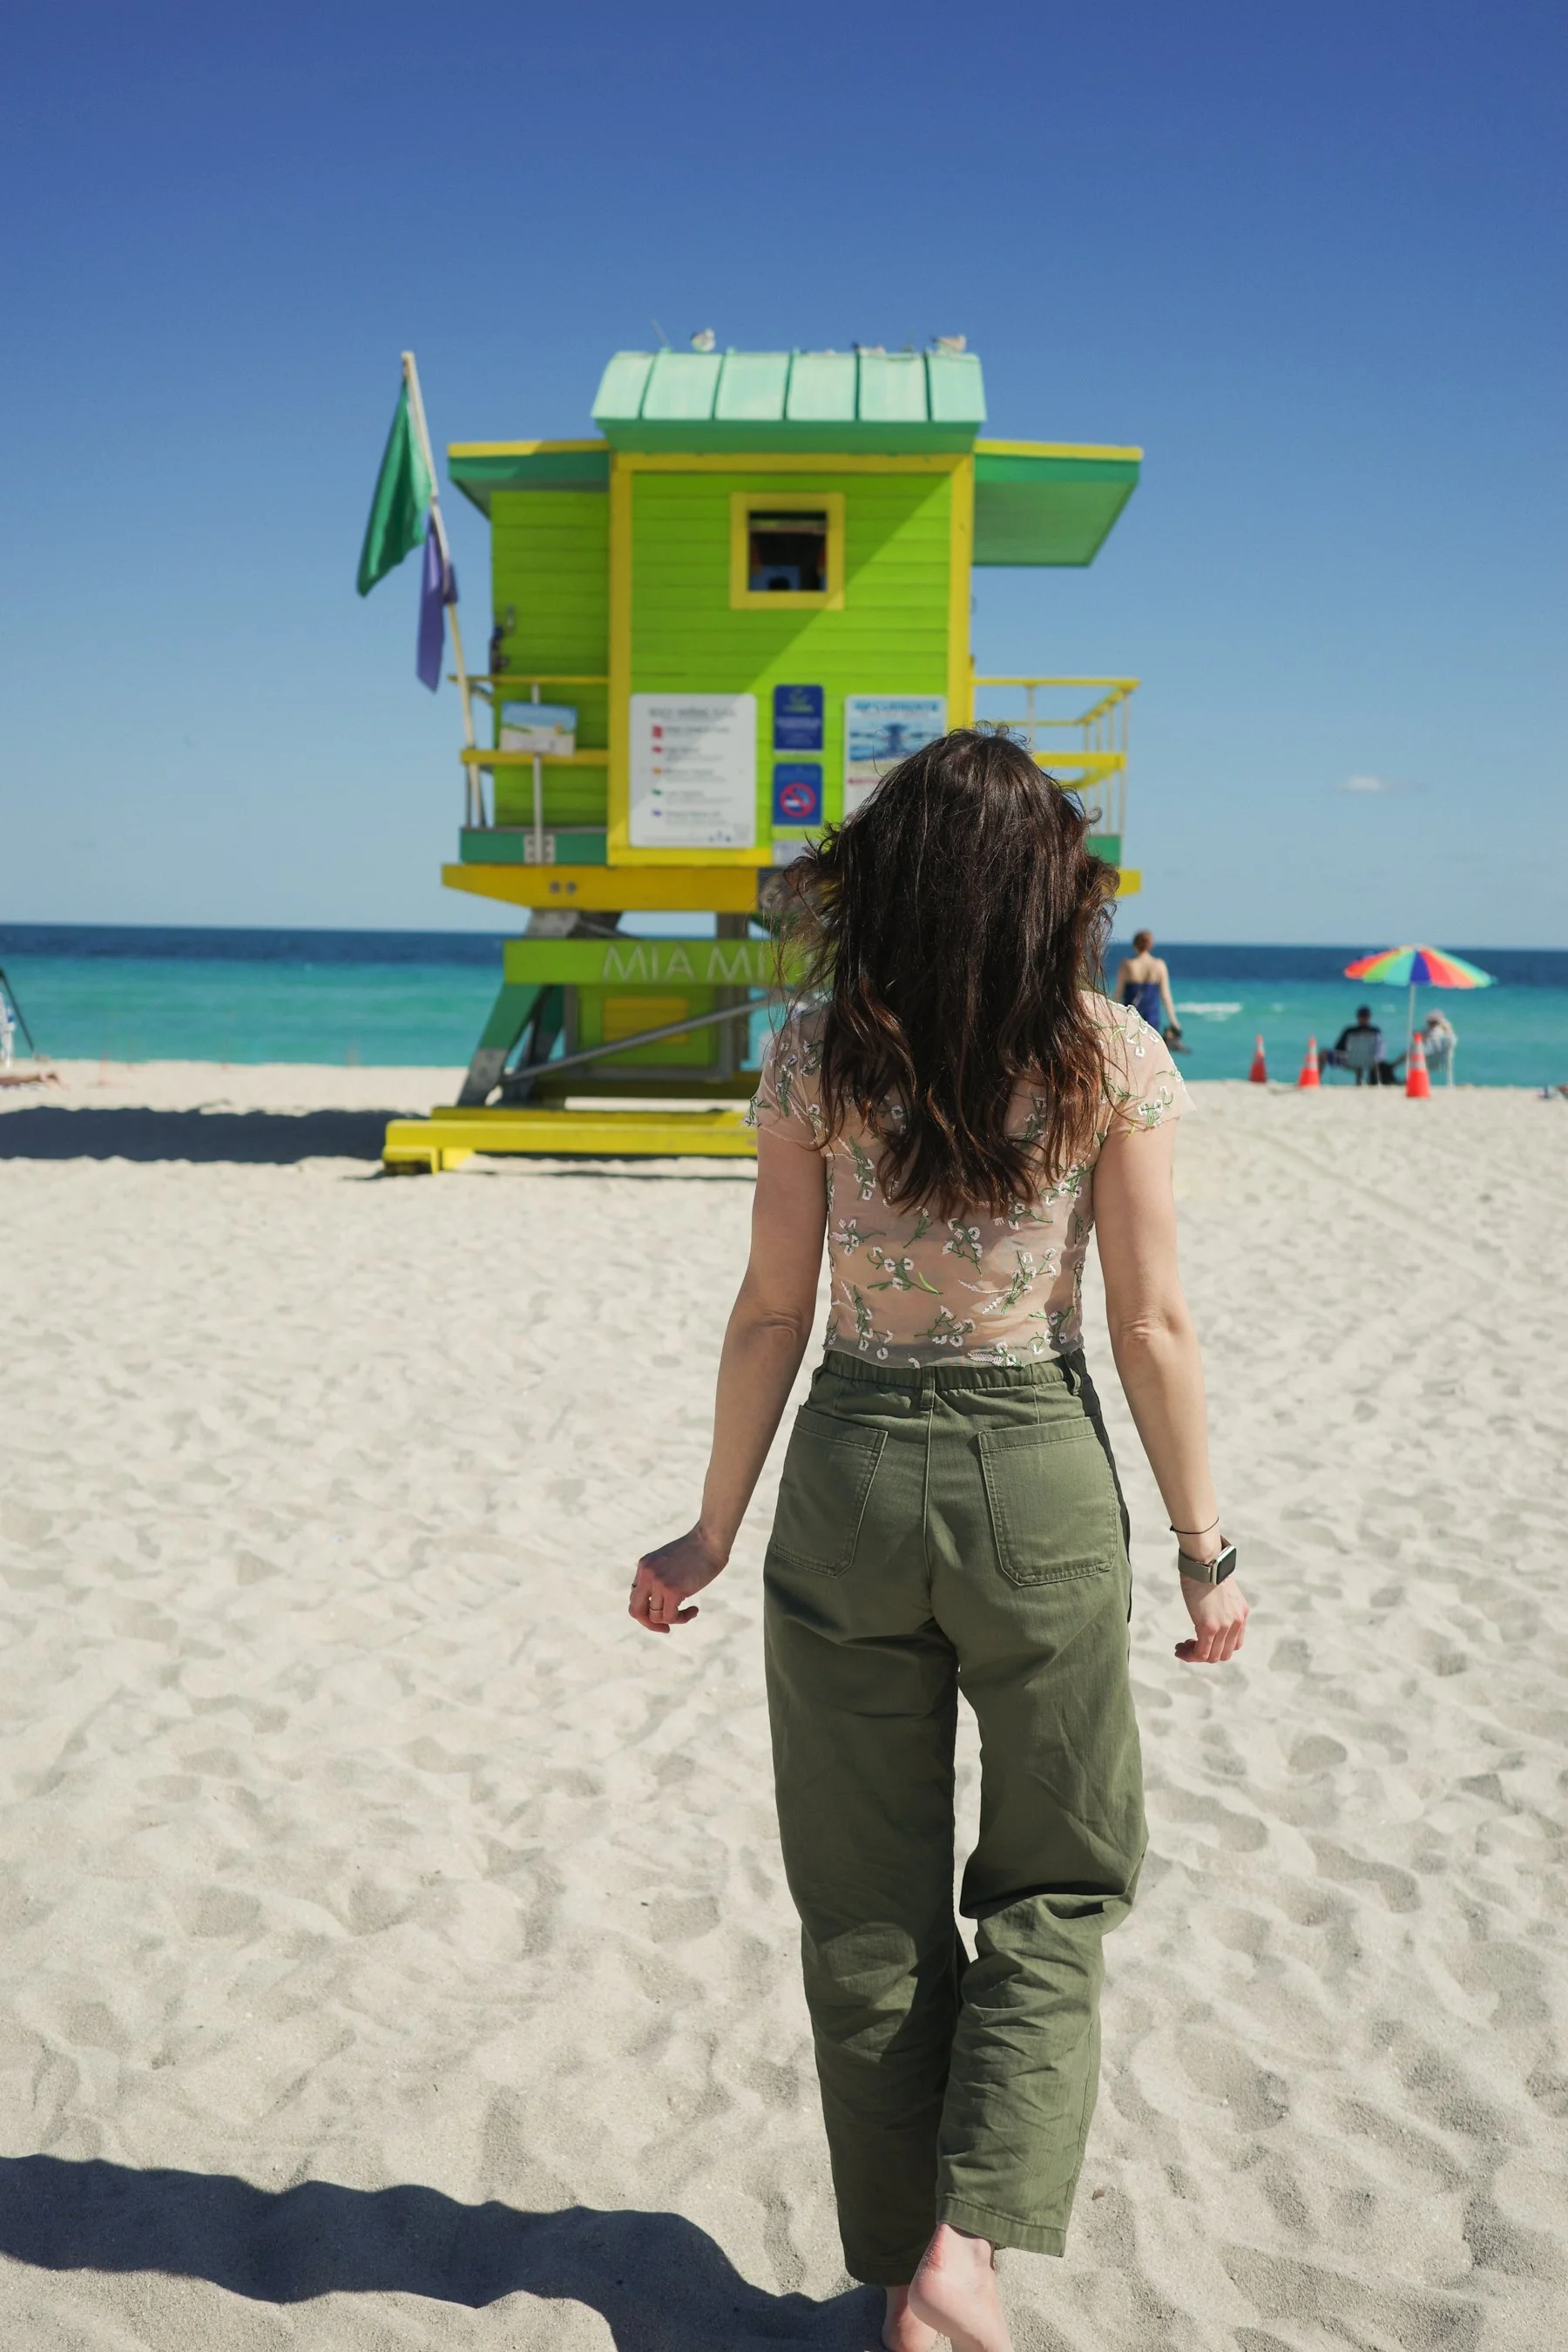
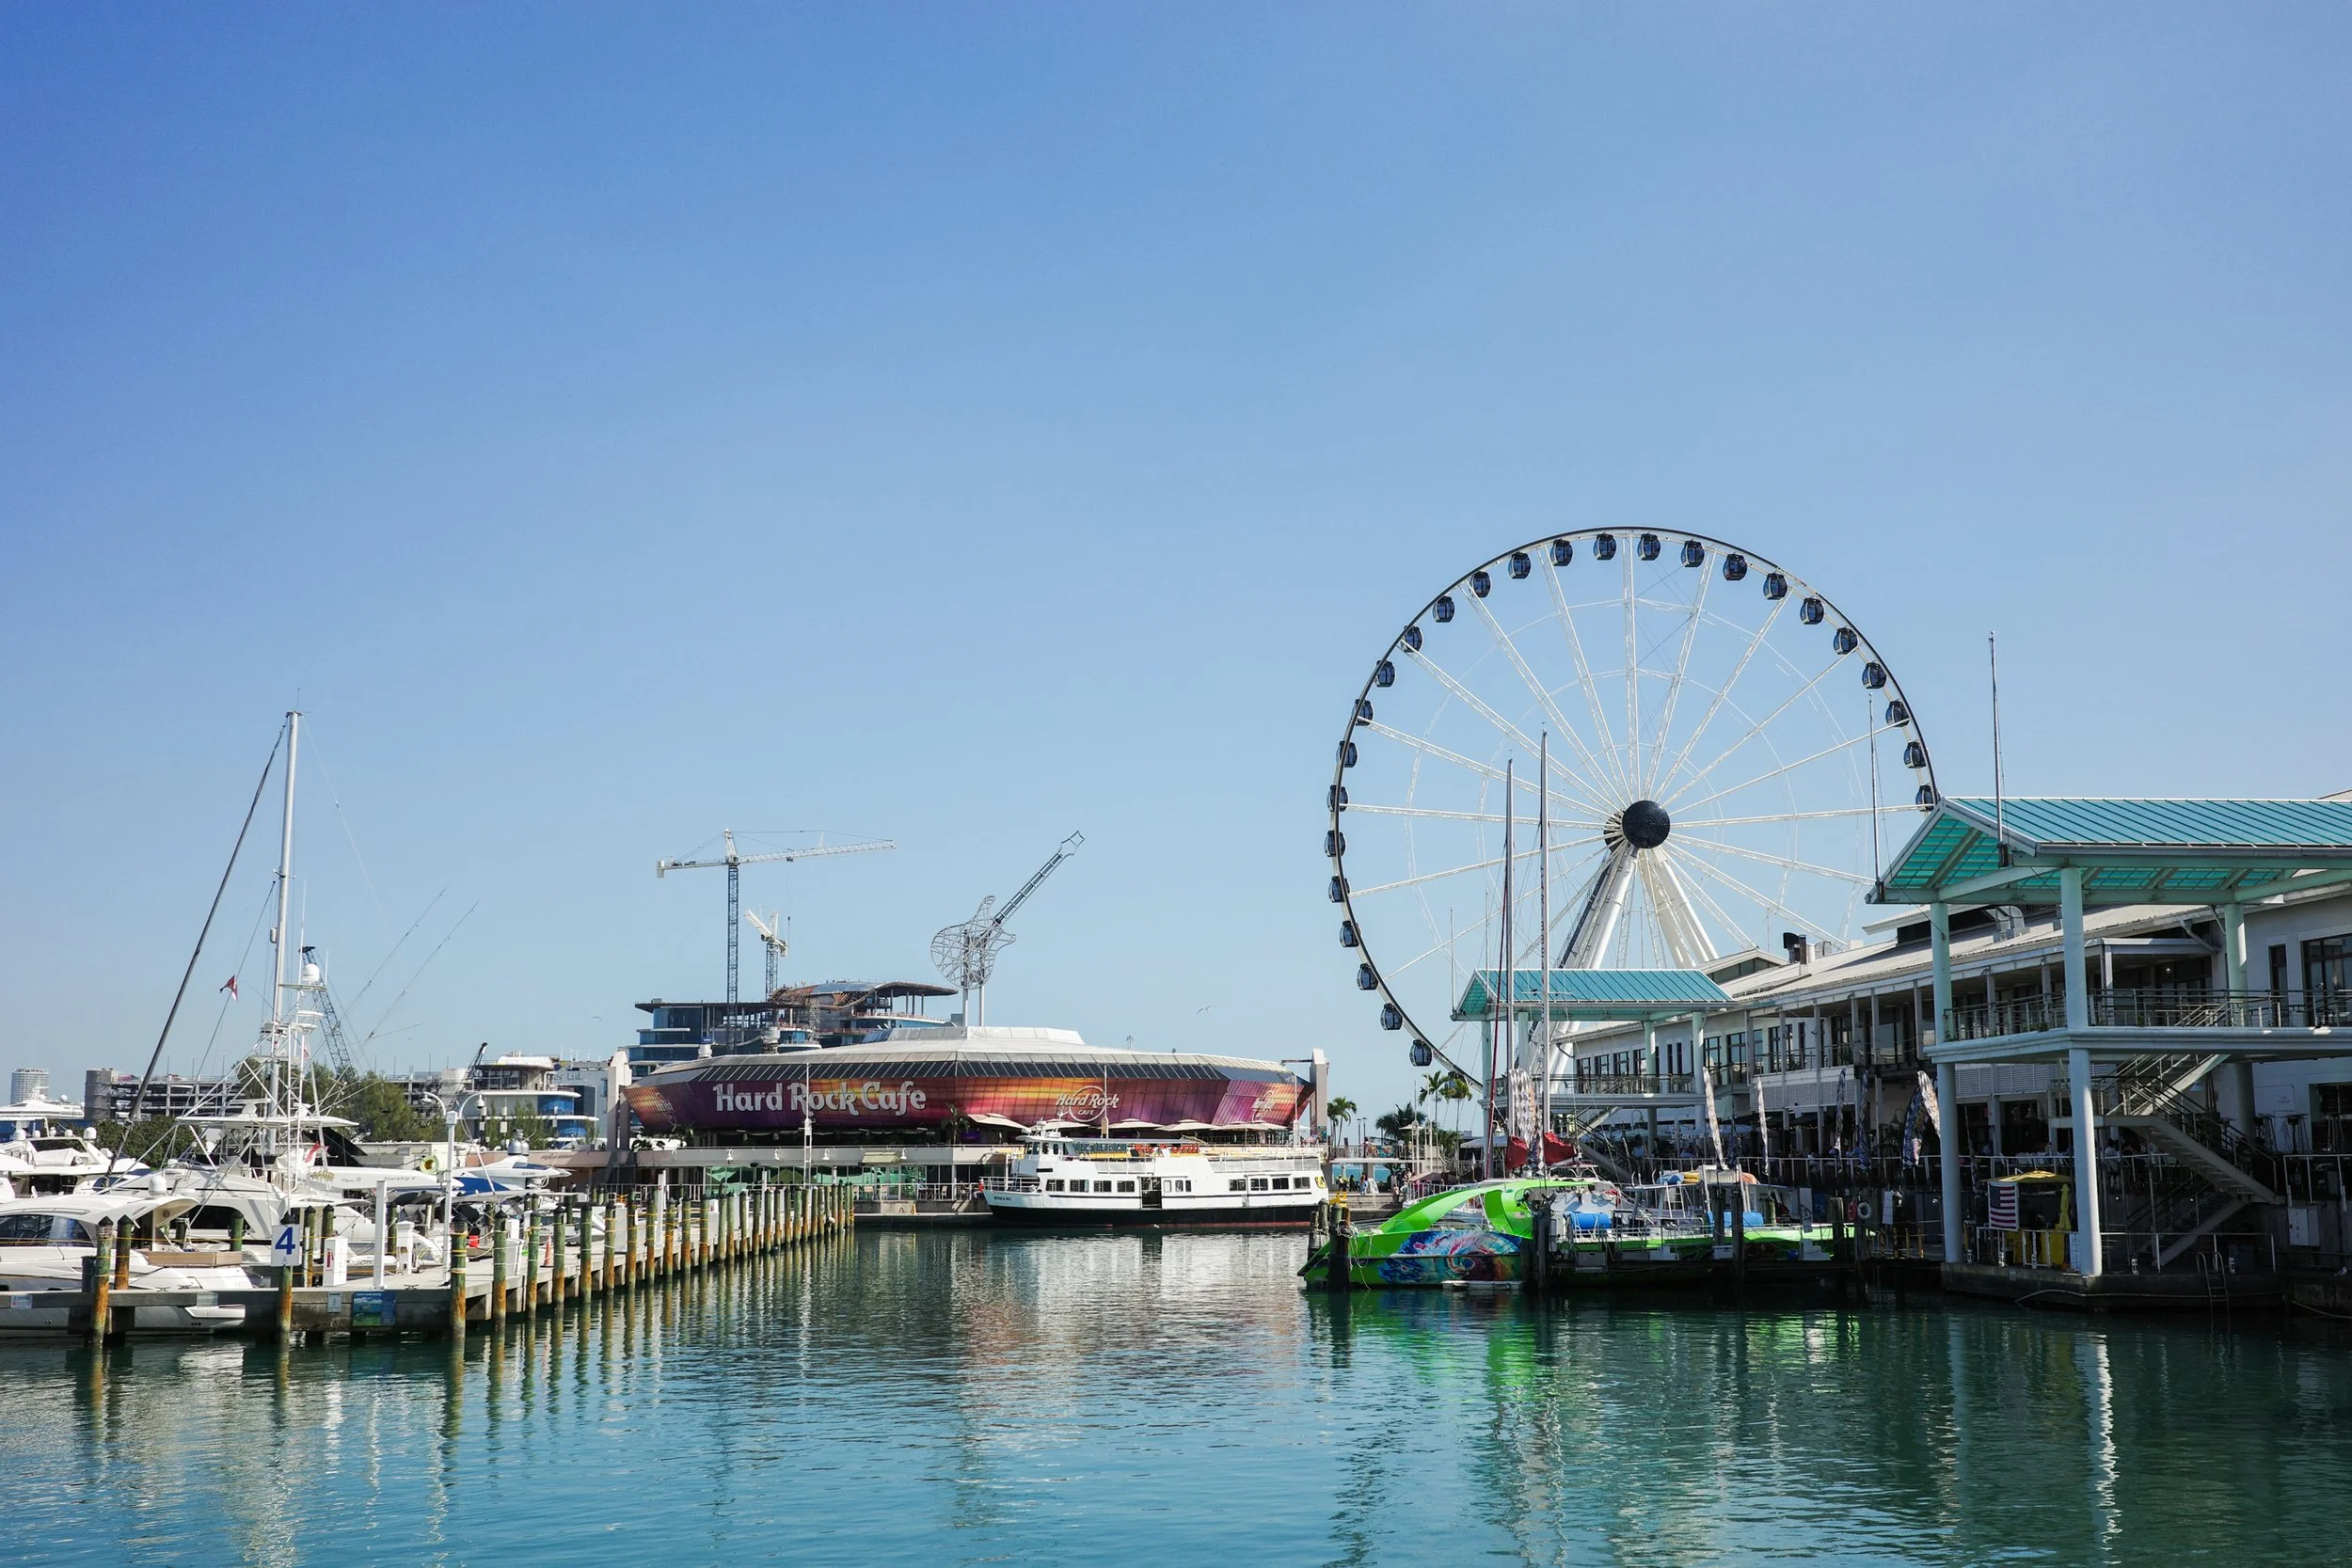
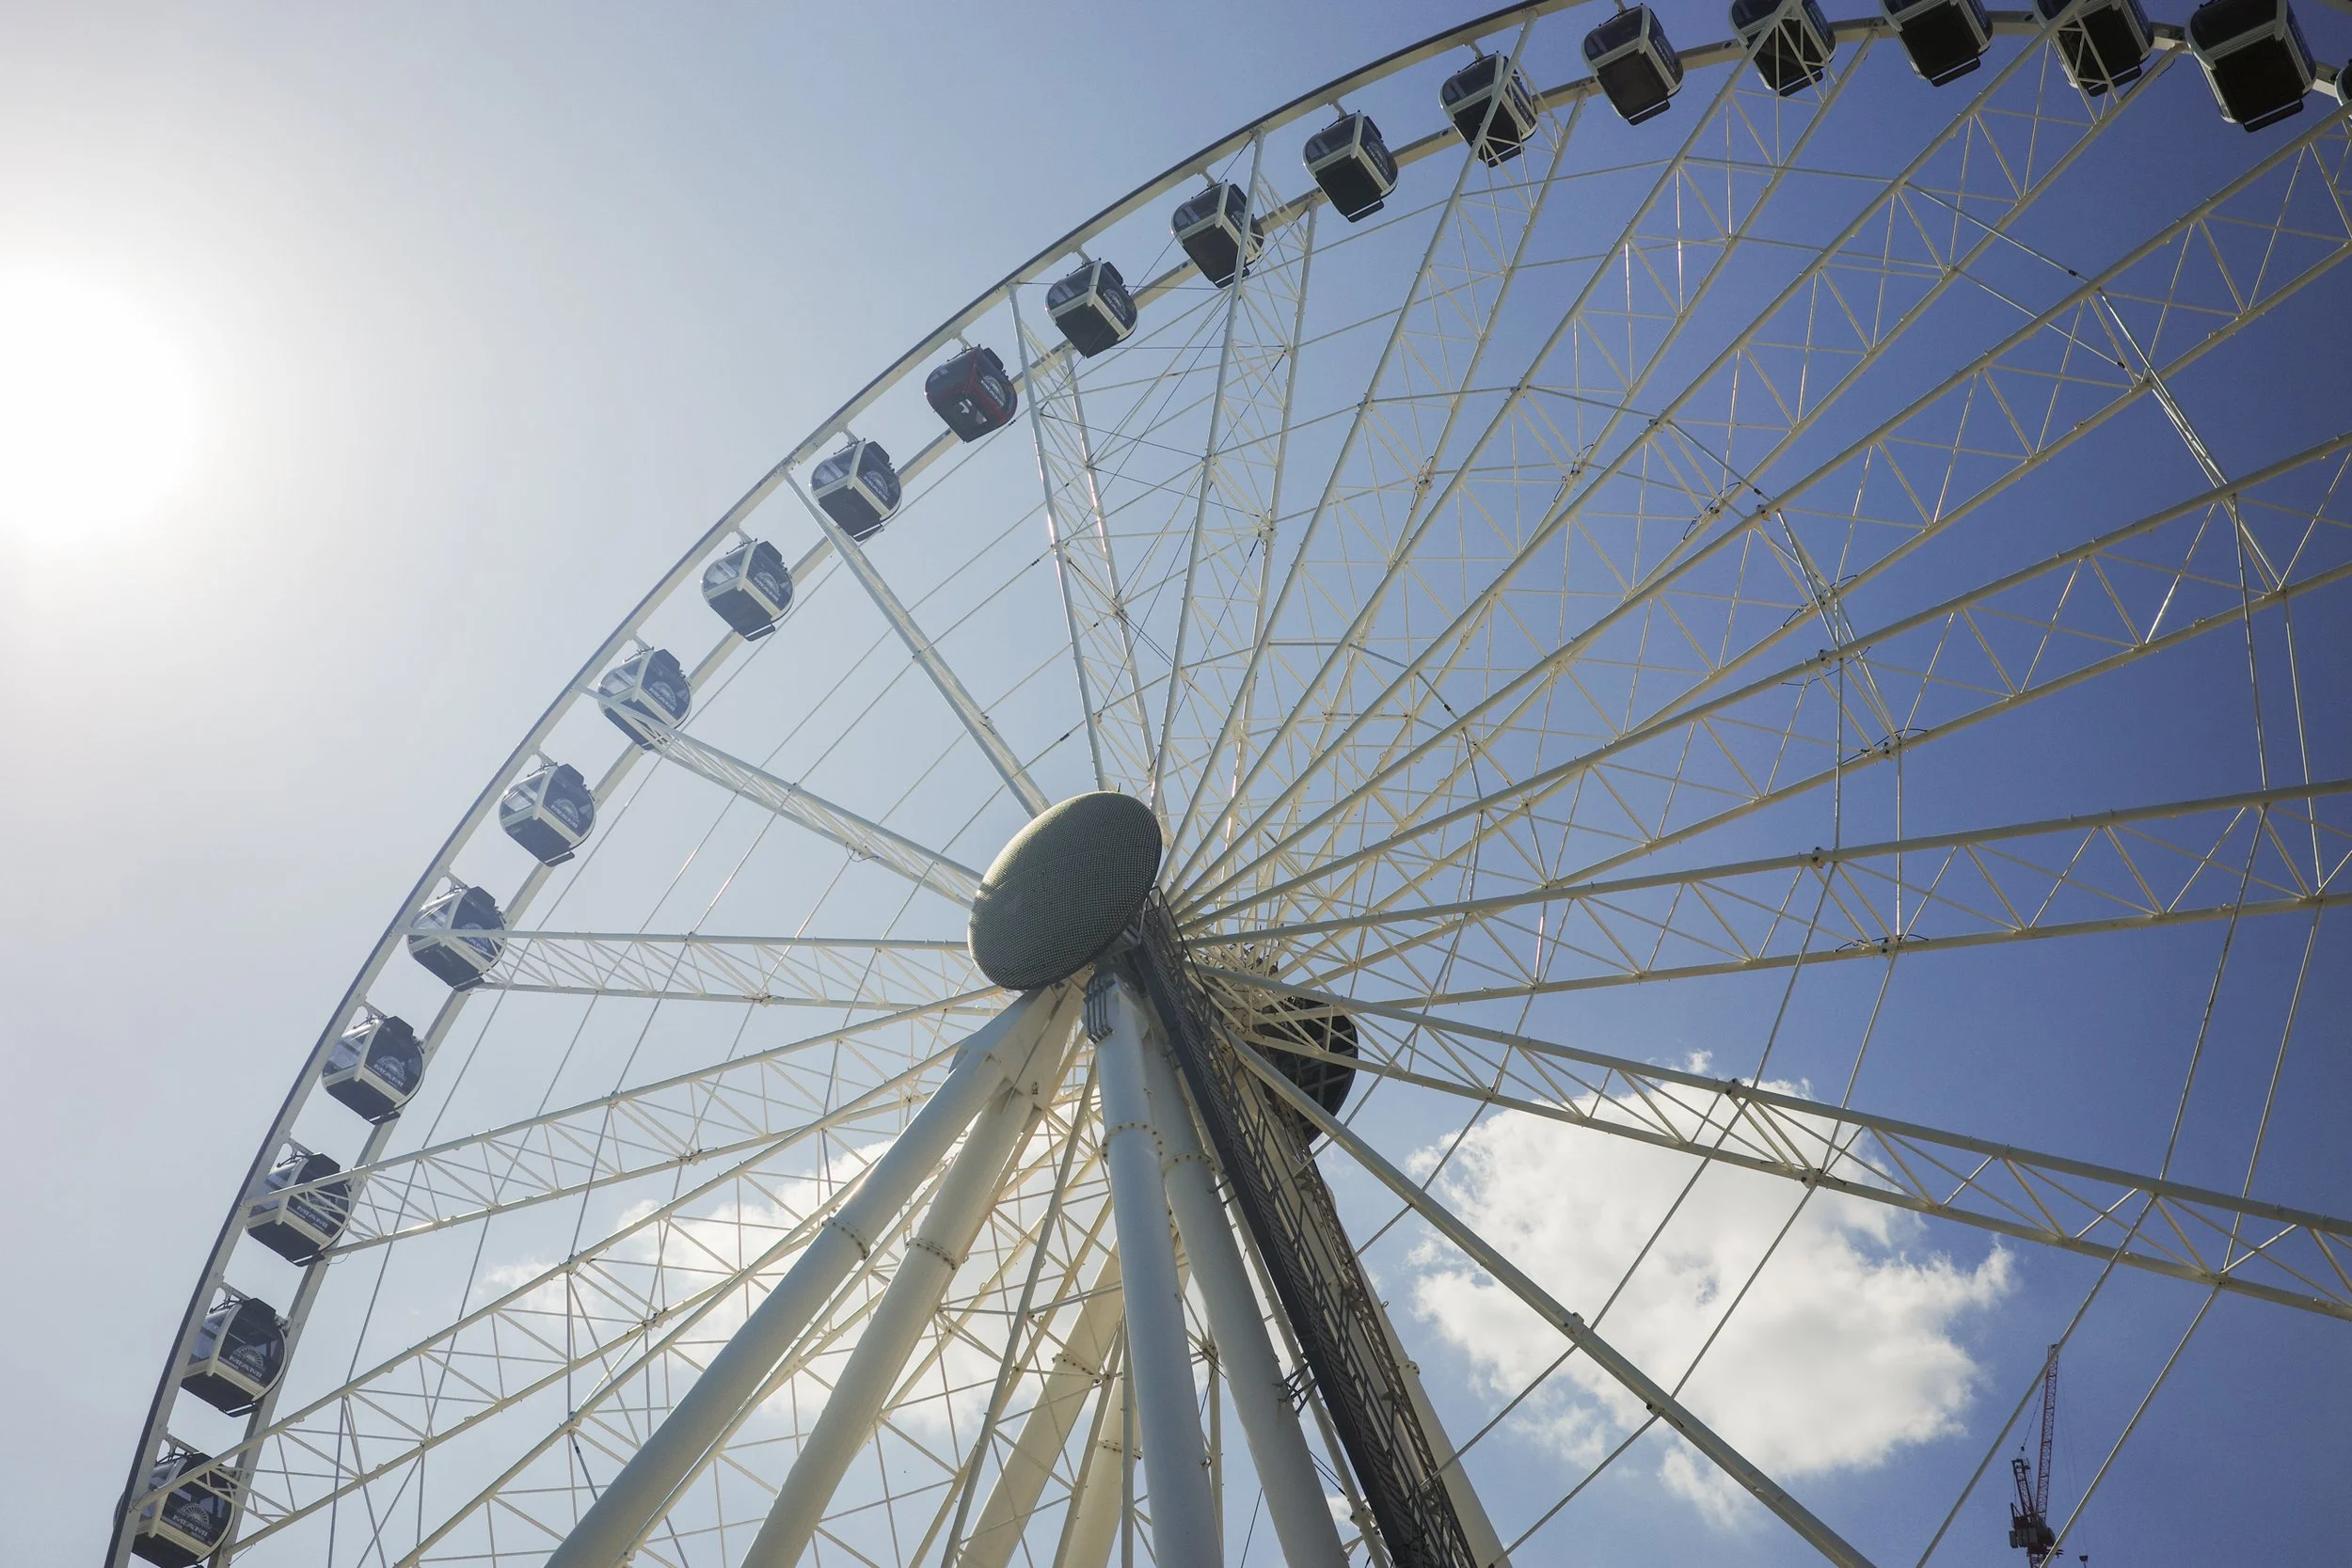
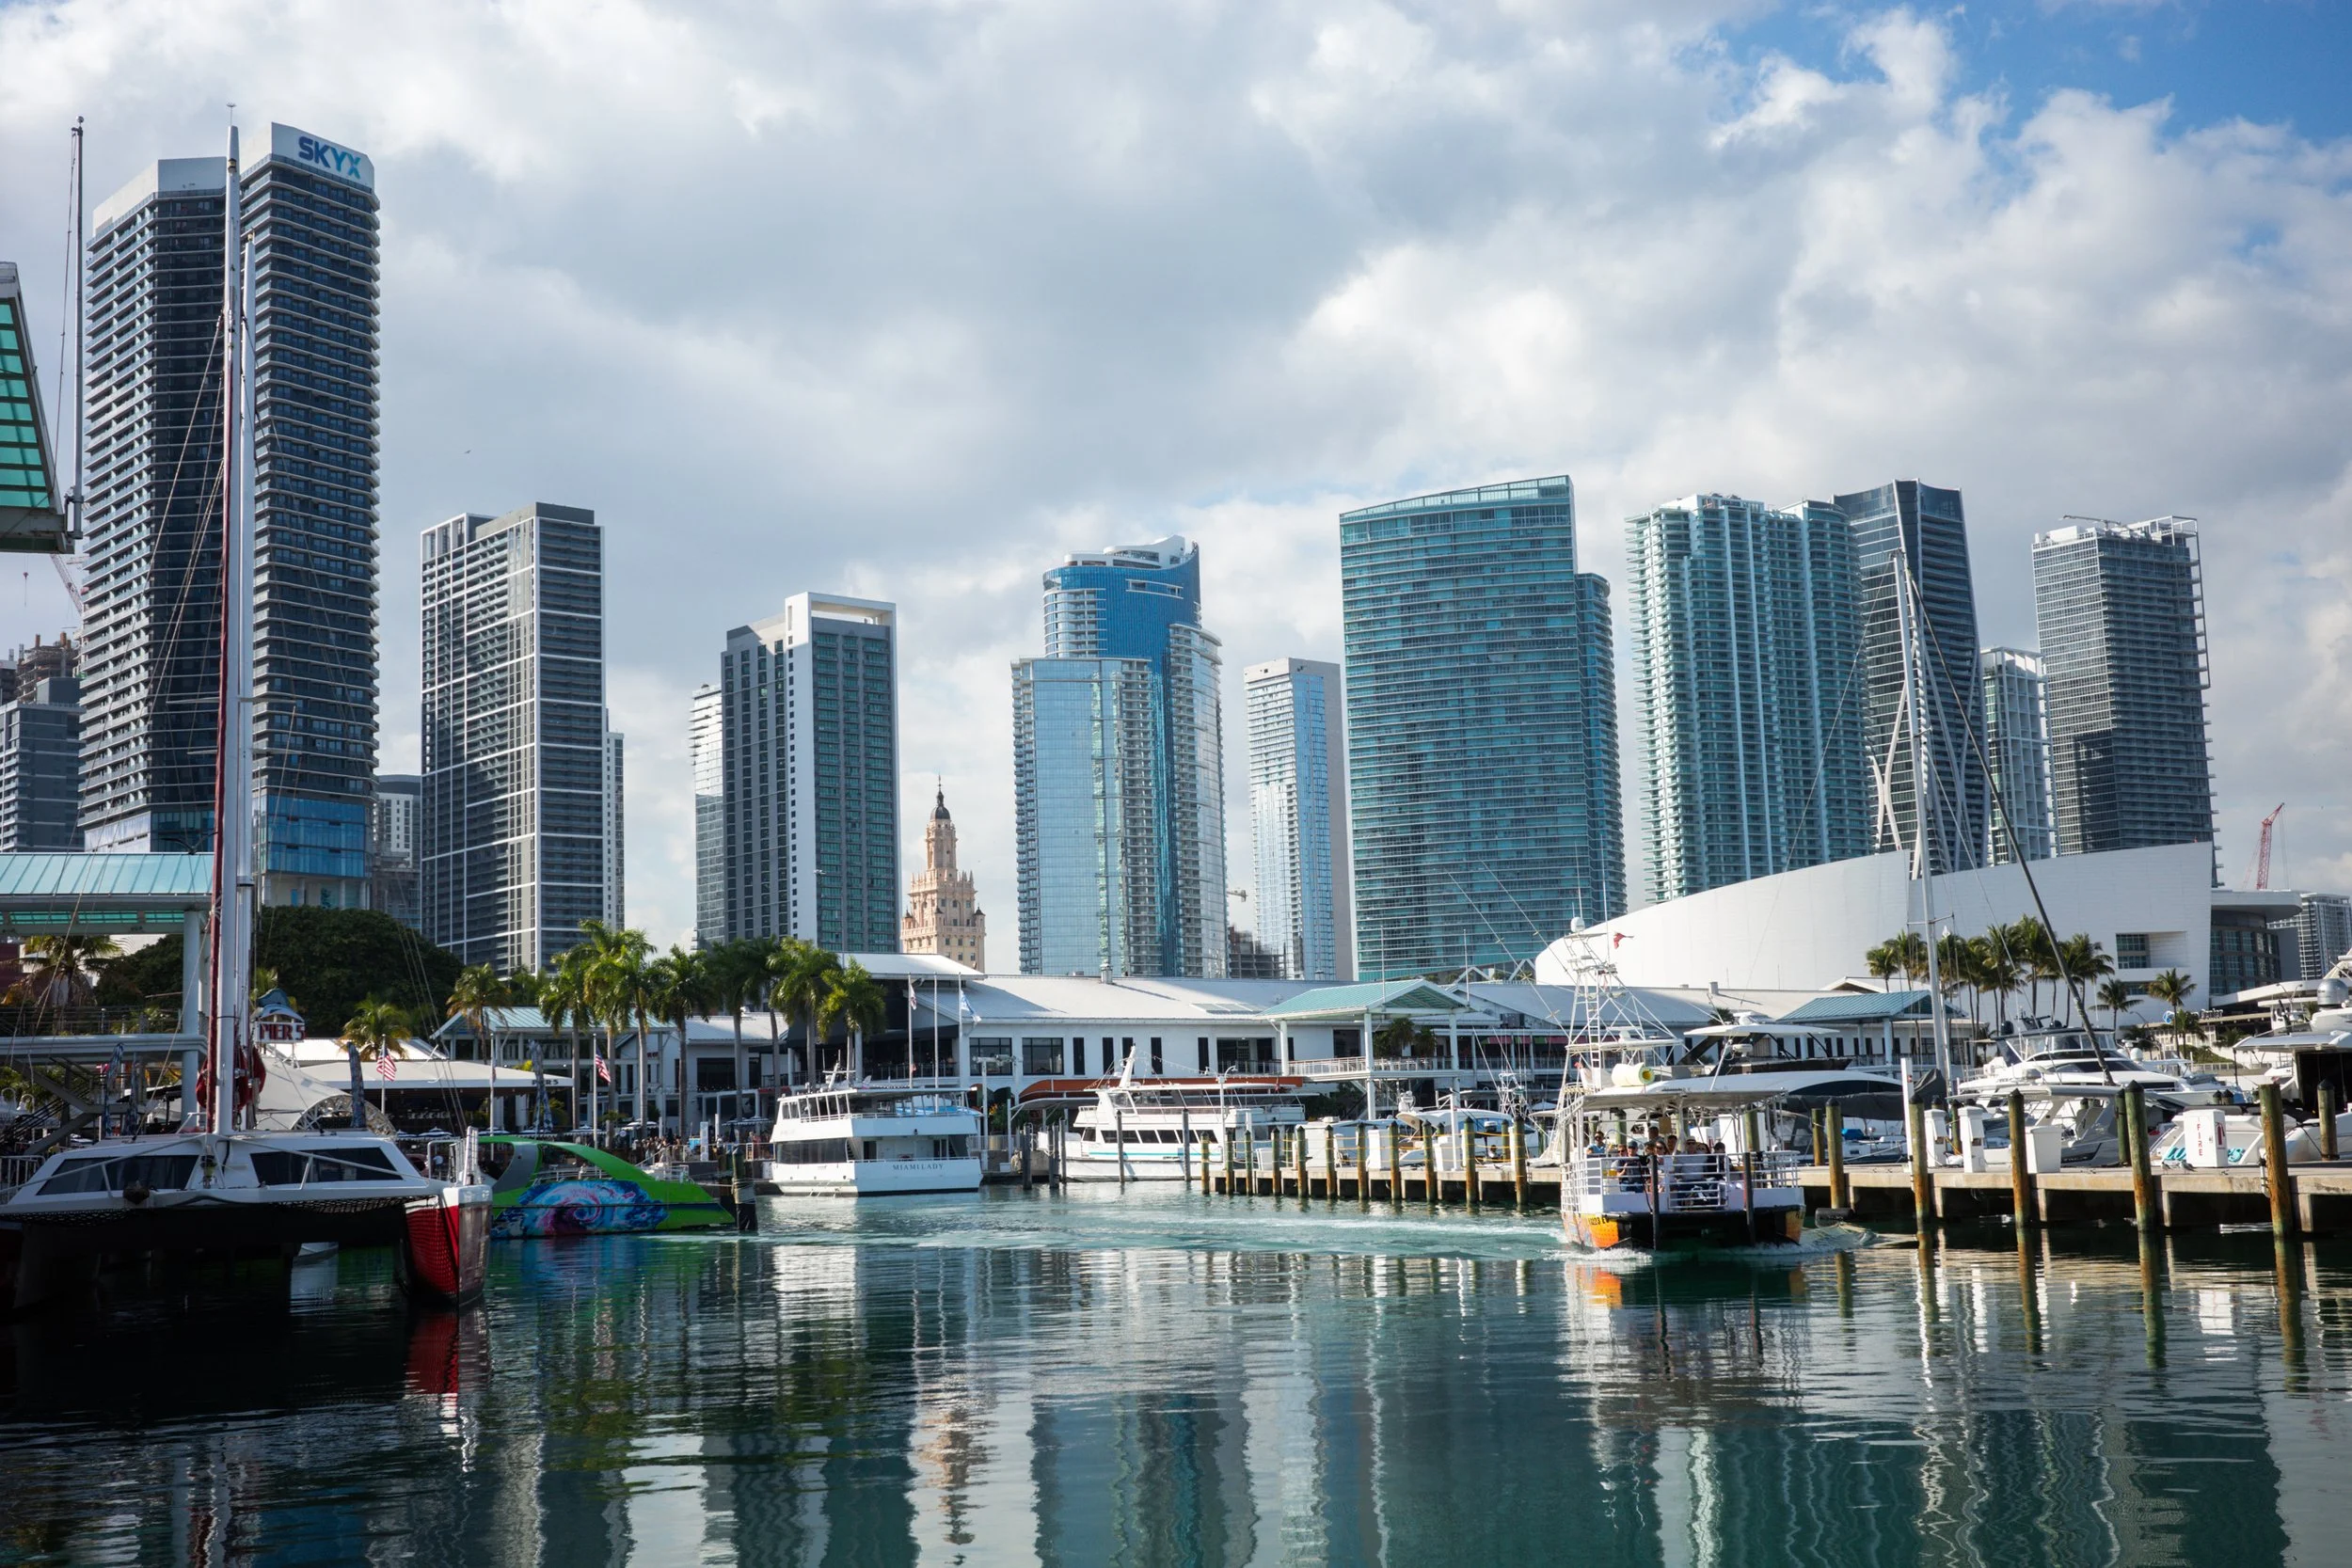
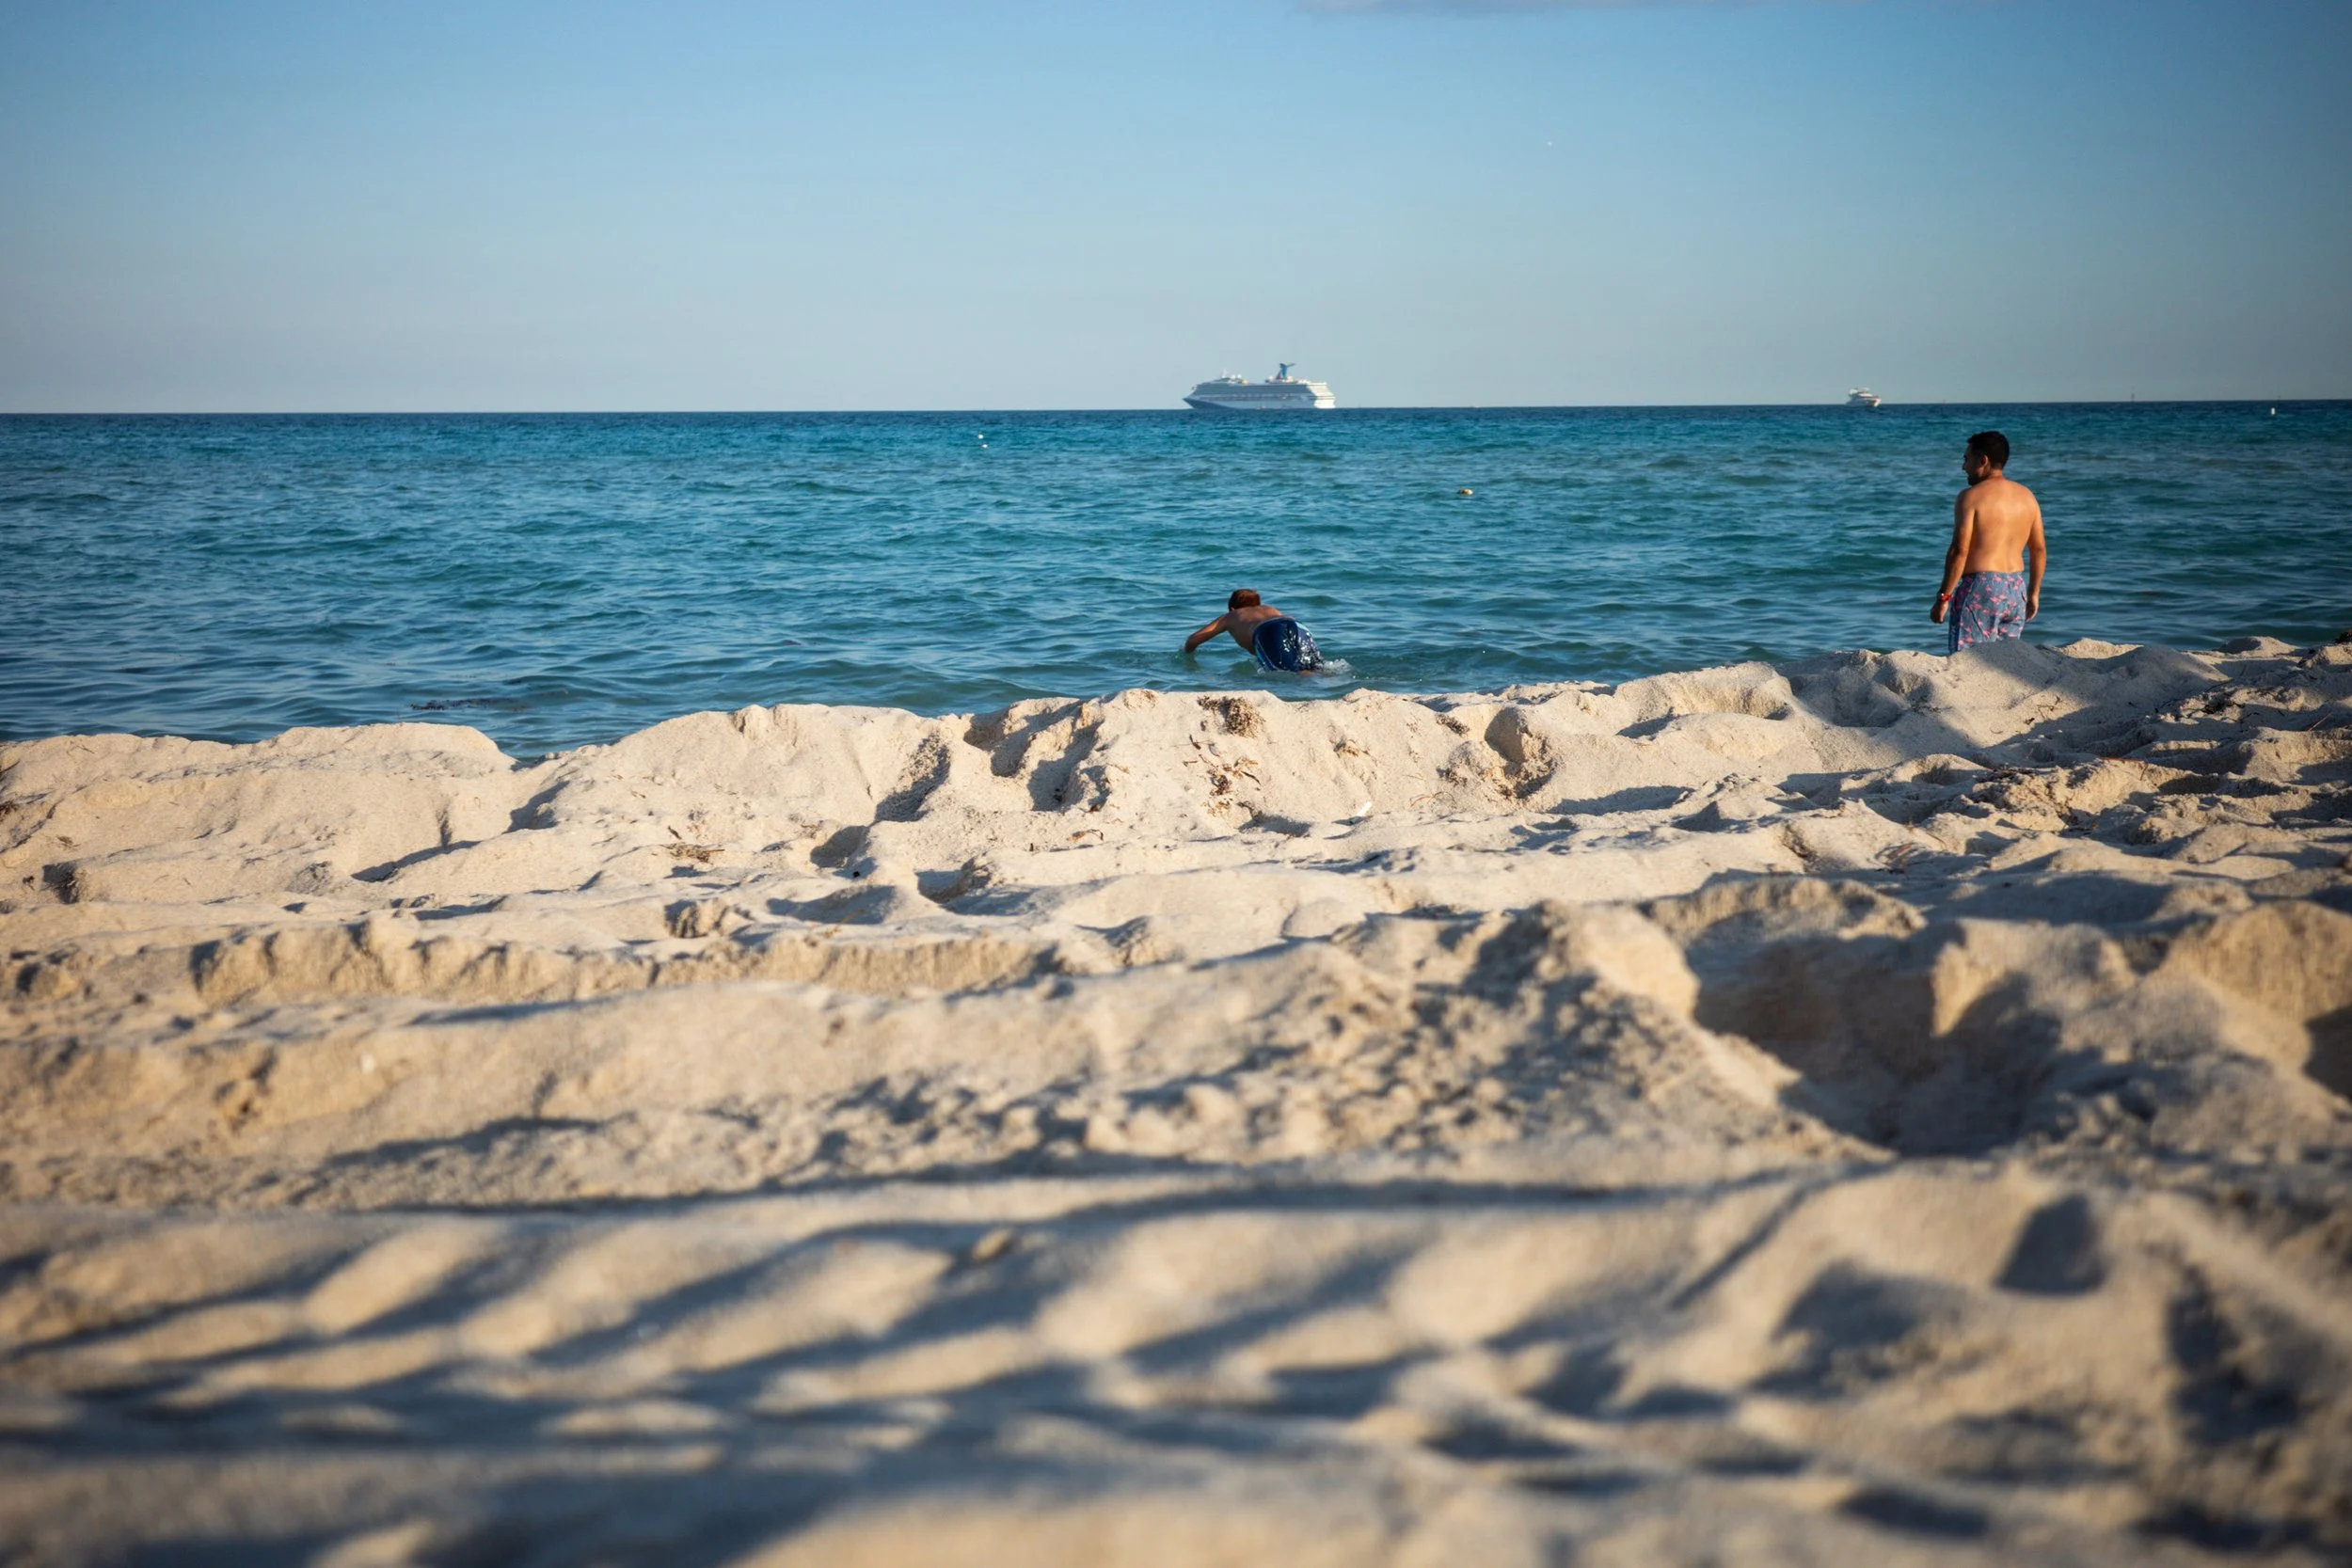
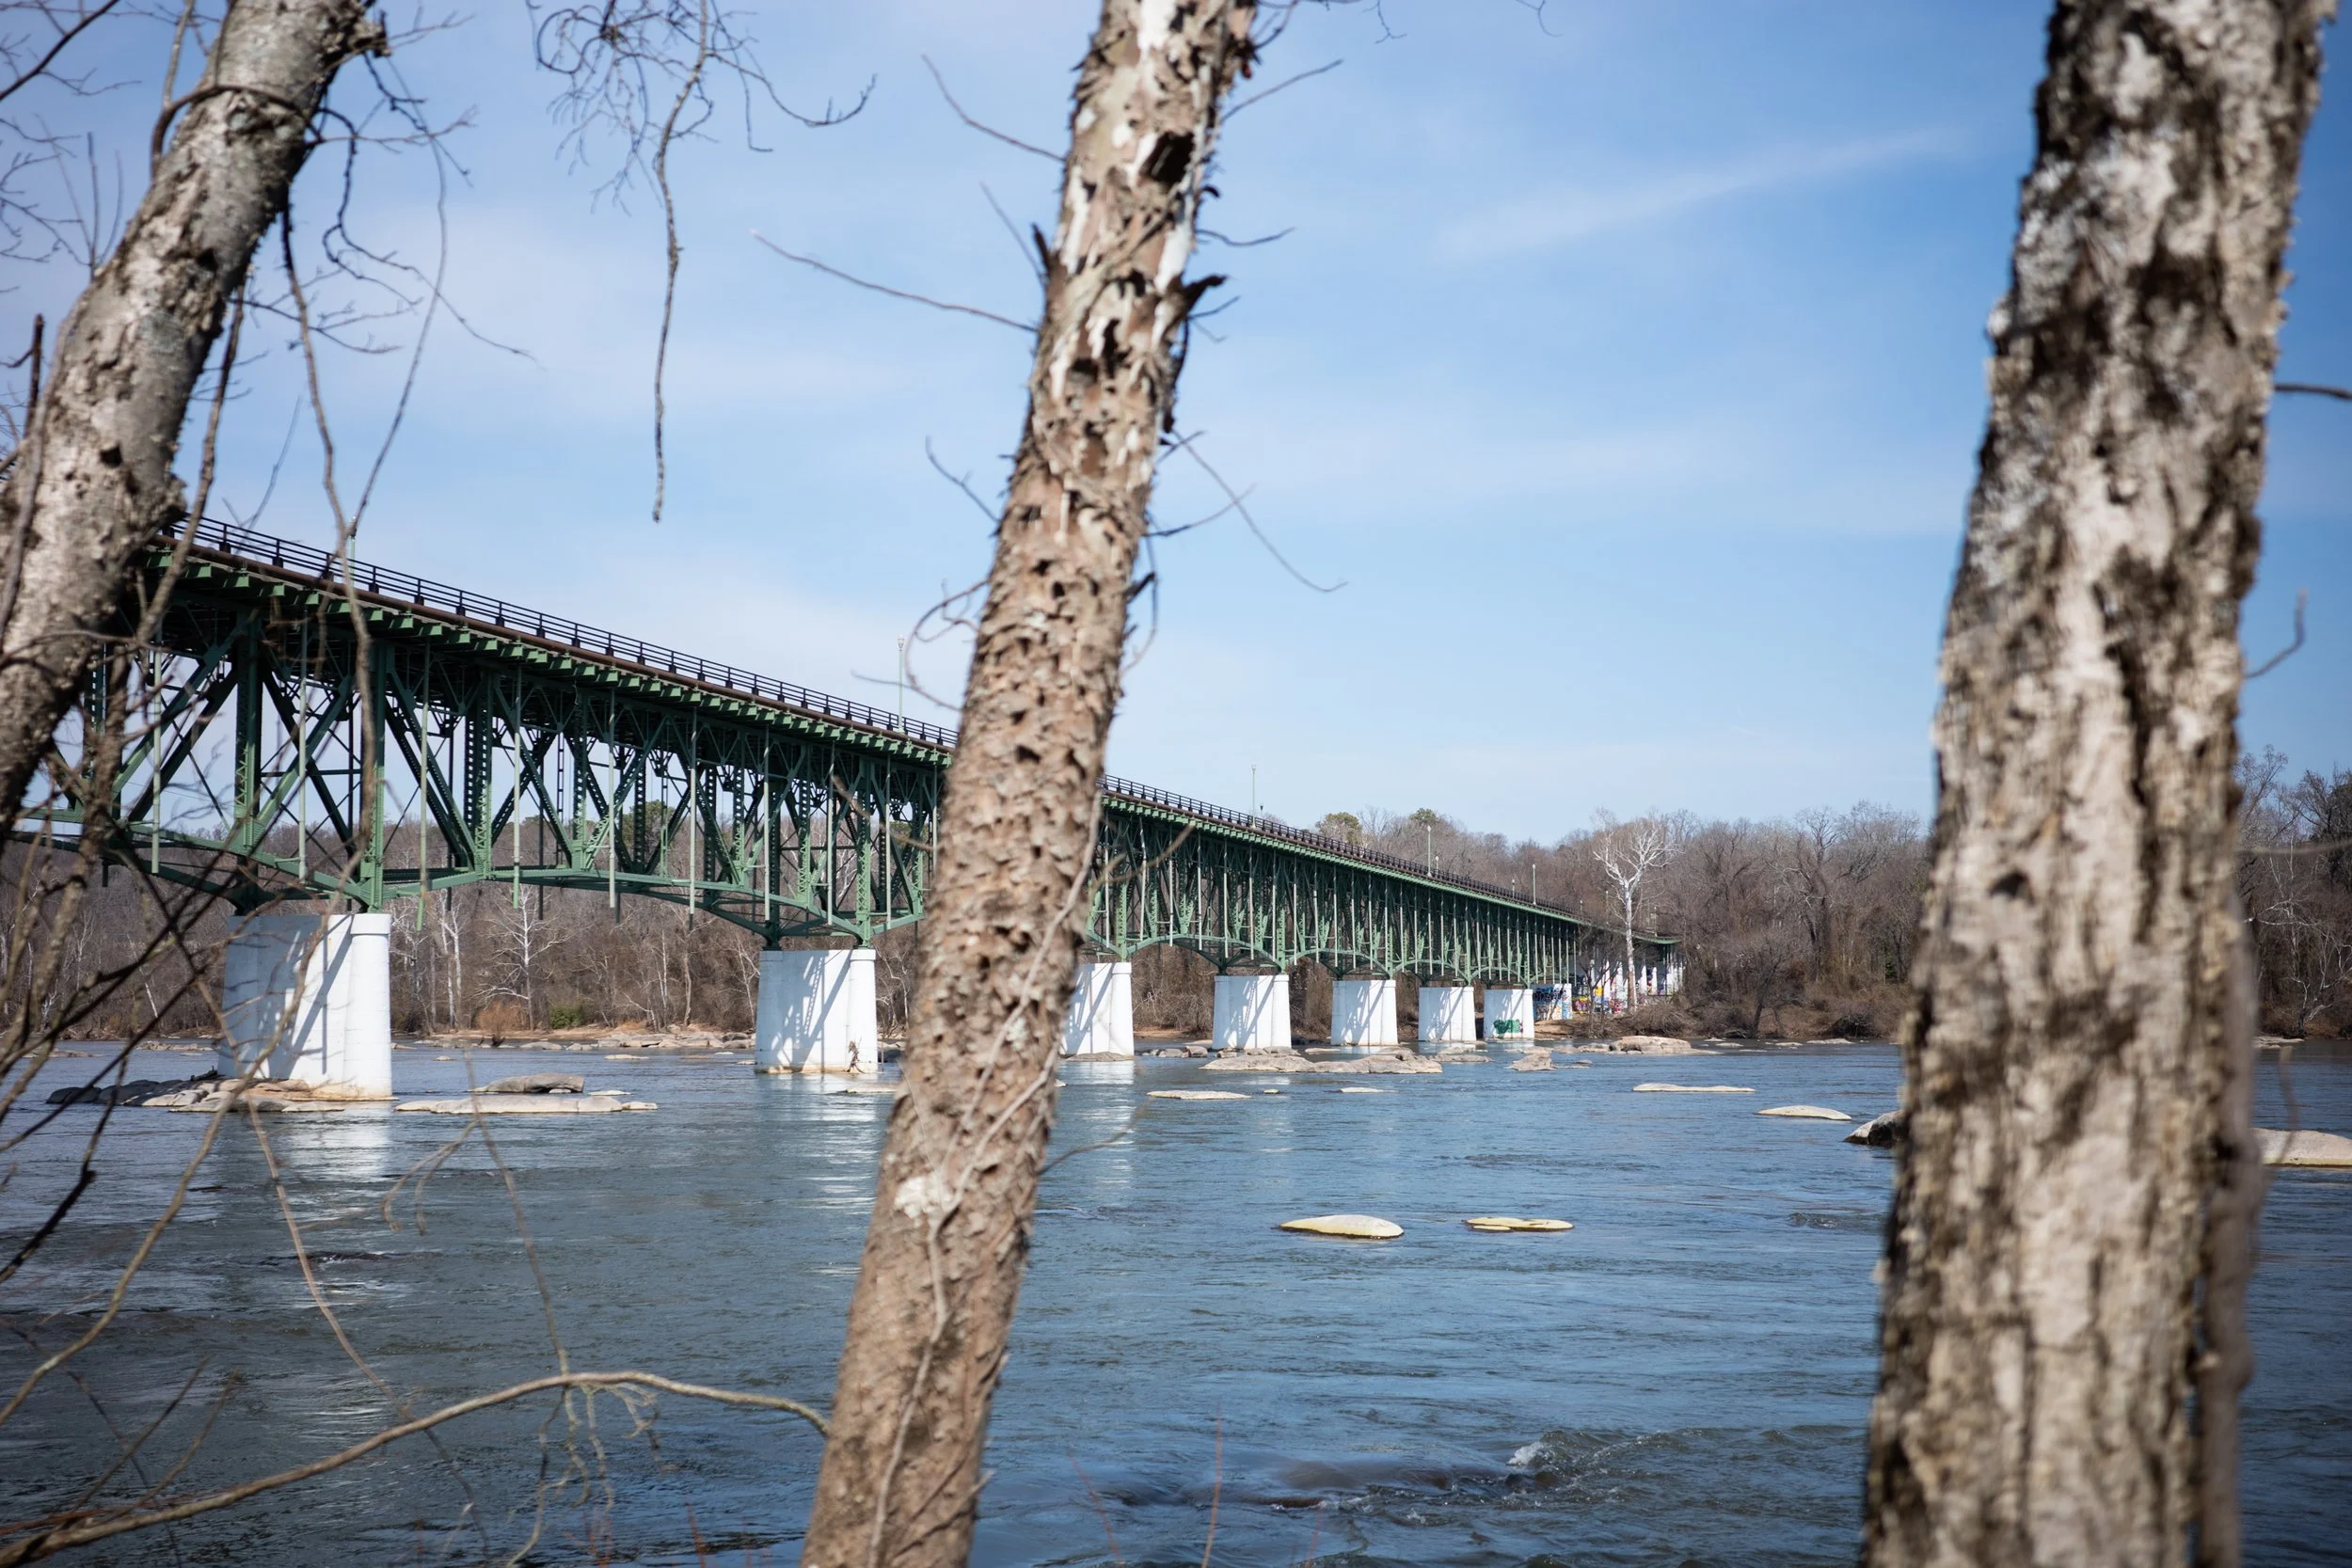
Lastly, the quality of the images surprised me. They’re not great by any means, but because of how lightweight and plastic the camera feels, I had convinced myself that the camera couldn’t possibly be taking photos at all! Not to mention, the camera makes the most ridiculous digital sound when you snap a photo and it’s kind of hilarious. I was positive that the photos were going to be beyond salvageable. I was pleasantly surprised when I imported the photos and they weren’t blurry or dark or unusable. It’s totally functional and super fun to use. Also, the fact that it has an f/1.8 lens is definitely a plus too, because it works relatively well in low light. I was pleased by how much detail it was able to capture in the evenings as the sun was going down.
Oh, and the Camp Snap camera comes in tons of fun colors which is always a plus!
CONS OF THE CAMP SNAP CAMERA
Definitely don’t go into this experience expecting high quality digital photos. They are meant to be low quality for aesthetic purposes. The photos aren’t supposed to be perfect and they aren’t even technically as good as an iPhone photo. BUT! There is an overall vibe to the images that is really unique and definitely reminds me of a disposable 35 mm camera. They are silly and quirky and fun for posting to social media or just to have memories to flip through one day.
I would love if the images were just a tiny bit higher quality though, because I find them to be way oversharpened and that begins to look too digitized to me, and not film-like. I wish they’d replace the plastic lens with a glass lens, which would make a huge difference. I love using toy cameras, particularly the Holga GCFN and Diana F+ (you can read more about the Holga on my blog here and the Diana F+ here), but I always prefer the glass lenses when it comes to plastic cameras. I also think that they should just add a few more megapixels to the images - currently it takes 8 MP images. I think they could create slightly larger files and still maintain that film-like quality. The classic disposable cameras really aren’t as bad of quality as you might think. They are typically loaded with Kodak Gold 800 or Fujifilm 400 film, which are both quite sharp and handle various lighting scenarios with ease. Even though the camera lenses on the disposable cameras are plastic, film photography in general just has a better quality to it than these low megapixel digital photos. And also with film photography, you have the option to scan your negatives in higher quality and you could potentially print them way larger than you could ever print these Camp Snap photos. Unfortunately, because they are digital images right out of the camera, you can’t increase the quality in any way once they’re taken. They’re perfectly fine for posting to social media and viewing on a phone, but I wouldn’t recommend printing them any larger than maybe 4x6.
And just something else to keep in mind, since there are no distance settings, you can’t get too close to your subject or it will be out of focus. You’ll notice that in some of the photos in the gallery below. I’d say keep at least 2-3 feet away and you should be fine.
SO, WOULD I RECOMMEND THE CAMP SNAP CAMERA?
In a lot of ways, yes! I think it’s a fun camera to play with and would be perfect for capturing a family vacation or just a night out with friends if you need some time away from your iPhone or want to be more present in the moment. To be honest, I think this would be a great camera for a young child or preteen just getting into photography. Because it’s entirely plastic, you don’t really have to worry about them breaking it. You could drop this on a concrete sidewalk and it would likely still work. It’s pretty sturdy and isn’t super expensive so you could replace it if you need to. In the long run, it would actually be more affordable than buying a bunch of disposable cameras because you can take as many photos as you want with this camera, and you also don’t have to pay for film processing and scanning. I remember when I was in middle school and starting taking photos with my mom’s cameras and I would have loved this camera.
If you’re looking for something new and different to change things up or if you’re looking for a gift for a photographer friend or child in your life, the Camp Snap camera is a unique option that they wouldn’t be expecting. I was super excited when I got it for Christmas because I always love a new camera. It comes in a cute little box and is incredibly easy to use right away. I probably wouldn’t use this camera for client work, even though I do use somewhat “crappy” film cameras sometimes, because I don’t have that option to scan the images in higher quality or blow them up larger. But I will be bringing this camera along for fun little day trips when I don’t feel like dragging my heavy cameras around, or if I just want a break from the stress of photography but don’t want to not bring a camera with me. I don’t go anywhere without a camera, so I think this will be one that I toss into my purse more often than I’d think!
If the Camp Snap camera sounds like something you’re interested in trying out, I’d also recommend giving a disposable 35 mm camera a try! I’ll always promote film photography over digital because there’s really nothing like it and I never want it to go away!
I recently got to play with the Camp Snap CS-8 Digital video camera too and that was a blast. It looks like an old Super 8 vintage camera but is entirely digital as well. It has built in creative modes that are meant to look like film, with dust specks and different retro color tones you can choose from. The one I got to test out belongs to a family member but I walked away really wanting one! The footage is lo-fi and you can’t watch it until you upload it to your computer too, so it really is like shooting with an old camcorder. There are only a few settings on all of the Camp Snap cameras too so they’re incredibly user-friendly and easy for anyone to use, even kids or older folks.
I’d say just give it a try and see what you think!! If you’re thinking about buying a Camp Snap camera as a gift, I think it’s a super fun choice! Or you can check out one of my gift guides for more ideas - 15 Unique Gifts for Photographers or The 20 Best Gift Ideas for the Artist in Your Life.
WHERE TO BUY THE CAMP SNAP “DISPOSABLE” CS-V105 CAMERA
WHERE TO BUY THE CAMP SNAP CS-8 VIDEO CAMERA
WHERE TO BUY A DISPOSABLE 35 MM FILM CAMERA
FUJIFILM QUICKSNAP FLASH (ISO 400 FILM)
KODAK FUN SAVER (ISO 800 FILM)
If you found this post helpful in any way, I’d love it if you considered signing up for my Patreon! For as little as $1 a month, you’ll get early access to all of my YouTube videos, plus tons of photos that I don’t post anywhere else. Depending on which tier you choose, you could also receive seasonal prints and/or discounts! I always use all of the proceeds towards cameras, film & processing.
If you have any questions, I’m always happy to help! You can contact me here, or leave a comment below! Thanks so much for stopping by! You can also check out my B&H Photo storefront & Amazon Storefront for more camera/film recommendations. :) Have a magical day!
<3 Myles Katherine